
What Are the Best Interior Paint Colors for House Projects?
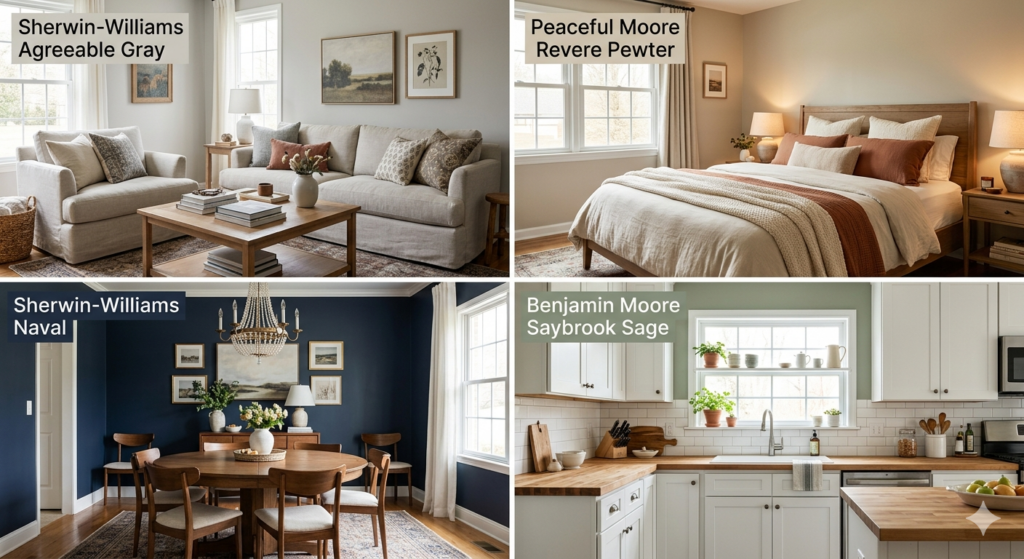
Interior paint colors for house projects can completely transform your living space from ordinary to extraordinary. Neutral tones like warm whites, soft grays, and beiges remain timeless favorites because they work with almost any decor style. Bold accent walls in navy, emerald, or terracotta add personality without overwhelming rooms. Light colors make small spaces feel larger, while darker shades create cozy environments. The 60-30-10 color rule helps balance dominant, secondary, and accent colors for professional results. Popular trends include earthy greens, warm taupes, and calming blues that bring nature indoors. Your choice should reflect your lifestyle, the room’s purpose, and how much natural light enters the space. What Is the Best Color for the Interior of a House? The best interior paint colors for house spaces depend on room function, natural light, existing furniture, and personal preferences. Warm whites and soft grays create clean backdrops that adapt to different rooms, reflect light beautifully, and make spaces feel open. For living rooms, warm neutrals like greige create welcoming environments. These interior paint colors for house common areas pair well with traditional and modern furniture. Bedrooms benefit from calming shades. Soft blues, gentle lavenders, and muted greens promote relaxation and better sleep, creating peaceful retreats. Kitchens work well with fresh colors. White makes spaces feel sanitary and bright. Light gray and soft sage green add personality while maintaining freshness. Bathrooms handle both light and bold choices. Crisp white creates spa-like feels, while deeper blues or greens add sophistication. How Natural Light Affects Your Color Choice Natural light dramatically changes how interior paint colors for house rooms appear. North-facing rooms receive cooler light making colors appear more blue or gray. Use warm tones like peach, cream, or warm beige here. South-facing rooms get abundant warm sunlight that intensifies colors. Cooler shades like soft grays, blues, or greens work well because natural light adds warmth. East-facing rooms receive bright morning light shifting to cooler afternoon tones, making versatile neutrals ideal. Test paint samples on your walls and watch how they look at different times of day before committing to interior paint colors for house projects. What Are Good Interior Paint Colors? Good interior paint colors for house transformations combine aesthetic appeal with practical functionality. Warm whites provide a clean, timeless look. Greige tones offer warmth without starkness. Soft blues bring calmness and serenity, reducing anxiety and promoting better sleep. Warm earth tones connect indoor spaces with nature. Terracotta, warm taupe, and clay create cozy environments perfect for living rooms and dining rooms. Green has become increasingly popular for interior paint colors for house projects. Sage, olive, and eucalyptus bring the outdoors in while maintaining sophistication. Top Color Pairings Navy blue creates dramatic focal points on accent walls or rooms with abundant natural light. Navy pairs beautifully with gold accents and natural wood tones. Charcoal gray adds sophistication without heaviness, working well in modern homes with white trim. What Is the 3 Color Rule in Interior Design? The 3 color rule, also known as the 60-30-10 rule, creates balanced, harmonious spaces. This guideline helps you distribute interior paint colors for house rooms in proportions that look intentional. Use 60% dominant color (typically walls), 30% secondary color (upholstery, curtains, furniture), and 10% accent color (accessories, throw pillows, artwork). For interior paint colors for house applications, walls represent the 60%. Your secondary color appears in sofas or area rugs. Accent colors show in throw pillows or vases. In bedrooms, choose pale blue walls (60%), cream bedding (30%), and soft coral accents (10%). Dining rooms could feature warm beige walls (60%), wood dining table (30%), and emerald green table settings (10%). Home offices might use sage green walls (60%), white furniture (30%), and brass hardware (10%). The rule is flexible. The key is maintaining balance so one color dominates, another supports, and a third adds interest. What Is the Most Popular Interior Paint Color Right Now? The most popular interior paint colors for house projects lean toward warm, earthy neutrals and nature-inspired shades reflecting comfort and connection to nature. Warm whites dominate as the go-to choice. Shades with creamy undertones create inviting spaces that feel fresh without coldness. Greige remains incredibly popular, blending gray and beige for sophistication with warmth. Earthy greens have surged in popularity. Sage, olive, and eucalyptus bring the outdoors inside while creating calming spaces. These interior paint colors for house bedrooms and living rooms reflect growing interest in nature-inspired design. Warm terracotta and clay tones create cozy spaces. These reddish-brown shades add warmth without being overly bold. In Winnipeg and across Canada, interior paint colors for house projects often reflect the local climate. Warm, cozy colors balance long, cold winters. True Coat serves Winnipeg homeowners with expert color consultation to help choose colors that suit your home. Current trends also include deeper, moodier colors. Navy blue, forest green, and charcoal create drama while feeling sophisticated. If you’re considering residential painting in Winnipeg, these warmer interior paint colors for house projects will keep your home looking current. What Color Makes a House Look Expensive? Certain interior paint colors for house projects instantly elevate spaces. Deep, rich neutrals like charcoal, deep taupe, and warm chocolate brown create luxurious backdrops that make furnishings pop. True white with warm undertones looks more expensive than stark, cool white. Creamy whites feel deliberate and curated, creating gallery-like quality in interior paint colors for house walls. Navy blue exudes sophistication in traditional and modern homes. Use it in dining rooms or as accent walls. Soft, muted colors like dusty pink, sage green, or soft lavender in powder rooms show attention to detail. Application Techniques That Add Luxury Paint finish affects how expensive your interior paint colors for house projects appear. Matte or flat finishes look sophisticated and hide imperfections. Eggshell or satin finishes strike a balance between elegance and durability with subtle sheen. Proper preparation makes any color look expensive. True Coat’s skim coating services create perfectly smooth surfaces. Monochromatic schemes using different shades create sophisticated spaces. High contrast between
How to Choose Interior Paint Neutral Colors for Your Winnipeg Home
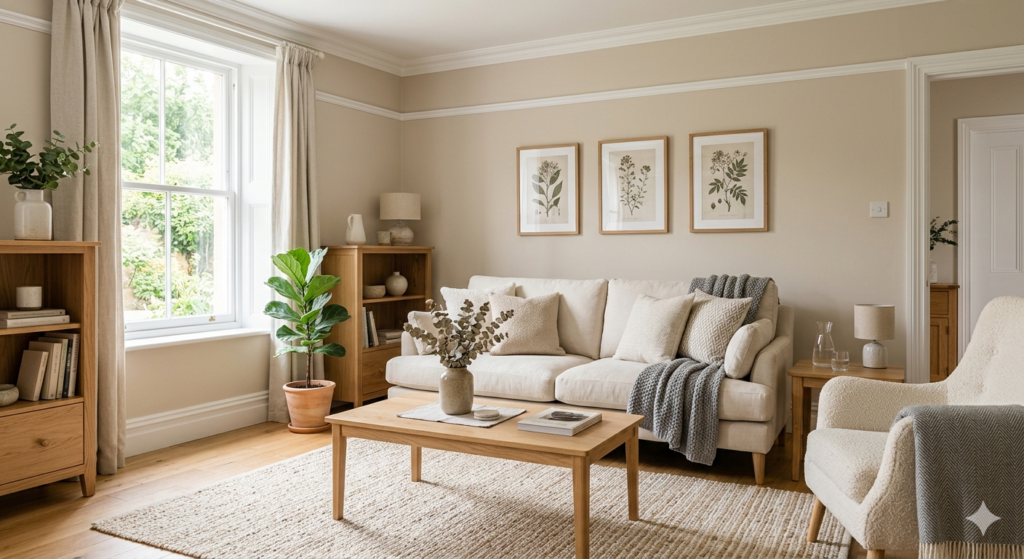
Interior paint neutral colors create calm foundations in any home, ranging from soft whites and warm beiges to cool grays. The best interior paint neutral colors balance warmth and coolness while adapting to changing light throughout the day, making them smart investments for Winnipeg homeowners looking to create beautiful, cohesive interiors that work with any decor style. What Are Interior Paint Neutral Colors? Interior paint neutral colors are shades that lack strong saturation, blending easily with other colors and decor. These hues work as backgrounds rather than focal points. True neutrals include white, black, gray, beige, and brown, each with variations based on undertones. A beige might lean warm with yellow undertones or cool with gray undertones. Modern interior paint neutral colors range from crisp whites to rich taupes. Understanding Warm vs. Cool Neutrals Warm neutrals contain yellow, red, or orange undertones, including cream, beige, tan, and warm gray. They create cozy spaces, especially in rooms with limited natural light. Cool neutrals have blue, green, or purple undertones, like pure white, cool gray, and greige. These work well in south-facing rooms, preventing spaces from feeling too warm. The Role of Undertones Undertones determine how neutral colors behave in different lighting. A gray with blue undertones might look perfect in morning light but turn purple at sunset. Paint large swatches on different walls and observe them throughout the day. Professional interior house painters can guide you through understanding undertones. Why Choose Neutral Colors for Interior Painting? Neutral colors solve many decorating challenges while providing flexibility for future changes. Benefits of Using Neutral Paint Colors Interior paint neutral colors increase resale value since homebuyers prefer neutral walls. These versatile shades work with any decorating style, from farmhouse to modern. Neutrals make rooms feel larger and brighter by reflecting light. They create seamless flow and reduce decorating stress since everything coordinates with neutral walls. How Neutrals Affect Room Size and Light Light interior paint neutral colors bounce light around rooms, making spaces appear larger. Dark neutrals create intimate feelings in large rooms. North-facing Winnipeg rooms get cool, indirect light, so these spaces benefit from warmer tones. South-facing rooms receive warm light, making cool neutrals prevent spaces from feeling too yellow. Consult with Winnipeg’s professional painting company for expert color selection. What Is the Most Popular Neutral Interior Paint Color? The most popular neutral interior paint color is greige, combining beige warmth with gray sophistication. This balanced shade works in almost any room and pairs with both warm and cool accents. Greige feels modern without being cold. Popular greige shades work as main wall colors in open-concept spaces, providing enough color to avoid starkness while remaining versatile. Top Neutral Color Choices for Winnipeg Homes Soft white works well on trim, ceilings, and rooms with architectural details. Warm beige suits traditional Winnipeg homes with wood floors. Cool gray fits modern homes with stainless appliances. Taupe offers versatility between traditional and modern styles. Regional Considerations for Winnipeg Climate Winnipeg’s long winters affect color perception. Warmer interior paint neutral colors combat dreariness during limited daylight. Summer sunlight can wash out some neutrals. Season Lighting Condition Best Neutral Type Winter Limited, cool light Warm beiges, soft whites Summer Abundant, warm light Cool grays, greiges Spring/Fall Variable light Balanced greige, taupe What Are the 4 Neutral Colors? The four main neutral colors are white, black, gray, and beige. Understanding these four categories helps you build cohesive color schemes. White as a Neutral Foundation White provides clean backdrops, though pure white rarely works well. Warm whites contain hints of yellow, cream, or pink. Cool whites have blue or gray undertones. Off-white sits between pure white and beige. Gray Neutral Options Gray works in traditional and modern spaces. Light gray opens small spaces while feeling sophisticated. Medium gray creates impact as feature walls. Dark gray adds drama, requiring good lighting. Beige and Brown Variations Beige creates comfortable spaces from pale cream to rich tan. Traditional beige has yellow undertones. Greige beige incorporates gray undertones. Taupe beige has brown undertones for sophisticated spaces. Black as an Accent Neutral Black serves as an accent rather than covering entire walls. Soft black works better than pure black. Using black on window frames or shelving adds depth. For incorporating neutrals throughout your home, residential painting services create cohesive plans. What Are Neutral Colors in Interior Design? Neutral colors in interior design serve as backdrops, letting furniture and artwork stand out. They include traditional neutrals plus subtle, desaturated versions of other colors. Creating Depth with Neutral Layers Successful neutral spaces use multiple shades. Start with a base for walls, go lighter for ceilings. Add mid-tone neutrals through furniture. Introduce darker neutrals through pillows and artwork. Explore our interior painting services for professional palettes. What’s a Neutral Color That Goes with Everything? Warm greige goes with everything because it balances gray and beige, adapting to different lighting and pairing with warm and cool accents. Greige coordinates equally well with warm wood and cool metal finishes. Unlike pure gray that clashes with oak floors, greige accommodates both, ideal for open-concept homes. Versatile Neutrals for Every Room Soft white works when chosen with balanced undertones. Medium gray serves as another versatile choice. Light taupe provides earthy versatility. Versatile Neutral Best Use Pairs Well With Warm Greige Whole home, open concepts All colors, warm and cool finishes Soft White Trim, ceilings, bright rooms Everything, especially as backdrop Medium Gray Living areas, bedrooms Blues, greens, warm woods Light Taupe Traditional spaces Warm colors, natural materials Coordinating Neutrals Across Open Spaces Open-concept homes need shades that work together visually. Using a single neutral throughout creates seamless flow. Alternatively, use different neutrals in each zone, keeping them within the same temperature family. All warm or all cool neutrals work together. Which Type of Color Is Best for Interior Walls? The best type for interior walls is a neutral with subtle warmth. Specifically, interior paint neutral colors in the greige or warm gray family offer flexibility and timeless appeal. These balanced neutrals work
How to Find the Best Interior Painters Winnipeg for Your Home
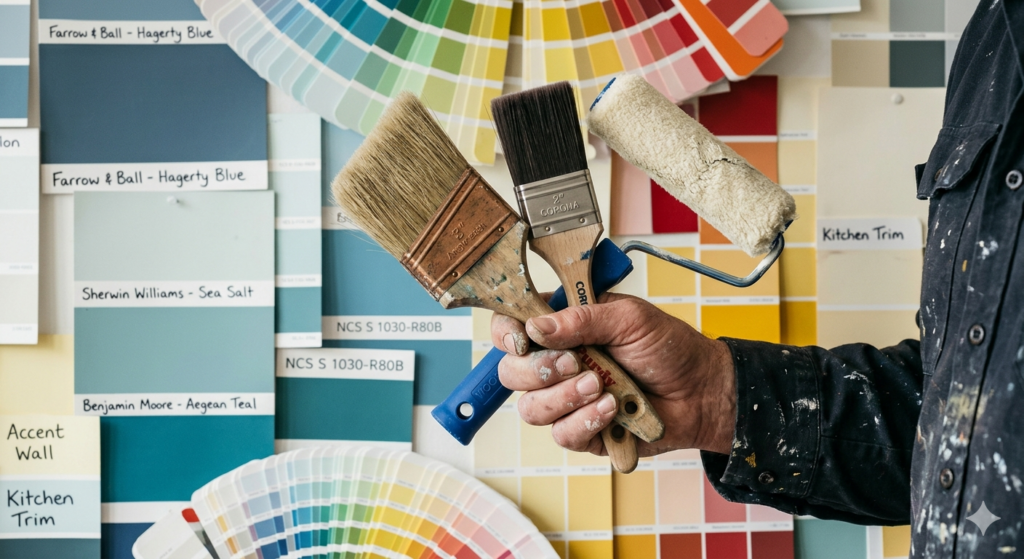
Finding quality interior painters Winnipeg homeowners can trust starts with knowing what to look for in a professional painting contractor. The right team brings more than just brushes and paint to your project. They deliver expertise, reliability, and results that transform your living space while protecting your investment. Whether you’re refreshing a single bedroom or renovating your entire home, choosing skilled painters means the difference between a job that looks good for a few months and one that stays beautiful for years. This guide walks you through everything you need to know about hiring interior painters in Winnipeg. You’ll discover how to spot red flags, what questions to ask before signing a contract, and why certain factors matter more than price alone. From understanding different painting techniques to knowing which services truly add value, you’ll learn practical steps to ensure your next painting project exceeds expectations. What Makes Interior Painters Winnipeg Homeowners Choose Stand Out? Not all painting contractors offer the same level of service or skill. The best interior painters Winnipeg residents hire share specific qualities that set them apart from less experienced or unreliable options. Licensed and insured status protects you from liability if accidents happen on your property. A proper license shows the company meets provincial standards and follows local regulations. Insurance coverage means you won’t face unexpected costs if a worker gets injured or property damage occurs during the project. Experience matters significantly in painting work. Contractors who have worked in Winnipeg for several years understand how local climate conditions affect paint performance. They know which products hold up best against our cold winters and humid summers. Experienced painters also handle surface preparation correctly, which prevents peeling, bubbling, or cracking down the road. Quality materials separate average results from exceptional ones. Professional interior painters use premium paints with better coverage, durability, and finish. They can explain why certain brands work better for specific surfaces and help you choose options that match your budget without sacrificing longevity. Communication skills indicate how smoothly your project will run. Reliable painters return calls promptly, provide clear written estimates, and explain timelines honestly. They discuss potential challenges upfront rather than surprising you with extra costs or delays later. How Do You Choose the Right Interior Painters Winnipeg Offers? Selecting the perfect painting contractor requires more than browsing websites or choosing the lowest bid. A systematic approach helps you identify professionals who will deliver quality results. Start by gathering recommendations from friends, family, or neighbors who recently completed painting projects. Personal referrals provide honest insights into a contractor’s reliability, work quality, and professionalism. Online reviews offer additional perspectives, but focus on detailed feedback rather than star ratings alone. Request quotes from at least three different contractors. This gives you a realistic sense of pricing and helps you spot unusually low bids that might indicate shortcuts or hidden costs. Detailed written estimates should break down labor, materials, surface preparation, and any additional services. Essential Questions to Ask Before Hiring The right questions reveal important details about how a contractor operates and whether they’re the right fit for your project. Ask about their experience with projects similar to yours. A painter who specializes in new construction might not be the best choice for restoring heritage home interiors. Request examples of completed work or references from past clients. Inquire about their preparation process. Quality painters spend significant time on prep work, including filling holes, sanding rough spots, and priming surfaces. Skipping these steps saves time but compromises the final result. Discuss the timeline and how they handle unexpected delays. Weather can affect ventilation and drying times even for interior work. Understanding their contingency plans helps you plan accordingly. Find out who will actually do the work. Some companies subcontract projects to other crews, which can affect consistency and quality control. Knowing who will be in your home matters for both security and accountability. Ask about their cleanup process and what protection they provide for your furniture, floors, and fixtures. Professional painters should leave your home cleaner than they found it. Red Flags to Watch For Certain warning signs indicate you should keep looking for a different contractor. Avoid companies that demand full payment upfront. Standard practice involves a deposit to secure your spot and purchase materials, with the balance due upon satisfactory completion. Requesting total payment before starting work often signals financial instability or questionable business practices. Be cautious of contractors who can’t provide proof of insurance or references. Legitimate businesses have nothing to hide and willingly share this information. Watch out for vague estimates that don’t itemize costs or specify which areas will be painted. Unclear agreements lead to disputes about what’s included in the price. Pressure tactics like limited-time offers or claims that they happen to have extra paint from another job suggest the contractor cares more about making a quick sale than delivering quality work. What Services Do Interior Painters Winnipeg Companies Provide? Professional painting contractors offer more than just applying color to walls. Comprehensive services address every aspect of transforming your interior spaces. Standard Interior Painting Services Basic painting services cover the most common residential needs. This includes walls, ceilings, trim, doors, and baseboards throughout your home. Wall painting involves proper surface preparation, priming when necessary, and applying multiple coats for even coverage. Professional interior house painters know how to cut clean lines along ceilings and trim without tape, creating sharp, professional edges. Ceiling work requires different techniques than walls because gravity affects how paint behaves on horizontal surfaces. Experienced painters manage drips and ensure uniform coverage without roller marks or streaks. Trim painting demands precision and patience. Doors, window frames, baseboards, and crown molding often receive enamel or semi-gloss finishes that highlight any imperfections. Proper sanding and multiple coats create smooth, durable results. Specialized Painting Techniques Beyond basic coverage, skilled interior painters Winnipeg homeowners hire can create unique visual effects and solve specific problems. Skim coating repairs damaged drywall and creates smooth surfaces on textured walls. This service proves
How to Choose the Best Home Paint Exterior for Your Winnipeg Home
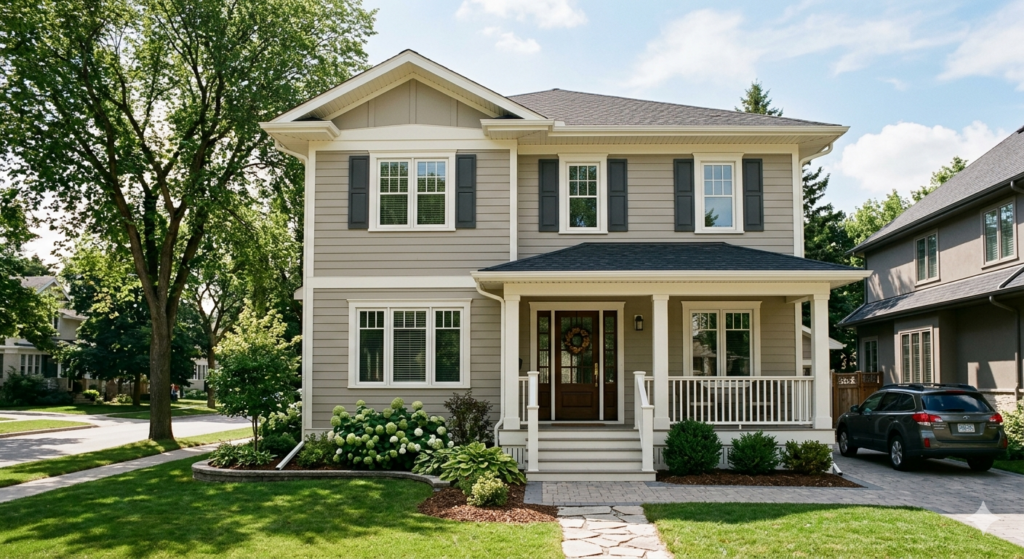
Home paint exterior selection determines how well your house withstands harsh Canadian weather while maintaining beautiful curb appeal. The right exterior paint protects your siding from moisture, UV damage, and temperature extremes while reflecting your personal style. Quality home paint exterior products contain weather-resistant ingredients that prevent peeling, cracking, and fading for 7-10 years or longer. Your choice impacts not just appearance but also maintenance costs, energy efficiency, and property value. Acrylic latex paints work best for most Winnipeg homes because they expand and contract with temperature changes, resist mildew, and clean up easily. Paint finishes range from flat to high-gloss, each serving different purposes on various exterior surfaces. Color selection involves considering neighborhood aesthetics, architectural style, and how different shades perform under intense sunlight or winter conditions. Surface preparation before applying home paint exterior determines longevity, requiring proper cleaning, scraping, priming, and repairs to achieve professional results. What is Home Paint Exterior? Home paint exterior refers to specially formulated coatings designed to protect and beautify the outside surfaces of residential buildings. Unlike interior paint, exterior formulas withstand harsh weather conditions including rain, snow, intense sunlight, and temperature fluctuations. These paints create a protective barrier over siding, trim, doors, and other exterior components. The formulation includes pigments for color, binders that help paint adhere to surfaces, and additives that provide weather resistance and mildew protection. Key characteristics of quality home paint exterior: Home paint exterior comes in various bases including oil-based, acrylic latex, and specialty formulations. Each type offers different advantages depending on your climate, surface material, and desired appearance. The paint works by forming a protective film over exterior surfaces. This film blocks moisture from penetrating into wood or other materials, preventing rot, warping, and structural damage. Quality home paint exterior also reflects or absorbs heat, potentially improving your home’s energy efficiency. Modern exterior paints include advanced technology like ceramic microspheres for better insulation, self-priming properties for easier application, and low-VOC formulas for environmental safety. Why Home Paint Exterior Quality Matters The quality of your home paint exterior directly affects how long your paint job lasts and how well it protects your home. Premium home paint exterior products cost more initially but save money over time. High-quality paints contain more pigment, better binders, and superior weather-resistant additives. These ingredients help the paint maintain color vibrancy and protective properties for 10-15 years compared to 3-5 years for budget options. Cheap home paint exterior often requires repainting twice as frequently. The labor costs for preparation and application remain the same regardless of paint quality, making frequent repainting expensive. Investing in quality paint reduces total ownership costs. Poor-quality exterior paint fails in predictable ways. The finish chalks, meaning pigment breaks down into a powdery residue. Colors fade dramatically within 2-3 years. The paint film cracks and peels, exposing bare surfaces to moisture damage. Quality home paint exterior provides better coverage, typically requiring fewer coats. Premium products spread more evenly and hide previous colors more effectively. This saves time during application and reduces total paint consumption. The protection factor cannot be overstated. Your home’s exterior constantly battles moisture, UV radiation, temperature swings, and physical impacts. Quality home paint exterior acts as the first line of defense against these elements, preventing expensive repairs to siding, trim, and structural components. True Coat exclusively uses premium-grade home paint exterior products for all projects. Our experience has shown that quality paints deliver superior results and long-term value. Contact us for professional exterior painting using the best products available. Types of Home Paint Exterior Choosing the right type of home paint exterior depends on your surface material, climate conditions, and performance expectations. Each paint type offers distinct advantages. Acrylic Latex Exterior Paint Acrylic latex represents the most popular home paint exterior choice for Canadian homes. This water-based formula combines durability with ease of application and cleanup. Advantages of acrylic latex: Acrylic latex home paint exterior works exceptionally well on wood siding, fiber cement, stucco, brick, and previously painted surfaces. The paint adheres strongly to properly prepared surfaces and creates a durable, long-lasting finish. In Winnipeg’s climate, acrylic latex handles temperature extremes better than other options. The paint remains flexible even in sub-zero winter conditions, preventing the cracking and peeling common with less flexible formulas. Oil-Based Exterior Paint Oil-based home paint exterior provides extremely durable finishes with excellent adhesion properties. While less popular today due to environmental regulations and difficulty of use, oil-based paints still excel in specific applications. These paints penetrate surfaces more deeply than latex, creating strong bonds with wood and metal. The slow drying time allows the paint to level smoothly, reducing brush marks and creating glass-like finishes. Best uses for oil-based home paint exterior: Oil-based home paint exterior requires mineral spirits for cleanup and emits stronger odors during application. Longer drying times mean projects take more days to complete. Many regions now restrict oil-based paints due to high VOC content. Specialty Exterior Paint Formulations Modern home paint exterior options include specialized products designed for specific purposes or surfaces. Masonry paint formulated for brick, concrete, and stucco contains additives that help the paint bond to alkaline surfaces. These paints often include waterproofing agents and breathe better than standard formulas. Trim paint offers higher durability and gloss levels than siding paint. These home paint exterior products resist scuffing and clean more easily, important for doors, windows, and decorative elements. Primer-and-paint combinations save time by combining surface preparation and finish coating in one product. While convenient, these work best on new or well-maintained surfaces rather than heavily weathered exteriors. For guidance on selecting the best home paint exterior type for your specific project, consult with True Coat’s experienced team. We evaluate your surfaces, climate conditions, and goals to recommend optimal products. Learn more about our exterior painting approach. Five Types of Paint Finishes for Home Paint Exterior Paint finish refers to the sheen or glossiness level. Each finish serves different purposes on exterior surfaces, affecting both appearance and performance. Flat or Matte Finish Flat home paint exterior
How to Skim Coat Ceiling: Complete Guide for Smooth Finishes
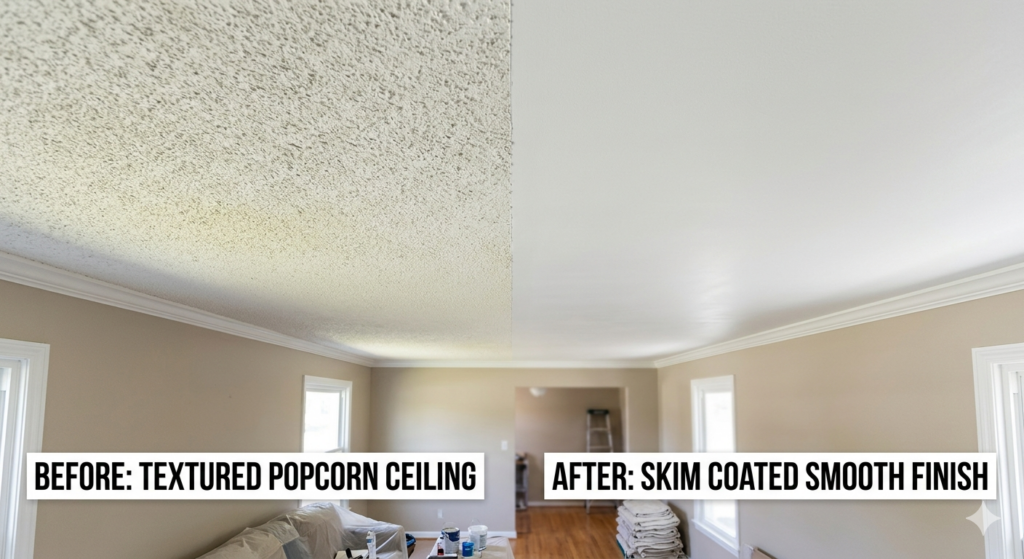
A skim coat ceiling involves applying a thin layer of joint compound over the entire surface to create a smooth, uniform finish. This technique transforms rough, damaged, or textured ceilings into flawless canvases ready for painting. You can achieve professional results by using the right materials, proper tools, and correct application methods. Whether you have popcorn texture, minor cracks, or simply want a modern smooth finish, applying a skim coat ceiling treatment offers a cost-effective solution compared to full ceiling replacement. The process typically takes 2-3 days including drying time, requires basic drywall skills, and produces lasting results when done correctly. Professional painters in Winnipeg can complete this work efficiently while ensuring proper surface preparation, even application, and a defect-free finish that will enhance your home’s appearance for years to come. What is a Skim Coat Ceiling? A skim coat ceiling refers to a finishing technique where you spread a very thin layer of joint compound across the entire ceiling surface. This method creates a smooth, even base for painting by filling small imperfections, hiding texture, and covering minor damage. The compound layer is typically just 1/8 inch thick or less. Unlike traditional plastering which builds up multiple thick layers, a skim coat ceiling application focuses on surface refinement rather than structural repair. Professional painters use specialized joint compound designed for skim coating. This material spreads easily, dries quickly, and sands smoothly. The consistency is thinner than standard drywall mud but thicker than paint. Common reasons homeowners choose a skim coat ceiling: The technique works on various ceiling materials including drywall, plaster, and previously textured surfaces. Before applying a skim coat ceiling treatment, you need to prepare the surface properly by cleaning, repairing major damage, and priming if necessary. How Does Skim Coating Differ from Regular Plastering? Skim coating and plastering serve different purposes despite using similar materials. Understanding these differences helps you choose the right approach for your ceiling project. Plastering builds up ceiling surfaces with multiple thick coats, often 1/4 to 1/2 inch per layer. This method repairs significant damage, creates new surfaces, or adds structural strength. Plasterers typically apply three coats: a scratch coat, brown coat, and finish coat. A skim coat ceiling uses just one or two very thin applications, each less than 1/8 inch thick. This technique focuses solely on creating a smooth finish over existing, structurally sound surfaces. The material dries faster and requires less expertise than traditional plastering. Feature Skim Coating Plastering Thickness 1/16 to 1/8 inch 1/4 to 1/2 inch per coat Number of Coats 1-2 thin layers 3 coats (scratch, brown, finish) Drying Time 24-48 hours total 5-7 days or more Primary Purpose Smooth finish on sound surfaces Repair damage, build new surfaces Material Cost Lower (less compound needed) Higher (more material, multiple coats) Skill Level Moderate (can be DIY) Advanced (professional recommended) For a skim coat ceiling project, you apply the compound in sweeping motions with a wide trowel or drywall knife. The goal is covering the surface with the minimum amount of material needed for smoothness. Traditional plastering requires more skill in mixing, applying multiple layers, and achieving proper cure times between coats. Plasterers often work with lime plaster or gypsum plaster rather than the joint compound used for skim coating. Most residential ceiling projects need only a skim coat ceiling treatment rather than full plastering. True Coat’s experienced team can assess your ceiling and recommend whether skim coating or more extensive drywall repair makes sense for your situation. When Should You Skim Coat a Ceiling? Deciding whether to apply a skim coat ceiling depends on the current condition of your surface and your desired outcome. Not every ceiling needs this treatment, but certain situations make it the ideal solution. You should consider a skim coat ceiling when: The ceiling must be structurally sound before skim coating. Large cracks, sagging sections, or water damage require proper repairs first. A skim coat ceiling covers only minor surface issues, not serious structural problems. Signs Your Ceiling Needs Skim Coating Look for these indicators that a skim coat ceiling treatment would benefit your space: Texture you dislike: Popcorn ceilings, heavy knockdown, or orange peel textures make rooms feel dated. A smooth skim coat ceiling creates a contemporary look. Visible repairs: If you have patched holes or cracks, the repaired areas often show through paint. Skim coating blends everything into a uniform surface. Surface irregularities: Run your hand across the ceiling. Bumps, ridges, or rough patches indicate the need for smoothing. Paint cannot hide these flaws. Multiple paint layers: Decades of painting can create an uneven buildup. A skim coat ceiling evens out these variations. Minor damage: Small dents from moving furniture, hairline cracks from settling, or nail pops all disappear under a properly applied skim coat ceiling. However, skip skim coating if you notice sagging drywall, active water leaks, major cracks wider than 1/4 inch, or mold growth. These issues need proper repairs before any skim coat ceiling application. The best interior painting companies evaluate your ceiling carefully before recommending skim coating. True Coat provides free estimates and honest assessments to ensure you get the right solution for your situation. Materials and Tools Needed for a Skim Coat Ceiling Success with a skim coat ceiling starts with having the right supplies. Professional results require quality materials and proper tools for application. Essential Materials Joint Compound: Choose pre-mixed all-purpose joint compound or lightweight topping compound specifically designed for skim coating. Topping compound spreads more easily and creates a smoother finish. You need about one gallon per 50-60 square feet of ceiling. Primer: Apply primer before skim coating if your ceiling has stains, repairs, or different surface materials. Use primer again after the skim coat ceiling dries to seal the compound before painting. Sandpaper: Stock 120-grit and 220-grit sandpaper for smoothing between coats and final finishing. Finer grits create the smoothest surfaces. Protective Materials: Cover floors and furniture with drop cloths. Use painter’s tape to protect walls where they meet the ceiling. Required
What Should You Know About Deck Stain Solid for Your Winnipeg Home?
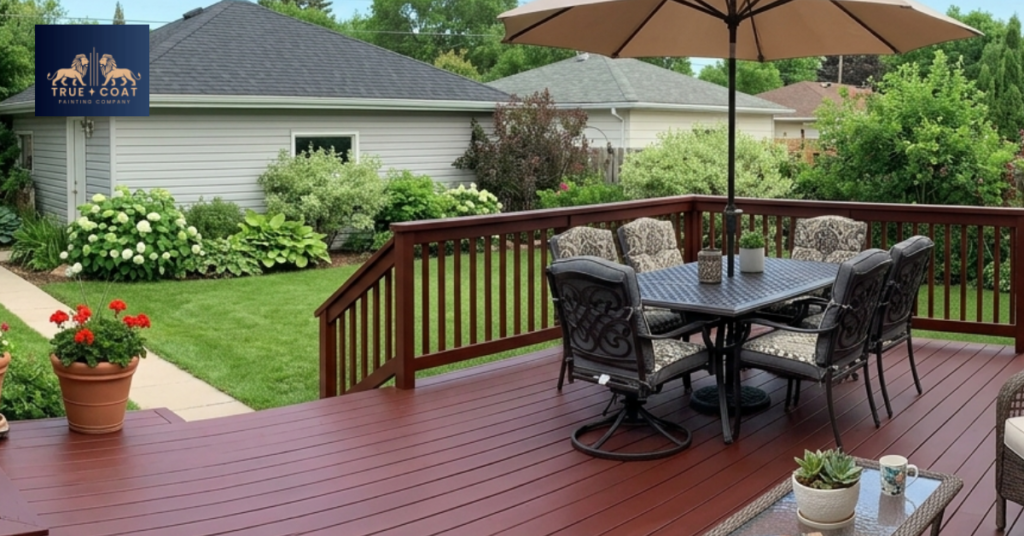
Deck stain solid provides complete coverage that hides wood grain while protecting your outdoor space from weather damage. This type of finish acts like paint but penetrates deeper into the wood, offering better durability than traditional paint for deck surfaces. Solid stain comes in various colors, lasts longer than transparent or semi-solid options, and requires less frequent maintenance when applied correctly. Choosing the right finish for your deck affects how long it lasts and how much work you’ll need to do later. Solid stain works well for older decks with imperfections or homeowners who want a uniform color without visible wood texture. The coverage helps protect against moisture, UV rays, and everyday wear while giving you flexibility in color choices that match your home’s exterior. This guide covers everything you need to know about using deck stain solid, from understanding the benefits to learning proper application techniques. You’ll discover how solid stain compares to other finishes, what makes a quality product, and how to avoid common problems like peeling or uneven coverage. Understanding Deck Stain Solid Deck stain solid is a thick coating that completely covers the wood surface while still allowing some breathability. Unlike paint, which sits entirely on top of wood, solid stain penetrates into the fibers while providing opaque coverage. This type of finish contains more pigment than semi-solid or transparent stains. The extra pigment blocks out the natural wood grain and creates a uniform color across your entire deck. You can choose from hundreds of colors, just like paint, but the formula is designed specifically for horizontal outdoor surfaces that get foot traffic. How Solid Stain Works Solid stain combines the best features of paint and stain. The product soaks into the wood pores, creating a strong bond that resists cracking and chipping better than regular paint. The pigments in deck stain solid protect wood from sun damage. UV rays break down wood fibers over time, causing them to turn gray and brittle. The thick color layer acts as a shield, blocking harmful rays before they reach the wood underneath. Water resistance is another key benefit. Solid stain creates a barrier that prevents moisture from soaking into deck boards. This protection stops rot, mold, and warping that happen when wood stays wet for long periods. Types of Solid Stain Formulas You’ll find two main types of deck stain solid products: oil-based and water-based. Each has different characteristics that affect application and performance. Oil-based solid stains penetrate deeply and provide excellent water resistance. They take longer to dry but often last longer before needing recoating. The strong odor and cleanup with mineral spirits make them less convenient to work with. Water-based solid stains dry faster and have less odor. Soap and water clean up tools easily. Modern water-based formulas have improved durability and now compete well with oil-based options. Many homeowners prefer them for easier application and environmental benefits. Comparison of Solid Stain Types: Feature Oil-Based Water-Based Drying Time 24-48 hours 4-6 hours Penetration Deep Moderate Odor Level Strong Low Cleanup Mineral spirits Soap and water Durability 4-6 years 3-5 years VOC Content Higher Lower Is Solid Stain Good for a Deck? Solid stain works extremely well for decks that need complete coverage or color transformation. This finish excels at hiding imperfections, protecting against weather, and giving you control over the final appearance. Decks with existing damage benefit most from deck stain solid. If your boards have dark stains, discoloration, or repairs that don’t match the original wood, solid stain covers everything uniformly. You won’t see patches or variations in color once the job is complete. Protection is the main reason people choose solid stain. The thick coating shields wood from rain, snow, and Winnipeg’s harsh winters. Moisture can’t penetrate as easily, which prevents the freeze-thaw cycles that crack and split unprotected boards. When Solid Stain Makes Sense Older decks that have lost their natural beauty are perfect candidates for solid stain. If your deck wood has turned gray or shows significant weathering, solid stain gives it a fresh, uniform appearance without expensive board replacement. Matching your home’s color scheme becomes easy with deck stain solid. You can coordinate your deck with your siding, trim, or shutters. This design flexibility helps create a cohesive look for your entire outdoor space. Mixed wood types or repair patches show less when covered with solid stain. Maybe you replaced a few damaged boards with wood that doesn’t quite match the original. Solid stain makes everything look the same, eliminating visual inconsistencies. Situations Where Other Stains Work Better Brand new decks with beautiful wood grain often look better with transparent or semi-solid stain. These thinner products let the natural beauty show through while still providing protection. Using deck stain solid on premium wood hides the grain patterns you paid extra to get. If you want to maintain the natural wood appearance, transparent stain is the better choice. You’ll see and feel the wood texture, which many people prefer for a more organic look. The trade-off is more frequent reapplication, usually every 1-2 years. High-quality cedar or redwood decks typically benefit from preserving their natural color. Semi-solid stains enhance the wood while adding protection. Covering these premium materials with solid stain removes the visual appeal that makes them special. What is the Best Rated Solid Color Deck Stain? The best rated deck stain solid products combine long-lasting protection with easy application and attractive finish. Quality varies significantly between brands, so understanding what makes a superior product helps you get better results. Top-rated solid stains share several characteristics. They penetrate well, resist fading, stand up to foot traffic, and maintain their appearance through multiple seasons. The best products also apply smoothly without excessive brush marks or lap lines. Key Features of Quality Solid Stain Pigment quality determines how well your deck stain solid resists fading. High-quality pigments maintain their color even after years of sun exposure. Cheaper products fade to lighter shades within a season or two, making your deck look worn
How To Install Drywall Over Plaster Walls Successfully
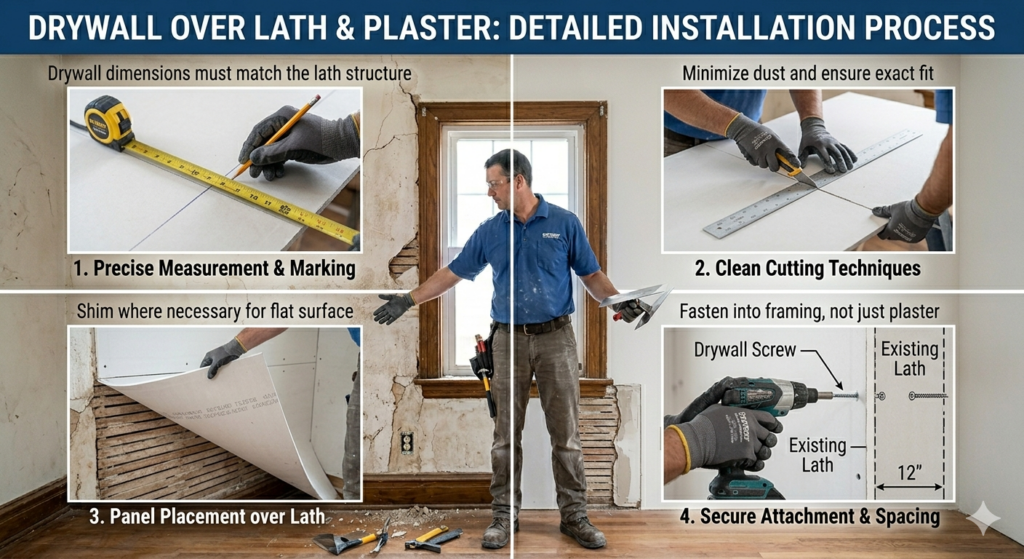
Drywall over plaster offers homeowners a practical solution for updating old walls without the mess and expense of complete plaster removal. This renovation method involves placing modern drywall sheets directly on top of existing plaster surfaces, creating smooth, fresh walls ready for painting. The process works particularly well in older Winnipeg homes where plaster shows age through cracks, uneven surfaces, or outdated textures. Success depends on proper wall assessment, correct installation techniques, and understanding when this approach makes sense. The method requires checking wall stability, addressing moisture issues, and ensuring adequate support. From preparation to finishing, knowing how to execute this technique correctly transforms aging rooms into modern spaces. What Is Drywall Over Plaster Drywall over plaster refers to the renovation technique of installing new drywall sheets directly onto existing plaster walls rather than removing the old plaster first. This method creates a fresh surface for painting and decorating while avoiding the dust, debris, and labor involved in tearing out plaster. The approach works by fastening drywall panels to wall studs through the existing plaster layer. The technique has become popular in older homes where plaster walls remain structurally sound but show cosmetic problems like cracks or outdated textures. Instead of dealing with challenging plaster removal, homeowners can cover these imperfections with smooth, modern drywall. The new layer provides a clean slate while maintaining existing wall structure. Understanding when this method makes sense requires evaluating current walls. If plaster remains firmly attached to the lath beneath and shows no signs of major damage, covering it with drywall can be an efficient choice. Why Choose Drywall Over Plaster For Your Walls Selecting drywall over plaster as your renovation approach offers multiple advantages for homeowners dealing with aging plaster surfaces. The drywall over plaster benefits extend beyond convenience to include cost savings and improved functionality. The most obvious advantage of drywall over plaster involves avoiding extensive mess created by plaster removal. By installing new sheets on existing surfaces instead, you eliminate this disruptive phase entirely. Cost represents another significant factor favoring drywall over plaster installations. This renovation typically costs considerably less because you skip demolition. For accurate pricing, contact True Coat for a detailed estimate. Speed of completion favors this installation method. This faster timeline means less disruption and quicker enjoyment of renovated spaces. Additional insulation comes as a bonus benefit. The existing plaster layer adds thermal mass to walls. When installing new panels on top, you can also add insulation materials in gaps, further improving energy efficiency. Future repairs become simpler with drywall surfaces. For professional guidance on whether this approach suits your renovation, True Coat’s experienced team can assess your walls. When Should You Install Drywall Over Plaster Determining whether to pursue this method requires careful evaluation of existing wall conditions. Several factors help identify when this approach works best. Good Candidates For This Installation Structurally sound plaster represents the ideal candidate. If your plaster remains firmly attached to the lath beneath with no hollow-sounding areas when tapped, it can support new drywall installation. Minor surface cracks, small holes, or cosmetic damage do not disqualify walls since new panels will cover these imperfections. Walls with outdated textures like heavy stippling or popcorn finishes work perfectly. Rather than attempting to remove these textured surfaces, covering them with smooth drywall provides quick transformation. Rooms undergoing complete renovation benefit from this approach. If you plan to update electrical or add insulation, installing new sheets fits naturally into the larger project. Situations Requiring Different Approaches Moisture damage disqualifies walls from this treatment. If you notice water stains, soft spots, or ongoing moisture problems, address these issues first. Installing new material over moisture-damaged surfaces traps the problem, leading to mold growth. Extensively damaged plaster with large sections loose or detached needs removal rather than covering. Hollow-sounding areas indicate separation from lath backing. Severely uneven walls may require removal. If plaster surfaces show extreme waves or bulges exceeding half an inch, new drywall may follow these contours. For expert assessment, exploring professional drywall services helps determine whether this method makes sense. How To Prepare Walls For Drywall Over Plaster Installation Proper preparation determines whether your drywall over plaster project succeeds. Taking time to prepare surfaces correctly ensures new panels perform well for years. Clean all wall surfaces thoroughly. Remove loose paint, wallpaper, or debris. Use a shop vacuum to eliminate dust. Inspect every section carefully by tapping across surfaces listening for hollow sounds indicating loose plaster. Mark areas where plaster has separated from lath backing. Locate and mark all wall studs. Since you will fasten panels through plaster into studs, knowing their exact location is essential. Use a stud finder rated for plaster walls. Mark stud locations clearly with pencil. Address moisture issues completely before starting. Fix water damage, leaks, or moisture sources permanently. Allow damp plaster to dry completely. Check electrical boxes and install box extenders before hanging panels. Step-By-Step Guide To Installing Drywall Over Plaster Installing drywall over plaster follows a systematic process requiring attention to detail. Following these drywall over plaster steps carefully results in professional-quality walls. Measuring And Cutting Drywall Measure wall dimensions carefully, accounting for ceiling height and obstacles like windows or doors. Standard drywall sheets come in four-foot by eight-foot panels. Plan your layout to minimize seams and waste. Horizontal installation often works better for standard room heights. Cut drywall using a utility knife and straightedge. Score the paper face deeply, then snap the panel backward along the score line. Cut the paper backing to complete separation. For openings around outlets, measure precisely and cut carefully with a drywall saw. Fastening Methods Two primary methods exist for attaching new sheets. The screw-through method involves driving drywall screws through both new material and existing plaster into wall studs beneath. Use screws long enough to penetrate studs by at least one inch after passing through both layers, typically requiring screws around two and a half inches long. Space screws appropriately, placing them every twelve inches along studs for walls. Drive screws
How Does Skim Coating a Wall Transform Your Interior?
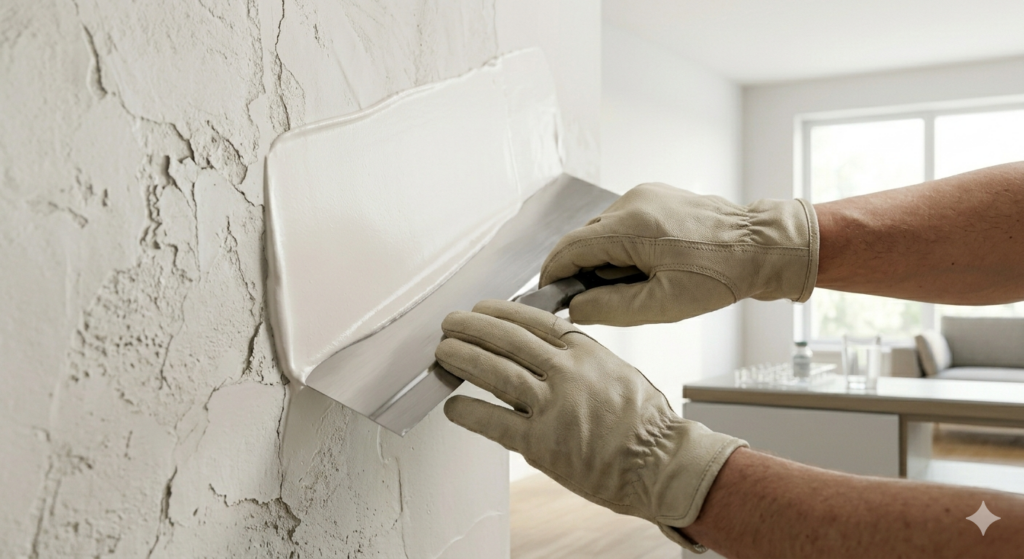
Skim coating a wall means applying thin layers of joint compound across an entire wall surface to create a smooth, even, paint-ready finish. It’s used to fix damaged drywall, remove old texture, repair surfaces after wallpaper removal, and prep walls for specialty finishes like limewash. The process involves cleaning and priming the surface, applying two to three thin coats of compound, sanding between each coat, and finishing with a drywall primer before paint. It works on both drywall and older plaster walls. One coat is rarely enough, and skipping the final primer causes uneven paint absorption. Skim coating a wall sits between spot patching and full drywall replacement on the repair scale. It costs less than replacement and delivers far better results than patching alone when a wall has widespread surface damage. For Winnipeg homeowners dealing with aging walls, post-wallpaper surfaces, or outdated textures, it’s often the most practical and cost-effective solution before repainting. What Is Skim Coating a Wall? Skim coating a wall is the process of applying one or more thin, even layers of joint compound across the full surface of a wall to create a perfectly smooth finish. It is not the same as patching an individual crack or hole. Instead, skim coating a wall treats the entire surface so that every square inch ends up level, uniform, and ready for paint. The compound used in skim coating a wall is typically a lightweight joint compound or finishing plaster. It gets spread across the wall in thin coats using a wide trowel or drywall knife. Once dry, each coat is lightly sanded before the next one goes on. The final result is a surface so smooth that paint sits on it evenly rather than sinking into ridges or bumps. Think of it as resurfacing your walls the same way you’d resurface a floor before laying tile. The prep work sets the entire outcome. Why Would You Need to Skim Coat a Wall? Not every wall needs this treatment, but there are several clear situations where skim coating a wall is the right move. Knowing when it applies saves you from painting over a problem that will just look worse once paint goes on. Old or damaged drywall. Walls that have been patched multiple times, scuffed, or damaged from water tend to be uneven all over. Skim coating a wall smooths everything out so patches don’t ghost through the paint. Removing wallpaper. When wallpaper is stripped, the paper face of the drywall often tears and lifts, leaving behind a rough, inconsistent surface. Painting directly over it creates a blotchy, textured result. Skim coating a wall after wallpaper removal fixes this completely. Eliminating old wall texture. Popcorn, orange peel, and knockdown textures were popular decades ago but look dated today. Skim coating a wall over the existing texture levels it out so you can achieve a clean, modern flat finish. Preparing for limewash or specialty finishes. Limewash paint and other decorative finishes require a smooth, consistent base to look their best. Without skim coating a wall first, uneven surfaces can cause the finish to appear blotchy or inconsistent. If you’re curious about specialty finishes, our team covers limewash paint in Canada and why you should consider it in more detail. Older homes with aging plaster. Many Winnipeg homes have plaster walls that have developed fine cracks, bubbling, and soft spots over the years. Skim coating a wall stabilizes and smooths the surface without requiring a full tear-out. How Does Skim Coating a Wall Work? A Step-by-Step Look Understanding the actual process helps you appreciate why results vary so much between DIY attempts and professional work. Here is how skim coating a wall is done properly. Step 1: Surface Assessment and Prep Before any compound touches the wall, the surface has to be cleaned and stabilized. Loose paint gets scraped away, grease is cleaned off, and any large holes or deep cracks get filled first. If wallpaper residue is present, torn drywall paper gets stabilized with a primer. Skipping this step is the most common reason skim coat jobs fail. Step 2: Priming A bonding primer or drywall primer is applied to the wall before the first coat of compound. This step ensures the joint compound adheres properly and doesn’t crack or peel as it dries. Step 3: First Coat A thin, even layer of joint compound gets spread across the entire wall using a wide trowel. The goal at this stage is full coverage, not perfection. The compound gets feathered out at the edges to avoid hard ridges. Step 4: Drying and Light Sanding The first coat takes roughly 24 hours to dry depending on humidity and temperature. Once fully dry, it gets lightly sanded to knock down any ridges or trowel marks. Winnipeg winters can slow drying considerably, so ventilation matters. Step 5: Second and Third Coats Most walls need at least two coats for a truly smooth result. Each coat is thinner than the one before it. By the final coat, the compound layer should be almost paper thin and completely flat. Step 6: Final Sanding and Priming After the last coat cures, the surface is finish-sanded and wiped clean of dust. A final coat of drywall primer seals everything before paint goes on. Without this primer, paint absorbs unevenly into the compound and the finished wall looks dull and patchy. Skim Coating a Wall vs. Other Options: Which One Is Right for You? There are a few different approaches to fixing wall surfaces, and choosing the right one depends on the condition of your walls and the result you want. Option Best For Finish Result Skim Coating a Wall Uneven surfaces, texture removal, full-room prep Completely smooth, professional-grade finish Spot Patching Small isolated holes or nail pops Targeted repair only, not full coverage Full Drywall Replacement Severe structural damage or water damage New panel, maximum durability Plaster Repair Older homes with historic plaster walls Restores original surface character For most Winnipeg homeowners dealing with cosmetically
Exterior Paint Black: The Bold, Lasting Choice for Winnipeg Homes
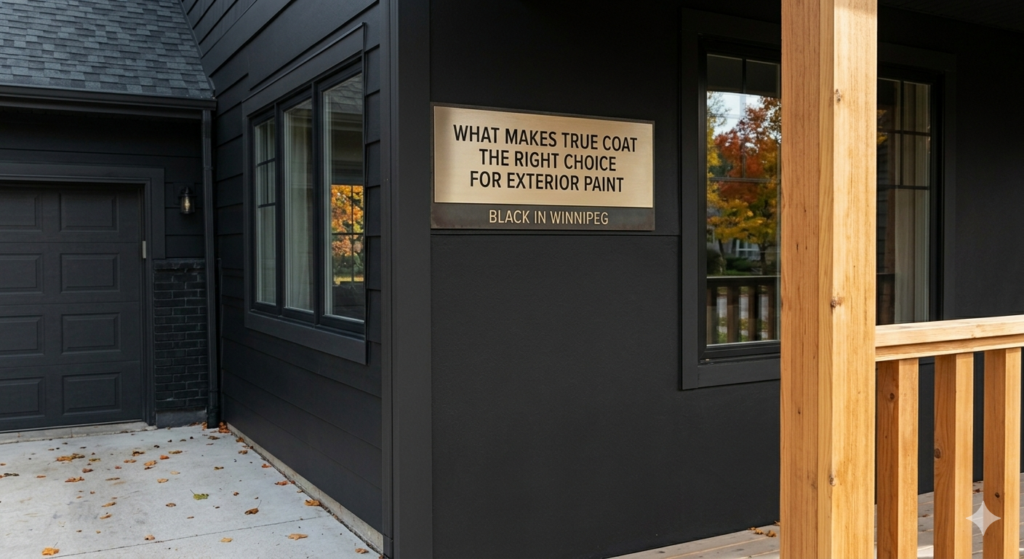
Exterior paint black is one of the most powerful choices a homeowner can make to instantly upgrade curb appeal and add long-lasting protection to their property. Whether you’re refreshing the siding, trims, doors, or the full facade, choosing the right black exterior paint and having it applied correctly makes all the difference between a finish that fades in two years and one that holds strong through Winnipeg winters. At True Coat, we help Winnipeg homeowners get the most out of exterior paint black projects by combining expert preparation, premium-grade paints, and skilled application. From deep matte finishes to satin sheens, our team handles every detail so your home looks striking from the street and stays protected through every season. If you’re thinking about going dark this year, this page covers everything you need to know. Why Exterior Paint Black Works So Well on Canadian Homes There’s a reason exterior paint black has become one of the fastest-growing colour choices across Canada. It’s bold, it’s versatile, and when it’s done right, it gives a home a clean, architectural look that genuinely stands out. Black works on heritage homes, modern builds, bungalows, and everything in between. In Winnipeg’s climate, black exterior paint also has a functional advantage. Darker colours absorb heat, which can help exterior surfaces dry faster after rain and resist moisture buildup during shoulder seasons. That said, this also means that surface prep and the right paint formulation matter more with dark colours. Thin coverage or poor-quality paint will show flaws far more visibly on a black exterior than on a lighter one. From a design standpoint, exterior paint black pairs naturally with wood tones, brick, stone, and metal accents. It frames windows and doors with definition and gives even simple architecture a finished, intentional look. When homeowners ask us whether black is a good exterior choice for their home in Winnipeg, the honest answer is almost always yes, as long as the prep work is done properly and the right product is selected. Table 1: Exterior Paint Black Finish Types and Best Applications Finish Type Best Used For Key Benefit Flat / Matte Main exterior walls, siding Hides surface imperfections well Satin Trims, doors, window frames Durable, easy to clean Semi-Gloss Doors, shutters, accent details High contrast, moisture resistant Eggshell Smooth render or stucco walls Subtle sheen, good washability How True Coat Handles Exterior Paint Black Projects in Winnipeg Applying exterior paint black the right way takes more than just rolling on a dark colour. At True Coat, we take a structured approach to every exterior painting project, and black surfaces require particular attention at each stage. Surface Preparation Comes First. Before any paint goes on, our team thoroughly cleans the surface, removes any peeling or flaking old paint, and fills cracks or imperfections. With exterior paint black, any blemish in the surface will be far more visible than with lighter colours. That’s why we treat the prep stage as seriously as the paint stage itself. Primer Matters More With Dark Colours. We apply a high-quality primer before laying down black exterior paint. This step improves adhesion, increases durability, and ensures the black comes out even and consistent without patchiness or streaking. Skipping primer on a dark colour is one of the most common mistakes homeowners make when DIYing an exterior paint black project. Multiple Coats for Real Coverage. One coat of exterior paint black is rarely enough. Our painters apply multiple coats with proper drying time between each layer. This gives the finish depth, richness, and the kind of durability that holds up through Winnipeg’s freeze-thaw cycles. Clean, Precise Edges. Black paint on exterior trims, doors, or accents needs sharp edges. Our team uses professional masking techniques and takes extra care around windows, soffits, and fixtures so the lines are crisp and the finished look is clean. If you’re looking for more context on what professional exterior painters actually do differently, our blog on what is the best approach to exterior painting for house projects covers that in detail. You can also browse our completed exterior painting projects to see the standard of work we deliver across Winnipeg homes. Choosing the Right Exterior Paint Black for Your Home Not all black exterior paints are created equal. The shade, sheen level, and formulation all affect how your home looks and how long the finish lasts. Shade Variation. Black isn’t just one colour. Some blacks lean slightly warm with brown undertones, others lean cool with blue or grey undertones, and some are true neutral blacks. Depending on your home’s other materials such as brick colour, roofline material, and window frames, one tone will suit better than another. Our colour consultation process helps homeowners in Winnipeg choose the right exterior paint black shade before a single drop goes on the wall. Climate-Appropriate Formulas. Winnipeg’s climate demands exterior paints that can flex with temperature changes. We use paints specifically rated for Canadian weather conditions, formulas that resist cracking in cold, hold colour under UV exposure, and repel moisture effectively. Low-quality exterior paint black will begin to fade, chalk, or peel within a couple of years in this climate. Low-VOC Options Available. For homeowners who prefer environmentally responsible products, True Coat offers low-VOC exterior paint black options. These perform just as well as conventional formulas and are better for air quality around your home during and after the project. Want to see how we approach full exterior projects? Our exterior painting services page outlines everything we offer for residential and commercial clients in Winnipeg. When Is the Best Time to Apply Exterior Paint Black in Winnipeg Timing matters for any exterior painting project, and it’s especially important with exterior paint black. Dark colours are more sensitive to temperature and humidity than lighter ones. Painting in the wrong conditions can lead to poor adhesion, uneven drying, and a finish that starts to peel within a season. Ideal Conditions. The best time to paint exterior black surfaces in Winnipeg is from late spring through
How To Choose Deck Stain Black For Your Outdoor Space
Deck stain black creates a striking, modern look that transforms ordinary outdoor spaces into sophisticated retreats. This bold finish protects against weather damage while adding character to wood surfaces, working on various wood types and lasting several years with proper care. The finish creates a dramatic backdrop for outdoor furniture while hiding minor wood imperfections. From semi-transparent options that show wood grain to solid coverage, deck stain black offers flexibility for different design preferences. Understanding product types, application techniques, and maintenance needs helps homeowners achieve professional results that enhance outdoor living areas with both visual appeal and long-lasting protection. What Is Deck Stain Black And Why Choose It Deck stain black is a wood finishing product designed for outdoor surfaces like decks, railings, and fences. Unlike paint that sits on top, stain penetrates wood fibers to provide protection while enhancing natural texture. The product contains pigments, binders, and protective additives shielding wood from moisture, UV rays, and wear. Black stain comes in transparent, semi-transparent, semi-solid, and solid formulations. Transparent allows maximum grain visibility with subtle tint. Semi-transparent provides moderate coverage while letting grain show. Semi-solid covers most grain but texture remains visible. Solid delivers complete coverage similar to paint but penetrates rather than forming thick layers. Oil-based black stains penetrate deeper and last longer than water-based options. Water-based versions dry faster, have less odor, and clean up with soap and water. The dark color hides imperfections like cracks and discoloration while creating modern, elegant looks. Maintenance becomes simpler because dirt blends into dark surfaces rather than creating obvious contrast. For professional application, True Coat’s deck staining services ensure proper preparation and expert techniques. Should You Stain A Deck Black Deciding whether deck stain black suits your project depends on climate, deck location, and style preferences. Black staining excels with modern or contemporary architecture, coordinating with neutral schemes, metal accents, and minimalist design. Shaded or partially covered decks work ideally since trees, overhangs, or structures reduce heat concerns. Decks used during evenings or cooler seasons handle deck stain black well. The dramatic appearance enhances evening gatherings and creates striking contrast with landscape lighting. Properties with contemporary landscaping featuring stone or gravel complement black stained decks perfectly. However, decks in full sun exposure may become uncomfortably hot without shade protection. Traditional or rustic homes often clash stylistically with deck stain black. Colonial, farmhouse, or cottage architecture typically harmonizes better with natural wood tones. Families with young children playing barefoot during summer might prefer lighter colors that reflect heat. Do They Make Black Stains For Decks Yes, manufacturers produce numerous deck stain black products for outdoor wood surfaces. Professional-grade and consumer options exist across multiple brands with various formulations and price points. Oil-based options provide deeper penetration and longer-lasting protection but require mineral spirits for cleanup and longer drying. Water-based black deck stains offer easier application, faster drying, and simpler soap-and-water cleanup. Semi-transparent black stains work when wood grain visibility matters. Semi-solid options offer more coverage while showing texture. Solid deck stain black delivers complete coverage, hiding nearly all grain and imperfections for longest-lasting results. Products for harsh weather contain additional UV blockers and water repellents. For expert guidance, contacting True Coat provides professional recommendations based on your specific situation. Advanced deck stain black products include mold and mildew inhibitors essential in humid climates. Quick-dry formulations cut drying time from 24-48 hours to 4-6 hours. Low-VOC and zero-VOC options meet environmental standards while reducing odor during application. What Are Black Stains On A Wood Deck The term “black stains on a wood deck” has two meanings. First, intentional application of deck stain black products for protection and aesthetics. Second, unwanted dark discoloration from moisture, mold, or tannins appearing as blotchy patches indicating underlying issues. Natural black staining occurs when moisture trapped in wood creates conditions for mold and mildew appearing as black or gray patches. Tannins naturally present in wood leach out with moisture exposure, creating dark streaks. Metal fasteners cause black staining through oxidation when iron reacts with moisture and wood tannins. Before applying deck stain black, address existing discoloration. Clean with oxygen bleach solutions to remove mold and mildew. Specialized wood brighteners restore natural color and prepare wood for stain absorption. Metal stain removers tackle discoloration around fasteners. For complex stain removal, True Coat’s experienced team handles challenging preparation ensuring optimal deck stain black application results. What Type Of Stain Is Best For A Deck Selecting the best stain type depends on goals, wood condition, and maintenance preferences. The “best” stain balances appearance, protection, longevity, and maintenance requirements based on climate and personal preferences. Stain Type Comparison Transparent black stain offers minimal coverage suited for premium wood showcasing grain. Semi-transparent deck stain black provides moderate coverage with visible grain, balancing protection and appearance, lasting 2-3 years. Semi-solid black stain covers most grain while maintaining texture, typically lasting 3-4 years. Solid deck stain black delivers maximum coverage and protection, lasting 4-5 years. Stain Type Grain Visibility Protection Level Expected Lifespan Best For Transparent Full Low 1-2 years Premium wood showcase Semi-Transparent Moderate Moderate 2-3 years Natural look with color Semi-Solid Minimal Good 3-4 years Balanced coverage Solid None Excellent 4-5 years Maximum coverage Oil-Based Vs Water-Based Options Oil-based deck stain black penetrates deeply, providing excellent protection and lasting longer. However, they require 24-48 hours drying between coats and mineral spirits cleanup with strong odors. Water-based deck stain black dries quickly within 2-4 hours with simple soap-and-water cleanup and lower odor. They contain lower VOCs and resist yellowing but may not penetrate as deeply in harsh weather conditions. Is A Black Stained Deck Too Hot Heat absorption represents the primary concern with deck stain black. Dark colors absorb more solar radiation potentially creating uncomfortable surfaces. However, geographic location, sun exposure, and usage patterns all affect whether heat becomes genuine concern or manageable consideration. Geographic location dramatically impacts surface temperatures. Decks in northern climates like Winnipeg experience different conditions than southern locations. Direct sun exposure matters more than geography alone. Trees, pergolas, awnings,