What Are the Best Colors for Interior Paint for Your Home?
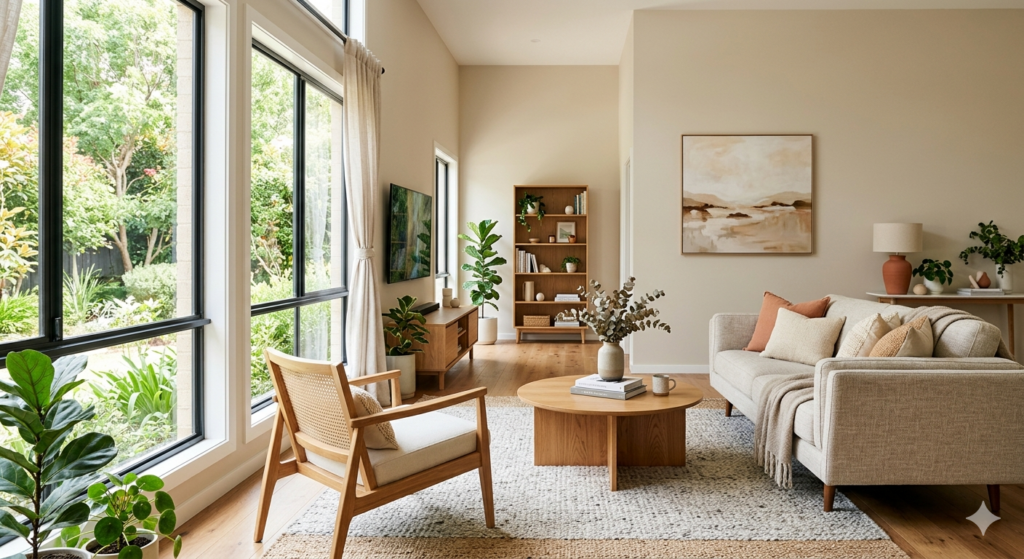
Choosing the right colors for interior paint can completely transform how a room looks and feels. The best colors for interior paint balance the mood of the space, the amount of natural light, and your personal style. Whether you are freshening up a living room, a bedroom, or a kitchen, picking the right shade matters more than most people think. In this article, you will learn which colors for interior paint work best room by room, how lighting affects your color choice, which finishes hold up best, and what things to consider before you commit to a shade. You will also find helpful tables, practical tips, and answers to the most common questions homeowners ask about colors for interior paint in Canada. What Are the Best Colors for Interior Paint? The best colors for interior paint are those that suit your lifestyle, the purpose of the room, and how much natural light comes in. Neutral shades like warm white, greige (grey-beige), and soft taupe remain consistently popular in Canada because they are versatile and timeless. However, bold choices like deep navy, forest green, and terracotta are gaining ground as homeowners get more confident with color. Here is a quick look at what makes certain shades stand out: Color Mood It Creates Best Room to Use It In Warm White Clean, airy, open Living room, hallways Greige (Grey-Beige) Cozy and modern Bedroom, main living areas Soft Sage Green Calm and refreshing Bathroom, kitchen Deep Navy Blue Bold and sophisticated Accent wall, study Light Grey Neutral and flexible Office, spare room Terracotta Warm and earthy Dining room, entryway When picking colors for interior paint, always consider how the shade looks at different times of day. A color that looks soft in the morning can shift under artificial lights in the evening. Testing a small sample patch on the wall before committing is always a smart move. Best Colors for Interior Paint Room by Room Every room in your home has a different function, and the colors for interior paint you choose should reflect that purpose. A bedroom needs something relaxing, while a kitchen benefits from something energizing and easy to clean. If you want to see real examples of how color transforms a space, take a look at True Coat’s project gallery for inspiration before you decide. Living Room Colors for Interior Paint The living room is where you spend quality time with family, so the colors for interior paint here should feel welcoming. Warm whites, soft creams, and light taupes are popular because they make rooms feel larger and brighter. If you want something with more personality, a muted dusty blue or a warm clay tone adds character without being overwhelming. For a practical tip: if your living room does not get a lot of natural light, avoid dark shades on all four walls. Instead, use a deeper color only on one feature wall and keep the rest lighter to balance the space. Bedroom Colors for Interior Paint For bedrooms, colors for interior paint that promote rest and relaxation work best. Soft lavender, muted green, dusty blue, and warm off-white are all solid choices. Studies in color psychology suggest that blue and green tones lower heart rate and help people wind down before sleep. Avoid overly bright or saturated colors in the bedroom, as these can make it harder to relax. A great option for Canadian homes during long winters is a warm sand or linen tone, which feels cozy even on grey days. Kitchen Colors for Interior Paint Kitchens see a lot of activity, so the best colors for interior paint here should be clean, bright, and easy to wipe down. Crisp white, soft yellow, and light grey work very well. If you want something bolder, a sage green or navy blue on lower cabinets paired with a light wall color creates a fresh, modern look. Avoid very dark wall colors in small kitchens because they can make the space feel cramped. Bathroom Colors for Interior Paint Bathrooms are often smaller, so colors for interior paint that feel light and fresh are the best fit. Crisp white, seafoam, pale blue, and soft mint are classic options. These shades also pair well with white fixtures, which most bathrooms have. If you want a more spa-like feel, a light taupe or warm stone color works beautifully. Just make sure to use a moisture-resistant paint finish to handle humidity. How Lighting Affects Colors for Interior Paint Lighting is one of the most overlooked factors when choosing colors for interior paint. Natural daylight shows a color’s truest tone. North-facing rooms get cooler, shadier light, which makes warm tones like yellows and oranges look better since they counterbalance the cool light. South-facing rooms get bright, warm light throughout the day, which means cooler shades like blues and greens will look their best. Artificial lighting also plays a big role. Warm LED or incandescent bulbs bring out the warmth in colours and can make certain shades look more orange or yellow. Cool white LED bulbs push the colour toward the blue or grey end of the spectrum. A practical tip: always look at your paint sample under the lighting you actually use in the room. Many homeowners choose colors for interior paint in a bright showroom and are surprised when the shade looks different at home. If you need professional guidance on this, learn more about why hiring interior house painters makes sense for your Winnipeg home before making your final decision. Best Paint Finishes to Pair With Colors for Interior Paint The finish you choose is just as important as the color itself. Different finishes change how colors for interior paint look on a wall and how well they hold up to daily wear. Finish Type Best For Key Benefit Flat / Matte Ceilings, low-traffic areas Hides surface imperfections well Eggshell Living rooms, bedrooms Slight sheen, easy to clean Satin Kitchens, hallways Durable and wipeable Semi-Gloss Bathrooms, trim, doors Moisture-resistant, easy to clean High
How to Find the Best Exterior Painting Contractor Near Me in Winnipeg?
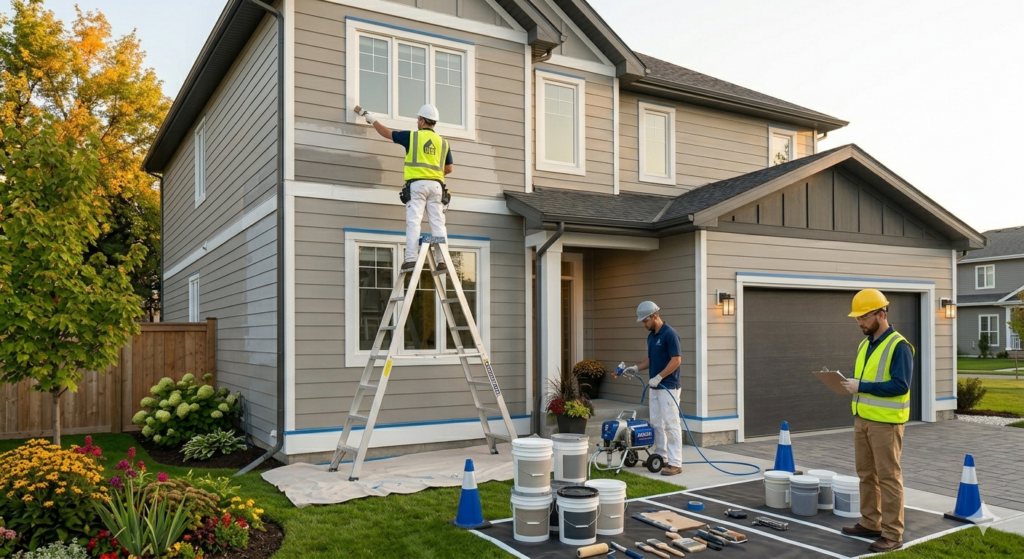
Finding an exterior painting contractor near me means securing a professional who can protect and beautify your home’s exterior with quality workmanship and reliable materials. The right contractor brings proper licensing, insurance coverage, proven experience, and transparent pricing to every project. Successful exterior painting starts with thorough surface preparation, uses weather-resistant paints designed for Canadian climates, and follows proper application techniques that ensure your home stays protected for years. Whether you need full house repainting, trim work, or specialty finishes, choosing the right exterior painting contractor near me sets the foundation for results that last through Winnipeg’s harsh winters and humid summers while increasing your property value. What Makes a Quality Exterior Painting Contractor Near Me? A quality exterior painting contractor near me stands out through several key characteristics that separate professionals from amateurs. The best contractors carry proper licensing and full insurance coverage that protects both your property and their workers during the project. Experience matters significantly in exterior work because different materials require specific techniques. Wood siding needs different preparation than vinyl or stucco. A qualified exterior painting contractor near me knows how to handle each surface type correctly. Look for contractors who provide detailed written estimates that break down labor costs, material expenses, and project timelines. Transparency in pricing shows professionalism and helps you avoid surprise charges later. Licensed and Insured Protection Proper licensing proves that an exterior painting contractor near me meets local regulations and industry standards. In Manitoba, contractors should carry Worker’s Compensation coverage and general liability insurance. Insurance protects you if workers get injured on your property or if accidental damage occurs during painting. Always ask to see current certificates before hiring any contractor. Licensed contractors also follow building codes and safety regulations that protect your investment. This matters especially for multi-story homes where fall protection and proper scaffolding become safety requirements. Years of Experience in Winnipeg Climate Winnipeg’s extreme weather demands contractors who understand local conditions. An experienced exterior painting contractor near me knows which paints withstand temperature swings from minus 40 to plus 35 degrees Celsius. Contractors familiar with Winnipeg recognize how freeze-thaw cycles affect paint adhesion. They schedule projects during optimal weather windows and choose products designed for prairie climates. Experience also means understanding moisture management in our climate. Proper contractors know where condensation problems develop and how to prevent paint failure from trapped moisture. How Do I Find Reliable Exterior Painting Contractors Near Me? Finding reliable contractors requires research beyond simple internet searches. Start by asking neighbors whose homes look freshly painted for recommendations. Personal referrals often lead to trustworthy contractors. Check online reviews on multiple platforms including Google, HomeStars, and the Better Business Bureau. Look for patterns in feedback rather than focusing on single reviews. Pay attention to how contractors respond to complaints. Local paint supply stores often know which exterior painting contractors near me do quality work. Store staff see contractors regularly and know who buys premium materials versus cheap alternatives. Online Reviews and Ratings Google reviews provide recent feedback from actual customers. Look for detailed reviews that mention specific aspects like punctuality, cleanliness, and communication quality. Watch for red flags like contractors who only have five-star reviews with generic praise. Authentic feedback includes both positives and minor concerns that got resolved. Check if the exterior painting contractor near me responds professionally to negative reviews. Good contractors address complaints constructively and explain their side of situations. Getting Multiple Written Estimates Request at least three detailed quotes to compare pricing and scope. Quality contractors visit your property to assess conditions before providing estimates. Written estimates should itemize surface preparation, primer costs, paint quality, labor charges, and completion timelines. Vague estimates that just list total prices often hide poor planning. Be wary of quotes significantly lower than others. Very low bids might indicate corner-cutting on preparation work or use of inferior materials that fail prematurely. Checking References and Past Projects Ask each exterior painting contractor near me for references from recent projects similar to yours. Contact these homeowners to ask about their experience, final results, and whether they’d hire the contractor again. Request photos of completed work or drive by addresses the contractor provides. Seeing actual finished projects reveals quality standards better than marketing photos. Visit job sites if possible to observe work practices. Notice whether crews protect landscaping, keep areas clean, and use proper safety equipment. What Questions Should I Ask an Exterior Painting Contractor Near Me? Asking the right questions helps you evaluate contractors thoroughly. Start by confirming their licensing status and insurance coverage with specific policy numbers you can verify. Ask how long they’ve operated in Winnipeg and how many exterior projects they complete annually. Established contractors with consistent work volumes demonstrate reliability. Discuss their preparation process in detail. Quality contractors spend significant time on surface prep because it determines paint longevity more than the paint itself. Surface Preparation Methods Ask exactly what preparation steps they’ll perform on your specific siding type. Proper prep for wood includes scraping loose paint, sanding rough areas, and priming bare spots. Find out if they power wash and how they handle moisture afterward. Surfaces must dry completely before painting or adhesion problems develop. Question whether they’ll caulk gaps, replace damaged boards, or repair other issues before painting. These details separate thorough contractors from those who just cover problems with paint. Paint Products and Warranties Request specific brand names and product lines they recommend. Quality exterior painting contractors near me use recognized brands like Benjamin Moore, Sherwin-Williams, or PPG with proven durability. Ask about paint warranties and what they cover. Manufacturer warranties typically guarantee against peeling or fading for 15 to 25 years on premium products. Understand the contractor’s workmanship warranty separately from paint warranties. Good contractors guarantee their work for at least two to three years covering application defects. Project Timeline and Weather Contingencies Discuss realistic timelines including start dates and estimated completion. Weather delays happen in Winnipeg, so ask how they handle schedule changes from rain or temperature issues.
How to Choose the Best House Painting Winnipeg Services for Your Home?
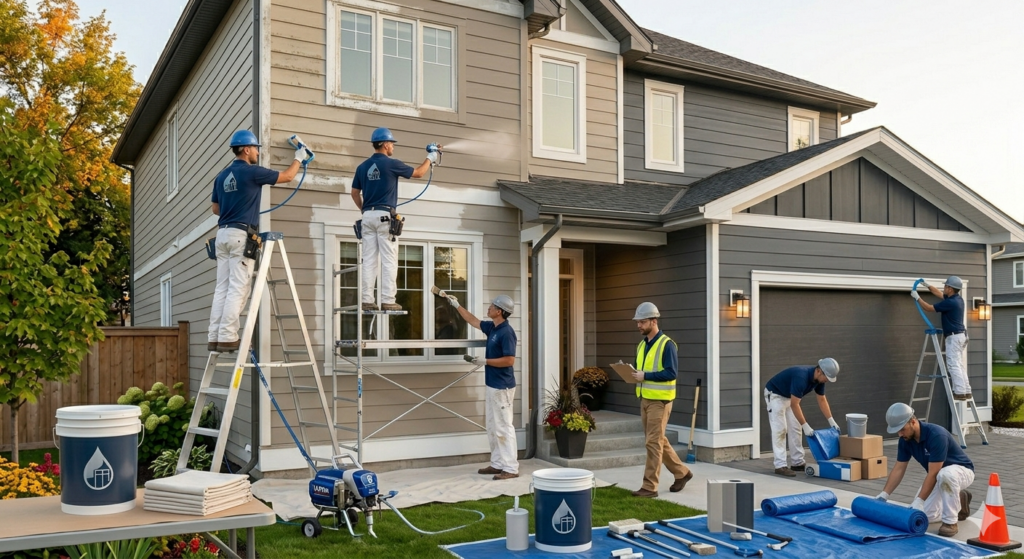
House painting Winnipeg projects require careful planning and the right professionals to deliver lasting, beautiful results. Homeowners face decisions about paint types, color selection, and choosing between DIY or hiring experienced contractors. Quality painting services protect your home from harsh Manitoba winters while boosting curb appeal and property value. Understanding cost factors and what separates excellent painters from average ones helps you make confident choices for Winnipeg properties. What Makes House Painting Winnipeg Different from Other Cities? Winnipeg’s extreme climate creates unique challenges for house painting projects. Temperatures swing from minus 40 degrees Celsius in winter to plus 30 degrees in summer, causing paint to expand and contract more than in moderate climates. Climate Challenges for Exterior Painting Manitoba’s freeze-thaw cycles put tremendous stress on painted surfaces. Water seeps into cracks during warmer periods, then freezes and expands, causing paint to peel and blister. Professional house painting Winnipeg contractors select paints formulated to withstand temperature extremes. Proper surface preparation becomes critical in this climate. Quality exterior paints must resist moisture penetration while allowing walls to breathe. Best Seasons for Painting in Winnipeg Late spring through early fall offers the ideal window for exterior house painting Winnipeg projects. Temperatures need to stay above 10 degrees Celsius for proper paint adhesion. Optimal Painting Conditions: Season Temperature Range Best For Late Spring 15-25°C Exterior walls, trim work Summer 20-30°C Siding, decks, full exteriors Early Fall 12-22°C Touch-ups, final projects Interior painting enjoys more flexibility since climate control maintains stable conditions year-round. Winter months often see increased demand for residential painting Winnipeg services. How Much Does House Painting Winnipeg Cost? Painting costs vary widely based on project scope, surface condition, and paint quality. Understanding these factors helps you budget accurately and compare quotes fairly. Factors That Affect Painting Prices Square footage forms the foundation of most estimates. Surface condition dramatically impacts prices. Homes needing extensive prep work cost significantly more than well-maintained surfaces. Paint quality matters more than many homeowners realize. Premium paints cover better, last longer, and resist fading. The best house painters Winnipeg homeowners trust provide detailed written estimates breaking down labor, materials, and preparation costs. Getting Accurate Estimates Contact True Coat for a free estimate on your house painting Winnipeg project. Professional assessments account for your home’s specific needs rather than offering generic pricing. Beware of estimates that seem too good to be true. Extremely low bids often indicate corners will be cut or hidden charges will appear later. True Coat’s transparent pricing includes everything needed to complete your project properly. Why Hire Professional House Painting Winnipeg Services? Professional painters bring more than brushes and ladders. Their expertise, equipment, and efficiency create results DIY efforts rarely match. Skills and Experience Matter Proper surface preparation determines how long paint lasts. Professionals know which primers work best for different materials and when conditions are right for painting. Safety becomes critical on multi-story homes. Professional crews use proper equipment and techniques to work safely at heights. Time savings add up quickly, with what takes homeowners weeks completed in days by efficient crews. Quality Materials and Tools Professional house painting Winnipeg contractors use commercial-grade tools that apply paint more evenly and quickly than consumer equipment. Paint coverage improves with professional application techniques. True Coat sources premium paints offering superior durability, coverage, and color retention. Our services include comprehensive surface preparation, ensuring paint adheres properly and lasts years longer than quick DIY jobs. What to Look for When Choosing House Painting Winnipeg Companies? Not all painting contractors deliver the same quality or service. Knowing what separates excellent companies from mediocre ones protects your investment. Licensing and Insurance Requirements Licensed contractors meet provincial standards and carry proper insurance coverage. This protects you from liability if workers get injured or if accidental damage occurs. True Coat maintains full licensing and insurance as a responsible Winnipeg painting company. Reviews and References Past customers provide honest assessment of work quality and professionalism. Read online reviews across multiple platforms. Request references from recent similar projects. Written Contracts and Warranties Detailed contracts prevent misunderstandings. Everything discussed should appear in writing, including paint brands, number of coats, and completion timelines. How to Prepare Your Home for House Painting Winnipeg Projects? Proper preparation makes painters’ jobs easier and improves final results. Interior Preparation Steps Remove furniture from rooms or move it to the center and cover with drop cloths. Take down wall decorations and window treatments. Remove switch plates and outlet covers. Clean walls to remove dust and grime. Point out any damage needing repair. When you hire interior house painters, they can focus on delivering flawless finishes. Exterior Preparation Checklist Clear landscaping away from the house perimeter. Trim bushes and tree branches near walls. Power wash siding to remove dirt and loose paint. Secure pets indoors during painting days. What Types of Paint Work Best for House Painting Winnipeg? Paint selection impacts both immediate appearance and long-term performance. Different surfaces and locations require specific paint formulations for optimal results. Interior Paint Options Latex paints dominate interior work. They dry quickly, clean up with water, emit fewer odors, and come in every color imaginable. Sheen levels affect appearance and practicality. Flat finishes hide wall imperfections. Eggshell and satin sheens balance durability with subtle shine. Semi-gloss finishes suit trim and high-moisture areas. Low-VOC and zero-VOC paints improve indoor air quality. True Coat offers eco-friendly painting solutions using environmentally responsible products. Exterior Paint Selections Acrylic latex paints handle Winnipeg’s temperature extremes better than oil-based alternatives. They flex with seasonal expansion and contraction while resisting cracking. Paint Type Comparison: Paint Type Durability Best Use 100% Acrylic Excellent Siding, trim, exteriors Acrylic Latex Very Good Most surfaces Lighter colors reflect sunlight, maintaining their appearance longer. Our approach to exterior painting prioritizes paint selections proven to withstand Manitoba weather. How Long Does House Painting Winnipeg Take? Project duration depends on home size, scope of work, and weather conditions. Understanding realistic timelines helps you plan accordingly. Interior Project Timelines Single-room painting typically takes one to two days. Whole-home interior
What Makes Painting Residential and Commercial Properties Different?
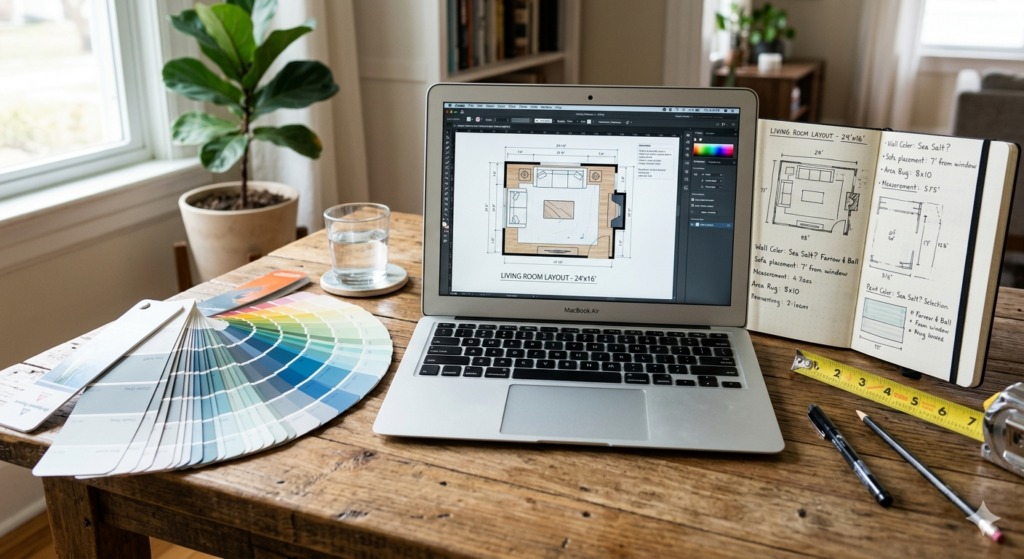
Painting residential and commercial spaces involves distinct techniques, timelines, and requirements that property owners should understand before starting any project. Residential painting focuses on homes and living spaces with personalized color choices and detailed finishes, while commercial painting covers business properties requiring durability, faster completion, and compliance with specific regulations. Both types demand professional expertise, but the scope, materials, and execution differ significantly based on the property type and intended use. Whether you need to refresh your home’s interior or update your office building’s appearance, knowing these differences helps you make informed decisions. Professional painting services handle everything from surface preparation to final touches, ensuring results that last. This guide breaks down what separates residential work from commercial projects, the types of painting available, and practical tips for choosing the right approach for your property in Winnipeg. Understanding the Key Differences Between Painting Residential and Commercial Properties The distinction between painting residential and commercial properties starts with understanding what each space needs. Homes prioritize aesthetics and personal preference, while businesses focus on brand representation and functionality. Residential painting typically covers smaller square footage with more intricate details. Homeowners select colors that reflect their personality and create comfortable living environments. Painters working on houses spend time on trim work, accent walls, and custom finishes that match the homeowner’s vision. Commercial painting involves larger surface areas, stricter timelines, and specific building codes. Businesses need quick turnarounds to minimize operational disruptions. The paint must withstand higher traffic, meet safety standards, and often align with corporate branding guidelines. Project Scale and Timeline Differences Residential projects usually take several days to a few weeks, depending on the home’s size. Painters can work during business hours without major disruptions to daily life. Homeowners have flexibility to adjust schedules if needed. Commercial projects demand efficiency. Many businesses require painting after hours or on weekends to avoid interrupting operations. Larger crews work simultaneously to complete projects faster. A commercial office building might need completion within a tight window, while a residential painting Winnipeg project allows more breathing room. Property Type Average Timeline Crew Size Work Hours Small Home 3-5 days 1-2 painters Daytime Large Home 1-2 weeks 2-3 painters Daytime Small Office 2-4 days 3-5 painters After hours Large Commercial 1-3 weeks 5-10 painters After hours/weekends Material and Durability Requirements Homes use paints designed for comfort and appearance. Low-VOC options create healthier indoor air quality. Finishes range from matte to glossy based on room function and personal taste. Commercial spaces need industrial-grade paints that resist scuffs, stains, and frequent cleaning. High-traffic areas like hallways and lobbies require durable coatings. Fire-resistant and antimicrobial paints may be mandatory in certain facilities. True Coat uses premium materials for both property types, selecting the right products based on your specific needs. Understanding these requirements ensures your investment delivers lasting value. Different Types of Painting Residential and Commercial Projects Both residential and commercial painting encompasses multiple specialty areas beyond basic wall coverage. Knowing these options helps you plan comprehensive property improvements. Interior Painting Services Interior painting transforms living spaces and work environments. Residential interiors focus on bedrooms, kitchens, bathrooms, and living areas. Homeowners often choose colors that create specific moods or match furniture and decor. Commercial interiors cover offices, retail spaces, restaurants, and warehouses. Color psychology plays a bigger role here, influencing customer behavior and employee productivity. Neutral tones dominate corporate settings, while retail stores use bold colors to attract attention. Interior house painters handle ceiling work, trim detailing, and specialty finishes. Techniques like skim coating smooth out imperfections before paint application, creating flawless surfaces. Exterior Painting Applications Exterior painting protects buildings from weather damage while enhancing curb appeal. Residential exteriors include siding, trim, doors, and shutters. Homeowners select colors that complement their neighborhood while expressing individual style. Commercial exteriors must withstand harsh conditions and maintain professional appearances. Building codes may dictate color choices or require specific paint types. Proper surface preparation becomes critical for adhesion and longevity. Exterior painting for house projects often involves pressure washing, scraping old paint, and repairing damaged surfaces. Weather considerations impact scheduling more heavily than interior work. Specialty Finishes and Custom Work Specialty finishes add character to both property types. Faux finishes, textured walls, and decorative techniques create unique visual effects. Limewash painting offers eco-friendly alternatives with distinctive appearances. Cabinet painting updates kitchens without full renovations. Kitchen cabinet painters transform dated spaces into modern showpieces using specialized primers and topcoats. Deck staining protects outdoor wood surfaces while highlighting natural grain patterns. This service applies to residential patios and commercial outdoor seating areas alike. Proper Preparation Steps for Painting Residential and Commercial Spaces Proper preparation determines project success regardless of property type. Taking time upfront prevents problems during execution and ensures quality results. Assessment and Planning Phase Start by evaluating your property’s current condition. Walk through spaces noting damaged areas, peeling paint, or water stains. These issues need repair before painting begins. Decide whether you want full coverage or targeted updates. Some projects only require accent walls or specific rooms, while others benefit from complete makeovers. Clear goals help painters provide accurate estimates and timelines. For commercial properties, consider operational impacts. Determine if work can happen during business hours or requires after-hours scheduling. Communication with employees or tenants minimizes disruptions. Color and Finish Selection Color selection significantly impacts final results. Residential clients often struggle choosing from endless options. Professional color consultation services guide decision-making based on lighting, furniture, and personal preferences. Commercial color choices align with brand identity and psychological effects. Corporate offices typically use calming neutrals, while restaurants might choose appetite-stimulating reds or oranges. Finish selection matters equally. Matte hides imperfections but shows marks easily. Satin and eggshell offer balanced durability and appearance. Semi-gloss and gloss withstand heavy cleaning, ideal for trim and high-traffic commercial areas. Surface Preparation Requirements Surface prep separates amateur results from professional quality. Walls need cleaning to remove dirt, grease, and mildew. Damaged areas require patching, sanding, and priming. Furniture and fixtures need protection or removal. Professional painters use drop cloths, plastic
How to Skim Coat Concrete for a Smooth Professional Finish
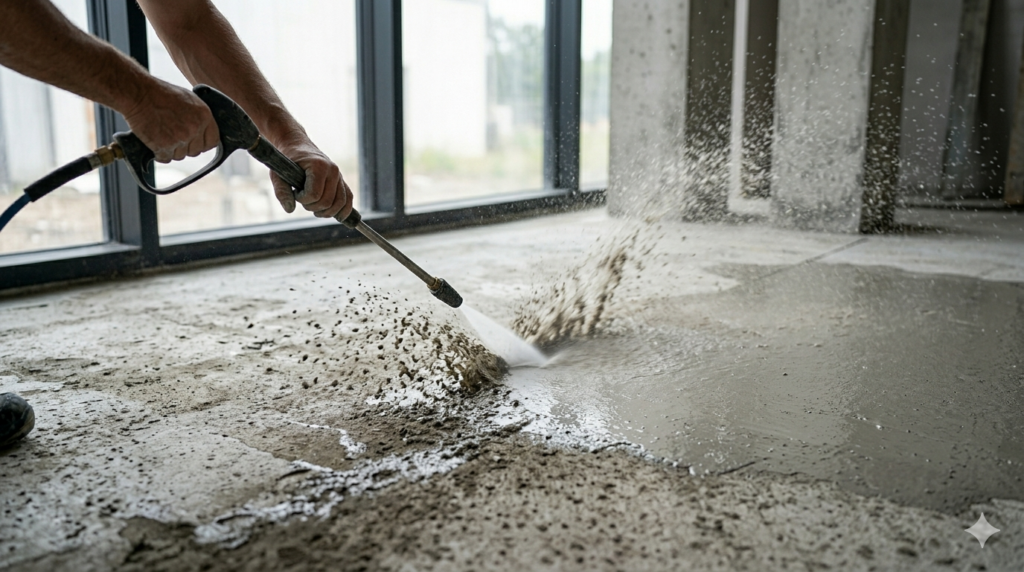
Skim coat concrete is a technique that applies a thin layer of specialized material over existing concrete surfaces to create a smooth, level finish. This process fixes minor imperfections like cracks, pits, and rough textures without the expense of replacing the entire surface. The method involves proper surface preparation, mixing polymer-modified materials, and applying thin coats evenly. You can achieve professional results in one to two days with the right tools, making it practical for basements, garages, patios, and commercial spaces. Skim coating costs less than replacement, works on structurally sound concrete, and creates ideal surfaces for painting, staining, or installing new flooring. What Is Skim Coat Concrete? Skim coat concrete involves spreading a thin layer of cement-based compound over existing concrete surfaces. This layer typically measures between 1/8 inch to 1/4 inch thick, just enough to cover surface defects without adding significant weight or height. The process uses special polymer-modified materials designed to bond strongly with old concrete. Unlike regular concrete, skim coat products contain additives that improve adhesion and flexibility, preventing cracks and separation over time. You’ll find skim coat concrete useful for leveling uneven surfaces, filling small holes and cracks, smoothing rough textures, and preparing floors for tile, vinyl, or epoxy coatings. Many property owners choose this method to refresh worn concrete without tearing it out and starting over. Common Uses for Skim Coat Concrete Basement floors benefit from skim coating when water damage or settling creates uneven spots. Garage floors with oil stains, pitting, or minor cracks become perfectly smooth, preparing them for durable finishes and protective coatings. Benefits of Skim Coating Skim coat concrete creates smooth surfaces ready for painting, staining, or new flooring installation. The thin application adds minimal height while fixing imperfections that make floors look old and worn. Where to Use Skim Coat Concrete Patios and walkways develop a fresh appearance when you apply skim coat concrete over weathered surfaces. Commercial spaces like retail stores, warehouses, and office buildings use skim coating to maintain professional appearances without expensive replacements. Why Choose Skim Coat Concrete Over Replacement? Replacing damaged concrete costs significantly more than skim coating. Complete removal requires heavy equipment, disposal fees, and new concrete installation. Time savings matter too, as concrete replacement takes several days while skim coating typically finishes in one or two days. Skim coat concrete works well when the existing slab remains structurally sound. If your concrete has minor surface issues but no major structural problems, skim coating provides an excellent solution at a fraction of replacement costs. Cost Savings with Skim Coating Skim coat concrete eliminates the need for expensive demolition and disposal. You save money on labor, equipment rental, and new concrete materials while achieving professional results that improve your property’s appearance. Time Efficiency Projects with tight deadlines benefit from faster completion compared to full concrete replacement. You can return to normal activities within days rather than weeks, minimizing disruption to your home or business operations. When Skim Coating Makes Sense Surface-level damage like small cracks, minor pitting, light scaling, and rough textures all disappear under a properly applied coat. Height restrictions sometimes prevent full replacement, making the thin layer of skim coat concrete ideal for maintaining specific floor heights. Materials and Tools Needed for Skim Coat Concrete Proper materials ensure your skim coat concrete project succeeds. Self-leveling concrete resurfacer works best for most applications, while polymer-modified cement provides enhanced bonding strength. Concrete bonding agent prepares the surface for the new layer, creating a strong connection between old and new concrete. Basic tools include a mixing drill with paddle attachment, large buckets, steel trowels, gauge rake, and spiked roller to remove air bubbles. Material/Tool Purpose Approximate Cost Range Self-leveling resurfacer Main coating material Contact True Coat for pricing Bonding agent Surface preparation Contact True Coat for pricing Steel trowels Application and smoothing Contact True Coat for pricing Spiked roller Air bubble removal Contact True Coat for pricing Safety equipment includes rubber gloves, safety glasses, knee pads, and a dust mask when mixing and spreading skim coat concrete. Choosing the Right Skim Coat Product Self-leveling compounds work great for large flat areas, spreading easily and settling into smooth surfaces. Trowel-grade products suit smaller areas or vertical surfaces, staying where you place them without running. Indoor vs. Outdoor Formulas Outdoor formulas withstand weather exposure and resist freeze-thaw cycles. Indoor products offer smoother finishes, working perfectly for basements, garages, and commercial spaces protected from weather. Essential Safety Equipment Proper safety gear protects you during application. Rubber gloves prevent skin irritation from cement products. Safety glasses shield your eyes from splashes, while knee pads make floor work more comfortable during long application sessions. How to Prepare Concrete for Skim Coating Surface preparation determines whether your skim coat concrete bonds properly and lasts for years. Clean the existing concrete thoroughly to remove all dirt, oil, grease, and loose material using a pressure washer or stiff brush with degreaser. Check for loose or flaking concrete and scrape away any material that doesn’t bond tightly. Fill large cracks and holes wider than 1/4 inch with concrete filler before skim coating, letting repairs cure completely. Cleaning the Surface Remove all contaminants including oil stains, grease, dust, and debris. Use a degreaser for stubborn stains and ensure the concrete is completely clean before moving to the next preparation step. Surface Testing and Repairs Test the concrete’s condition by pouring water on the surface. If water soaks in quickly, the concrete is ready for coating. If water beads up, you may have sealers needing removal through grinding or etching. Repair structural cracks properly before skim coating. Deep cracks indicate foundation problems that skim coat concrete can’t fix, requiring professional evaluation. Check for moisture problems in basement floors, addressing water issues before coating to ensure long-lasting results. Applying Bonding Agent Apply bonding agent with a roller or brush, covering the entire surface evenly without leaving dry spots. Work in sections small enough to coat before the bonding agent dries, usually 30 minutes to an hour. Let
How Do You Choose the Best Interior Paint Wall Colors for Your Home?
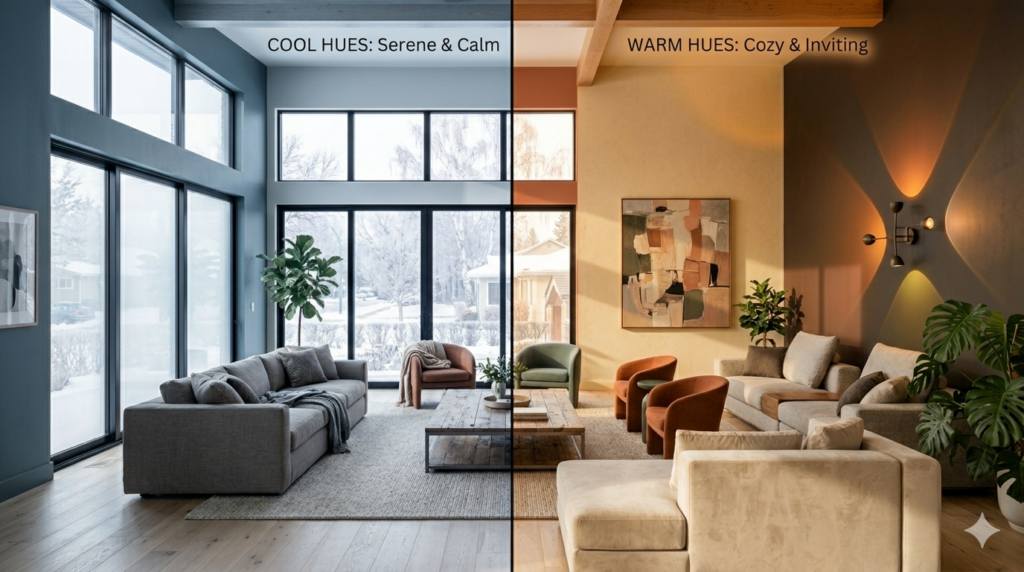
Interior paint wall colors can make or break the atmosphere in your home. Choosing the right shade involves understanding how colors affect mood, considering natural and artificial lighting, testing samples in your actual space, and selecting appropriate finishes for each room. The best interior paint wall colors balance personal preference with practical considerations like room size, existing furniture, and the amount of natural light available. Whether you prefer neutral tones that stand the test of time or bold accent walls that make a statement, the key is selecting colors that create the environment you want while complementing your home’s architecture and your lifestyle needs. Why Do Interior Paint Wall Colors Matter? Interior paint wall colors shape how you experience every room in your home. The shades you choose affect your emotions, energy levels, and even how you interact with family and guests. Color has real psychological power. Blues and greens typically create calm, relaxing spaces perfect for bedrooms and bathrooms. Warm tones like yellows and oranges energize kitchens and dining areas where families gather. Neutrals provide versatile backdrops that work anywhere. Your interior paint wall colors also influence how large or small a room feels. Light shades make tight spaces appear more open and airy. Dark colors add coziness and intimacy to large rooms that might otherwise feel cold or empty. The colors you select impact your home’s resale value too. According to residential painting experts, homes with well-chosen, neutral palettes often appeal to more buyers. That doesn’t mean you can’t have personality, it just means balance matters. Paint color affects how your furniture, artwork, and decor look. A sofa that looked perfect in the store might clash with the wrong wall color. Your interior paint wall colors should enhance your existing pieces, not fight against them. How Do Different Interior Paint Wall Colors Affect Room Atmosphere? Every color tells a different story and creates a unique feeling in your space. Understanding these effects helps you make smarter choices for each room. Warm Colors and Their Impact Warm interior paint wall colors include reds, oranges, yellows, and warm neutrals like beige and cream. These shades bring energy and warmth to any space. Red stimulates conversation and appetite, making it popular for dining rooms. However, too much red can feel overwhelming. Consider using it as an accent wall rather than covering an entire room. Orange creates a friendly, welcoming atmosphere. It works well in social spaces like living rooms and home offices where creativity matters. Softer peach or coral tones offer the same warmth without the intensity. Yellow brings sunshine indoors. Pale yellows work beautifully in kitchens and breakfast nooks, promoting cheerfulness during morning routines. Deeper golden yellows add richness to living areas. Warm neutrals like tan, beige, and cream provide flexibility. These interior paint wall colors pair well with almost any decor style and create cozy, inviting environments throughout your home. Cool Colors and Their Benefits Cool interior paint wall colors encompass blues, greens, purples, and cool grays. These shades typically calm and refresh. Blue is the most popular color for bedrooms because it promotes relaxation and better sleep. Lighter blues make small rooms feel larger, while navy creates sophisticated, dramatic spaces. Green connects us to nature and reduces stress. Sage green has become increasingly popular for its versatility. It works in bedrooms, bathrooms, living rooms, and even kitchens. Deeper forest greens add elegance to formal spaces. Purple ranges from calming lavender to luxurious deep plum. Lighter purples suit bedrooms and bathrooms, while richer purples create statement walls in living areas or home offices. Gray remains a neutral favorite. Cool grays with blue or green undertones feel modern and fresh. They provide excellent backdrops for colorful furniture and artwork while maintaining a clean aesthetic. Neutral Colors for Versatility Neutral interior paint wall colors include whites, grays, beiges, and taupes. These timeless choices offer maximum flexibility for changing decor over time. White brightens spaces and makes them feel clean and open. Bright whites work well in modern homes with lots of natural light. Warmer whites with cream or beige undertones suit traditional spaces and rooms with less light. Greige, a blend of gray and beige, has become one of the most requested interior paint wall colors. It offers the warmth of beige with the contemporary feel of gray, working beautifully in open-concept homes. True Coat’s team of experienced professionals can help you navigate the subtle differences between neutral shades to find the perfect match for your space. What Factors Should You Consider When Selecting Interior Paint Wall Colors? Choosing interior paint wall colors involves more than just picking your favorite shade. Several practical factors determine whether a color will work in your specific space. Room Size and Layout The size of your room dramatically impacts how colors appear and function. Small rooms benefit from light interior paint wall colors that reflect light and create an illusion of more space. Whites, pale blues, soft grays, and light greens work particularly well. Large rooms can handle darker, richer colors without feeling cramped. Deep blues, charcoal grays, or warm chocolates add intimacy and sophistication to spacious areas that might otherwise feel empty or cold. Room shape matters too. Long, narrow rooms benefit from painting the shorter walls a darker shade to visually pull them closer, making the space feel more balanced. Low ceilings appear higher when painted lighter than the walls. Natural and Artificial Lighting Lighting transforms how interior paint wall colors appear throughout the day. A shade that looks perfect at noon might seem completely different at night under artificial lights. North-facing rooms receive cooler, indirect light that can make colors appear darker and flatter. These spaces often need warmer interior paint wall colors to feel inviting. South-facing rooms get abundant warm, natural light that can intensify colors. Cooler shades often balance this warmth beautifully, though warm colors can create a sunny, cheerful atmosphere. East-facing rooms receive warm morning light that shifts to cooler tones in the afternoon. West-facing rooms experience the
What Are the Best Interior Paint Design Ideas for Your Winnipeg Home?
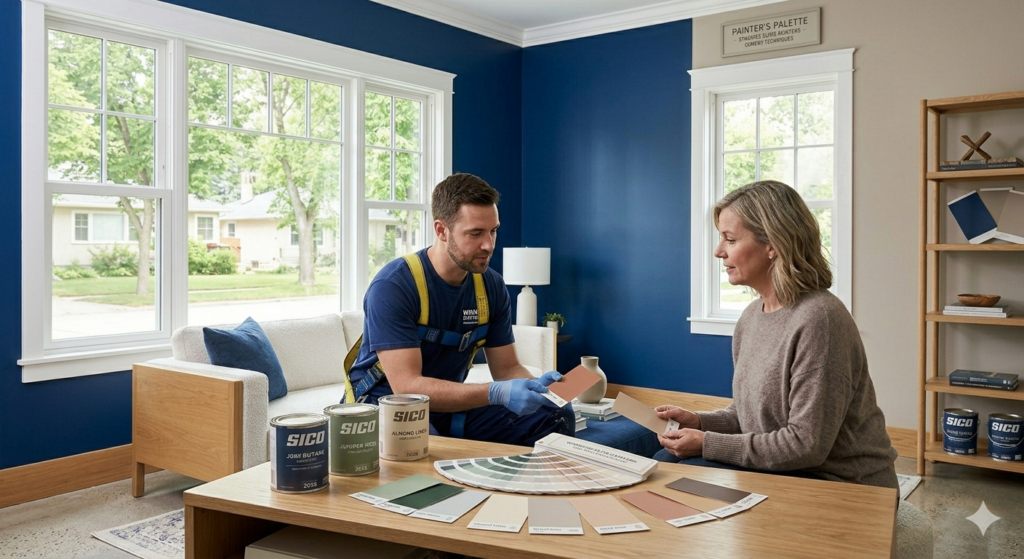
Interior paint design ideas transform ordinary rooms into personalized spaces that reflect your style and enhance your home’s atmosphere. The best approaches combine color psychology, creative techniques like accent walls and two-tone designs, and practical considerations such as room size and natural lighting. Popular interior paint design ideas include using the 60-30-10 color rule for balanced schemes, incorporating nature-inspired palettes with greens and earth tones, and experimenting with bold geometric patterns or ombre effects. Whether you prefer calming neutrals, dramatic dark hues, or vibrant statement walls, choosing the right interior paint design ideas involves understanding how colors affect mood, selecting complementary shades, and applying techniques that suit your room’s function. From minimalist monochromatic looks to texture-rich finishes, these design strategies help homeowners create cohesive, visually appealing interiors that stand the test of time while expressing individual personality through thoughtful color selection and application methods. Why Do Interior Paint Design Ideas Matter for Your Home? Interior paint design ideas play a crucial role in shaping how your home feels and functions. The colors you choose directly impact your mood, energy levels, and even how spacious a room appears. Research shows that color psychology influences emotions, with cool blues promoting calmness while warm yellows encourage happiness and creativity. Beyond aesthetics, interior paint design ideas affect your property value. Homes with modern, well-coordinated color schemes attract buyers and can increase resale prices by up to 10%. Professional painting choices signal care and maintenance, making your space more appealing. Room functionality changes based on your color selections. Kitchens painted in warm tones like terracotta or soft peach stimulate appetite and conversation. Bedrooms benefit from soothing shades such as lavender or sage green that promote restful sleep. Home offices work best with focused colors like navy blue or forest green that enhance concentration. Natural lighting interacts with paint colors throughout the day. North-facing rooms with limited sunlight need warmer hues to feel inviting, while south-facing spaces can handle cooler tones without feeling cold. Testing paint samples at different times helps you understand how light affects your chosen interior paint design ideas. The right paint transforms small spaces into seemingly larger areas. Light colors reflect more light, making cramped rooms feel open and airy. Conversely, dark colors create cozy, intimate atmospheres in oversized rooms that might otherwise feel empty. Your home’s architectural features shine when you select complementary colors. Crown molding, wainscoting, and trim pop against contrasting wall colors. Interior painting services can help highlight these details through strategic color placement. Key Benefits of Thoughtful Paint Design: Which Color Is Best for Interior Paint? Choosing the best color for interior paint depends on several factors including room purpose, size, lighting conditions, and personal preferences. No single color works universally for all spaces, but certain shades prove popular and versatile across different home styles. Neutral colors remain the most reliable choice for interior paint design ideas. Shades like warm white, greige (gray-beige blend), and soft taupe provide timeless backdrops that work with various decor styles. These colors create clean canvases that allow furniture and artwork to stand out while maintaining visual calm. For living areas, warm neutrals like accessible beige or agreeable gray create welcoming environments that encourage conversation and relaxation. These shades adapt to changing natural light throughout the day without appearing drab or cold. Bedrooms benefit from colors that promote relaxation and sleep. Soft blues reduce heart rate and blood pressure, creating peaceful atmospheres. Light lavenders and muted greens also encourage tranquility. Avoid overly stimulating colors like bright red or orange in sleeping spaces. Kitchens and dining rooms work well with appetite-stimulating colors. Warm tones like buttery yellow, soft coral, or earthy terracotta create inviting spaces for cooking and gathering. White kitchens remain popular for their clean, bright appearance and timeless appeal. Bathrooms suit both crisp whites and spa-like colors. Pale aqua, soft seafoam, and light gray create refreshing, clean-feeling spaces. These colors pair well with white fixtures and chrome hardware. Home offices require focus-enhancing colors. Deep blues and forest greens boost productivity and concentration without causing eye strain. These colors create professional atmospheres suitable for video calls and focused work. Consider your home’s overall flow when selecting colors. Choosing a cohesive palette that connects rooms creates visual harmony. Use varying shades of the same color family or complementary colors that transition smoothly from space to space. Popular Interior Paint Colors by Room: Room Type Best Color Choices Why They Work Living Room Warm gray, beige, soft blue Versatile, calming, adaptable Bedroom Pale blue, lavender, sage green Promotes relaxation and sleep Kitchen White, soft yellow, light gray Clean, bright, welcoming Bathroom Aqua, seafoam, crisp white Fresh, spa-like atmosphere Home Office Navy blue, forest green, charcoal Enhances focus and productivity Working with professional painters in Winnipeg ensures your color choices translate well from sample to finished walls. Experts understand how different paint finishes and lighting conditions affect final results. What Is the 3 Color Rule in Interior Design? The 3 color rule, also known as the 60-30-10 rule, provides a balanced approach to interior paint design ideas that creates visually harmonious spaces. This principle guides how you distribute colors throughout a room to achieve professional-looking results without overwhelming the senses. The dominant color occupies 60% of your space. This primary shade typically covers walls and large furniture pieces. Choose neutrals or subtle colors for this dominant role, as these shades won’t tire your eyes over time. Think soft grays, warm beiges, or muted blues that create calm foundations. Your secondary color fills 30% of the room. This shade appears in upholstery, curtains, rugs, or accent furniture. The secondary color should complement your dominant shade while adding visual interest. If your walls are neutral gray, your secondary color might be soft navy or warm terracotta. The accent color comprises the final 10% and brings energy to your design. Use bold, vibrant shades for throw pillows, artwork, vases, or small decorative items. This pop of color catches the eye and prevents rooms from feeling flat. Accent colors
Residential Painters Near Me: Complete Guide to Finding Quality Painting Services in Winnipeg
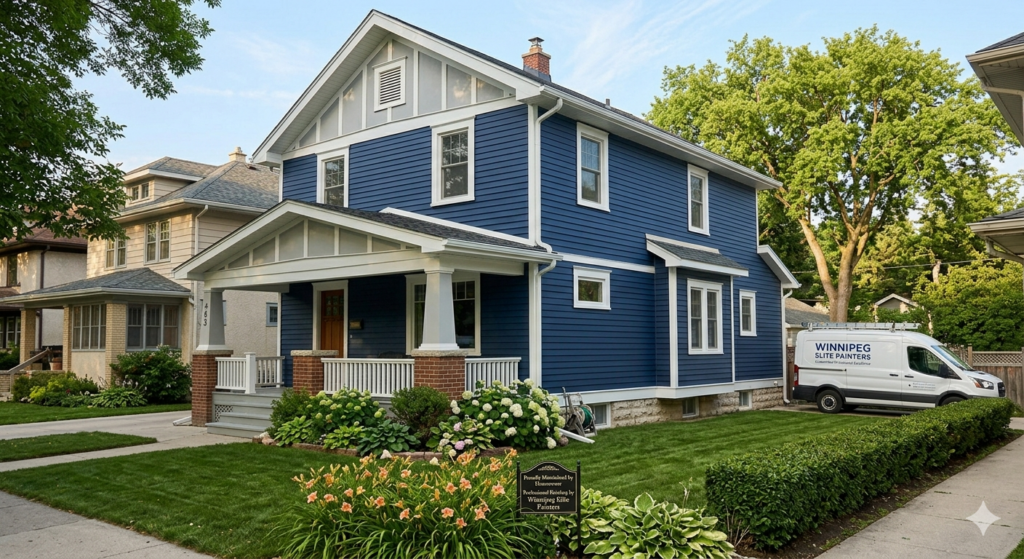
Finding reliable residential painters near me starts with understanding what separates quality painting contractors from the rest. Professional residential painters bring proper licensing, insurance coverage, skilled workmanship, and proven techniques that ensure your home receives a flawless, long-lasting finish. When searching for residential painters near me in Winnipeg, you need contractors who offer transparent pricing, use premium materials, prepare surfaces properly, and respect your property throughout the project. The right painting team transforms your space with meticulous attention to detail, from the initial color consultation through final cleanup. Whether you’re refreshing a single room or painting your entire home’s exterior, choosing experienced residential painters near me means investing in beautiful results that protect and enhance your most valuable asset for years to come. What Are Residential Painters Near Me and Why Do You Need Them? Residential painters near me are professional contractors who specialize in painting and finishing work for homes in your local area. These skilled tradespeople handle both interior and exterior painting projects, bringing expertise that goes far beyond simply applying paint to walls. When you hire residential painters near me, you’re getting trained professionals who understand surface preparation, paint chemistry, application techniques, and how to achieve smooth, even coverage that lasts. They know which primers work best for different surfaces, how weather affects exterior painting, and how to protect your floors, furniture, and landscaping during the project. Why Professional Painters Matter for Your Home Many homeowners consider tackling painting projects themselves to save money, but professional residential painters near me offer value that extends well beyond the cost of paint and brushes. These experts complete projects faster because they work efficiently with the right tools and established systems. Quality painters prepare surfaces properly, which makes the biggest difference in how long your paint job lasts. They fill cracks, sand rough spots, clean surfaces thoroughly, and apply appropriate primers before the first coat of paint touches your walls. Professional residential painters near me also carry liability insurance and workers compensation coverage. This protects you if someone gets injured on your property or if accidental damage occurs during the project. Licensed contractors follow local building codes and safety regulations, giving you peace of mind throughout the process. The finish quality you get from experienced painters simply looks better. Professionals create crisp, straight lines where walls meet ceilings and trim. They avoid drips, streaks, and uneven coverage that plague amateur paint jobs. When you search for residential painters near me, you’re looking for craftspeople who take pride in delivering flawless results. Services Offered by Residential Painting Contractors Most residential painters near me offer comprehensive services that cover all your home painting needs. Interior painting services include walls, ceilings, trim, doors, and specialty finishes. Contractors help you select colors that complement your furnishings and lighting while creating the mood you want in each room. Exterior painting protects your home from weather damage while boosting curb appeal. Professional painters power wash surfaces, scrape away loose paint, repair damaged wood or siding, and apply weather-resistant coatings that stand up to Winnipeg’s harsh winters and hot summers. Many residential painters near me also provide additional services like cabinet refinishing, deck staining, wallpaper removal, and decorative finishes. True Coat offers specialized services including limewash painting, skim coating, and drywall repair that create perfectly smooth surfaces for painting. How to Find Quality Residential Painters Near Me in Winnipeg Searching for residential painters near me requires more than typing those words into Google and calling the first company that appears. Quality contractors earn their reputation through consistent excellent work, not just clever marketing. Research and Verification Steps Start by asking friends, neighbors, and family members for recommendations. Personal referrals from people you trust provide valuable insights into a painter’s reliability, work quality, and professionalism. When someone you know had a positive experience with residential painters near me, that company deserves serious consideration. Check online reviews on multiple platforms including Google, Facebook, and local business directories. Look for patterns in feedback rather than focusing on single reviews. Consistent mentions of punctuality, cleanliness, quality workmanship, and fair pricing indicate a reliable contractor. Verify licensing and insurance before hiring any residential painters near me. In Manitoba, painting contractors should carry liability insurance and workers compensation coverage. Ask to see proof of insurance and confirm the policy remains current. This protects you from financial responsibility if accidents occur during your project. Review portfolios and past projects whenever possible. Many residential painters near me maintain websites or social media pages showing completed work. Pay attention to finish quality, attention to detail, and the variety of projects they’ve handled. Getting Accurate Quotes and Estimates Contact at least three residential painters near me for estimates on your project. Reputable contractors offer free, no-obligation quotes that detail exactly what’s included in their pricing. Quality painters visit your home to assess the project in person rather than providing estimates over the phone. During this visit, they measure spaces, examine surface conditions, discuss your color preferences, and answer your questions. This thorough approach leads to accurate pricing without surprise charges later. Compare quotes carefully, looking beyond the bottom-line price. The cheapest bid often means shortcuts in preparation, lower-quality materials, or inexperienced workers. The most expensive quote doesn’t automatically guarantee superior results either. Focus on finding residential painters near me who offer fair pricing backed by quality materials and proven expertise. Ask each contractor to explain what their quote includes. A detailed estimate should specify: True Coat provides transparent, upfront quotes that clearly outline every aspect of your painting project. For personalized pricing information, visit our contact page to schedule your free estimate. What to Look for When Choosing Residential Painters Near Me Not all painting contractors deliver the same level of quality, professionalism, or customer service. Knowing what separates exceptional residential painters near me from mediocre ones helps you make confident hiring decisions. Essential Qualifications and Credentials Licensed residential painters near me demonstrate their commitment to professional standards and ongoing education. While Manitoba doesn’t require specific
What Is the Best Exterior Paint for House Projects in Winnipeg?
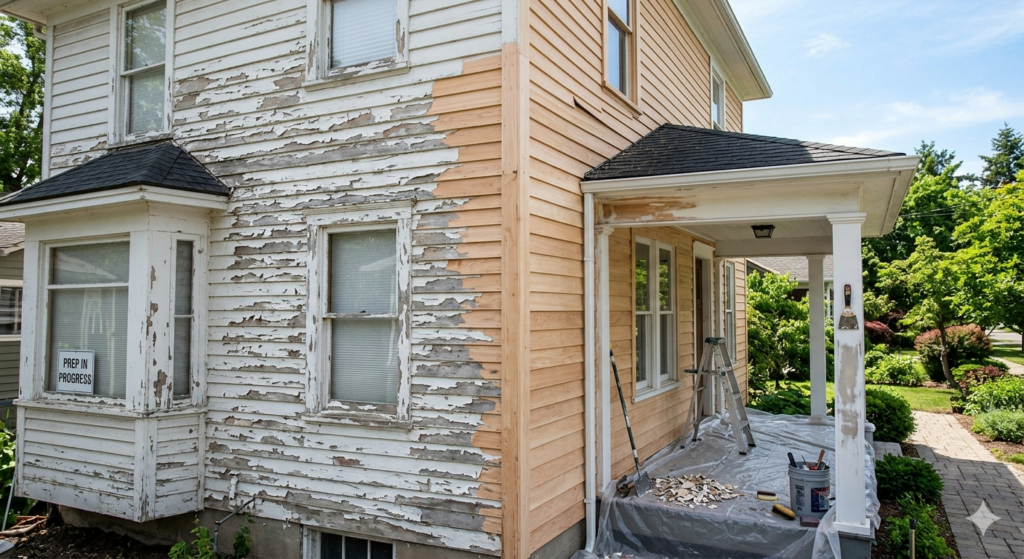
Exterior paint for house surfaces does more than add curb appeal. It shields your home from harsh weather, prevents moisture damage, and increases property value. Choosing the right exterior paint for house applications involves understanding paint types, color psychology, surface preparation, and application methods that work best in Winnipeg’s unique climate. From acrylic latex formulas that flex with temperature changes to oil-based options for specific surfaces, each choice affects how long your paint job lasts and how well it protects your investment. The best exterior paint for house projects combines durability, weather resistance, and aesthetic appeal while matching your home’s architectural style and the local environment. Why Exterior Paint for House Projects Matters Your home’s outer coating serves as the first line of defense against rain, snow, UV rays, and temperature swings. In Winnipeg, where winters bring freezing conditions and summers deliver intense sun, the right exterior paint for house surfaces prevents wood rot, blocks moisture penetration, and stops mold growth before it starts. Quality exterior paint for house applications also impacts energy efficiency. Light-colored paints reflect heat during summer months, keeping your home cooler and reducing air conditioning costs. Dark shades absorb warmth in winter, though this effect is minimal compared to proper insulation. A fresh coat of exterior paint for house exteriors can boost your property’s resale value by up to 5 percent. Buyers notice curb appeal immediately, and a well-maintained exterior signals that the home has been cared for properly. Even if you’re not selling, updated paint makes your space feel newer and more inviting. Paint choice affects maintenance schedules too. Premium exterior paint for house projects lasts 10 to 15 years with proper application, while lower-quality options may need repainting every 5 to 7 years. Investing in better paint upfront saves time and money over the long run. What Are the Four Main Types of Paint Exterior? Understanding paint types helps you match the right product to your specific surfaces and climate conditions. Each formula offers distinct advantages depending on your home’s material and exposure to weather elements. Acrylic Latex Paint Acrylic latex stands as the most popular choice for exterior paint for house applications. This water-based formula cleans up easily with soap and water, dries quickly, and releases fewer harmful fumes than oil-based alternatives. The paint expands and contracts with temperature changes, making it ideal for Winnipeg’s dramatic seasonal shifts. Wood siding, stucco, and fiber cement all accept acrylic latex well. The formula resists cracking, peeling, and blistering better than older paint types. Modern acrylic formulas contain advanced resins that create a flexible, breathable film. Moisture can escape from behind the paint, preventing trapped water from causing damage. This breathing quality matters especially for older homes where moisture management affects structural integrity. Oil-Based Paint Oil-based formulas penetrate deep into wood surfaces, creating a hard, durable finish that resists wear. While less common now for exterior paint for house siding, these products still perform well on trim and metal surfaces in specific situations. This paint type takes longer to dry and requires mineral spirits for cleanup. The fumes are stronger during application, and many regions have restricted oil-based paints due to environmental concerns. However, the finish resists stains better than latex and creates an extremely smooth surface on railings, doors, and metal fixtures. Latex-Acrylic Blend These hybrid formulas combine latex convenience with acrylic durability. The blend offers easier application than pure acrylic while maintaining good weather resistance. Many professional painters choose latex-acrylic blends for exterior paint for house siding projects because they level well and hide brush marks effectively. Specialty Paints Masonry paint, elastomeric coatings, and textured finishes serve specific purposes. Elastomeric exterior paint for house foundations and stucco stretches up to 300 percent, bridging small cracks and preventing water infiltration. These specialty products cost more but solve particular problems that standard paints cannot address. How to Choose the Right Exterior Paint for House Surfaces Selecting exterior paint for house projects starts with assessing your home’s current condition and the materials you’ll be painting. Different surfaces demand different paint formulations for optimal results. Matching Paint to Surface Material Wood siding accepts most exterior paint for house applications, but benefits most from acrylic latex formulas that flex with the material. Cedar and redwood contain natural oils that can bleed through paint, so these woods need oil-blocking primer before any topcoat goes on. Vinyl siding requires special consideration. Regular exterior paint for house vinyl must be lighter than the original color because dark shades absorb heat and cause warping. Look for vinyl-safe formulations that won’t damage the material through thermal expansion. Brick and concrete need breathable masonry paint that allows moisture to escape while blocking water penetration. Standard exterior paint for house wood surfaces will trap moisture in brick, leading to spalling and deterioration over time. Metal surfaces like aluminum siding, gutters, and railings require paint with rust inhibitors. Direct-to-metal (DTM) exterior paint for house metal components eliminates the need for separate primer on many surfaces. Surface Type Best Paint Choice Key Consideration Wood Siding Acrylic Latex Flexibility with temperature changes Vinyl Siding Vinyl-Safe Acrylic Must be lighter than original color Brick/Stucco Breathable Masonry Paint Allows moisture escape Metal DTM with Rust Inhibitors Prevents corrosion Climate Considerations for Winnipeg Homes Winnipeg’s climate puts extreme demands on exterior paint for house surfaces. Winter temperatures drop well below freezing, while summer heat and UV exposure fade colors and break down paint films. Choose exterior paint for house projects rated for freeze-thaw cycles. These formulas maintain flexibility even when temperatures swing 40 degrees in a single day. Paint applied during moderate weather (between 10 and 30 degrees Celsius) cures properly and develops maximum durability. Rain resistance matters too. Quality exterior paint for house applications becomes rainproof within 2 to 4 hours of application, protecting your investment even if weather turns unexpectedly. Planning your painting project around Winnipeg’s weather patterns helps ensure proper curing and long-lasting results. For professional help with timing and application, check out True Coat’s services. Which Color
What Are the Best Interior Paint Colors for House Projects?
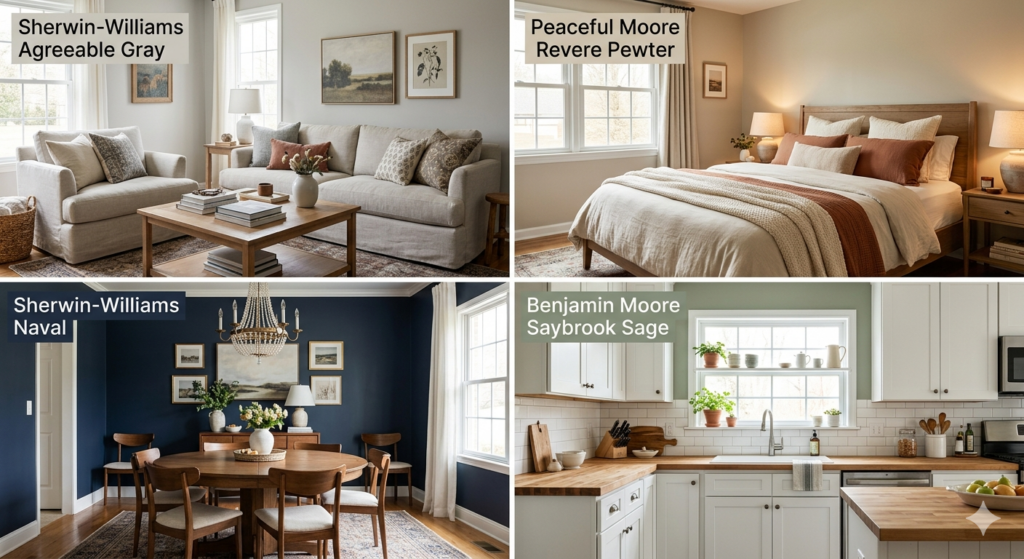
Interior paint colors for house projects can completely transform your living space from ordinary to extraordinary. Neutral tones like warm whites, soft grays, and beiges remain timeless favorites because they work with almost any decor style. Bold accent walls in navy, emerald, or terracotta add personality without overwhelming rooms. Light colors make small spaces feel larger, while darker shades create cozy environments. The 60-30-10 color rule helps balance dominant, secondary, and accent colors for professional results. Popular trends include earthy greens, warm taupes, and calming blues that bring nature indoors. Your choice should reflect your lifestyle, the room’s purpose, and how much natural light enters the space. What Is the Best Color for the Interior of a House? The best interior paint colors for house spaces depend on room function, natural light, existing furniture, and personal preferences. Warm whites and soft grays create clean backdrops that adapt to different rooms, reflect light beautifully, and make spaces feel open. For living rooms, warm neutrals like greige create welcoming environments. These interior paint colors for house common areas pair well with traditional and modern furniture. Bedrooms benefit from calming shades. Soft blues, gentle lavenders, and muted greens promote relaxation and better sleep, creating peaceful retreats. Kitchens work well with fresh colors. White makes spaces feel sanitary and bright. Light gray and soft sage green add personality while maintaining freshness. Bathrooms handle both light and bold choices. Crisp white creates spa-like feels, while deeper blues or greens add sophistication. How Natural Light Affects Your Color Choice Natural light dramatically changes how interior paint colors for house rooms appear. North-facing rooms receive cooler light making colors appear more blue or gray. Use warm tones like peach, cream, or warm beige here. South-facing rooms get abundant warm sunlight that intensifies colors. Cooler shades like soft grays, blues, or greens work well because natural light adds warmth. East-facing rooms receive bright morning light shifting to cooler afternoon tones, making versatile neutrals ideal. Test paint samples on your walls and watch how they look at different times of day before committing to interior paint colors for house projects. What Are Good Interior Paint Colors? Good interior paint colors for house transformations combine aesthetic appeal with practical functionality. Warm whites provide a clean, timeless look. Greige tones offer warmth without starkness. Soft blues bring calmness and serenity, reducing anxiety and promoting better sleep. Warm earth tones connect indoor spaces with nature. Terracotta, warm taupe, and clay create cozy environments perfect for living rooms and dining rooms. Green has become increasingly popular for interior paint colors for house projects. Sage, olive, and eucalyptus bring the outdoors in while maintaining sophistication. Top Color Pairings Navy blue creates dramatic focal points on accent walls or rooms with abundant natural light. Navy pairs beautifully with gold accents and natural wood tones. Charcoal gray adds sophistication without heaviness, working well in modern homes with white trim. What Is the 3 Color Rule in Interior Design? The 3 color rule, also known as the 60-30-10 rule, creates balanced, harmonious spaces. This guideline helps you distribute interior paint colors for house rooms in proportions that look intentional. Use 60% dominant color (typically walls), 30% secondary color (upholstery, curtains, furniture), and 10% accent color (accessories, throw pillows, artwork). For interior paint colors for house applications, walls represent the 60%. Your secondary color appears in sofas or area rugs. Accent colors show in throw pillows or vases. In bedrooms, choose pale blue walls (60%), cream bedding (30%), and soft coral accents (10%). Dining rooms could feature warm beige walls (60%), wood dining table (30%), and emerald green table settings (10%). Home offices might use sage green walls (60%), white furniture (30%), and brass hardware (10%). The rule is flexible. The key is maintaining balance so one color dominates, another supports, and a third adds interest. What Is the Most Popular Interior Paint Color Right Now? The most popular interior paint colors for house projects lean toward warm, earthy neutrals and nature-inspired shades reflecting comfort and connection to nature. Warm whites dominate as the go-to choice. Shades with creamy undertones create inviting spaces that feel fresh without coldness. Greige remains incredibly popular, blending gray and beige for sophistication with warmth. Earthy greens have surged in popularity. Sage, olive, and eucalyptus bring the outdoors inside while creating calming spaces. These interior paint colors for house bedrooms and living rooms reflect growing interest in nature-inspired design. Warm terracotta and clay tones create cozy spaces. These reddish-brown shades add warmth without being overly bold. In Winnipeg and across Canada, interior paint colors for house projects often reflect the local climate. Warm, cozy colors balance long, cold winters. True Coat serves Winnipeg homeowners with expert color consultation to help choose colors that suit your home. Current trends also include deeper, moodier colors. Navy blue, forest green, and charcoal create drama while feeling sophisticated. If you’re considering residential painting in Winnipeg, these warmer interior paint colors for house projects will keep your home looking current. What Color Makes a House Look Expensive? Certain interior paint colors for house projects instantly elevate spaces. Deep, rich neutrals like charcoal, deep taupe, and warm chocolate brown create luxurious backdrops that make furnishings pop. True white with warm undertones looks more expensive than stark, cool white. Creamy whites feel deliberate and curated, creating gallery-like quality in interior paint colors for house walls. Navy blue exudes sophistication in traditional and modern homes. Use it in dining rooms or as accent walls. Soft, muted colors like dusty pink, sage green, or soft lavender in powder rooms show attention to detail. Application Techniques That Add Luxury Paint finish affects how expensive your interior paint colors for house projects appear. Matte or flat finishes look sophisticated and hide imperfections. Eggshell or satin finishes strike a balance between elegance and durability with subtle sheen. Proper preparation makes any color look expensive. True Coat’s skim coating services create perfectly smooth surfaces. Monochromatic schemes using different shades create sophisticated spaces. High contrast between