
How Does Painting Deck Work and What Makes It Last Longer?
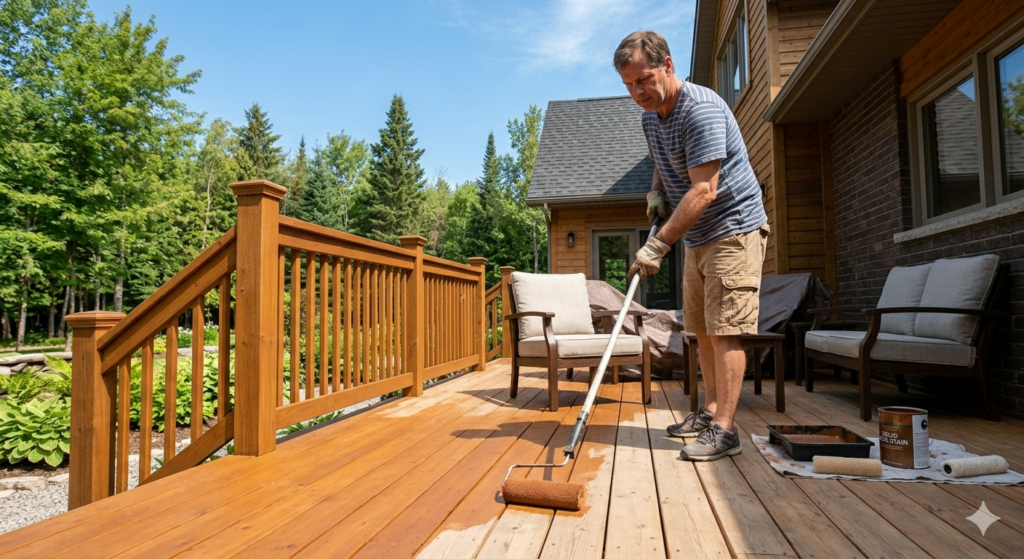
Painting deck the right way protects wood from moisture, UV damage, and heavy foot traffic for three to five years. Prep the surface, let it dry fully, prime bare wood, apply two thin coats of 100% acrylic exterior deck paint, and paint between May and September when temps stay above 10 degrees Celsius. Solid paint works best on older or weathered wood. Two coats beat one thick coat every time. Skip prep and the paint peels within a season. What Is Painting Deck and Why Does It Matter? Painting deck means applying a protective coating directly onto the wooden surface of your outdoor deck. It is not the same as staining, though the two are often confused. Paint sits on top of the wood and creates a solid film, while stain soaks into the grain. For Winnipeg homeowners, painting deck matters because outdoor wood faces extreme temperature swings from summer heat to below-freezing winters. Without protection, wood absorbs moisture, swells, cracks, and eventually rots. A quality paint job, done correctly, can protect deck wood for three to five years before needing a touch-up. Painting deck also adds visual appeal. A clean, solid colour gives the home a polished look and can increase property value. It is also one of the more affordable ways to improve the look of your backyard without replacing the entire structure. How to Prepare a Deck Before Painting Deck Surfaces Preparation is the most important part of any painting deck project. Skipping prep is the number one reason paint peels early. Step 1: Clean the Surface Start by sweeping the deck to remove loose dirt, leaves, and debris. Then wash the wood with a deck cleaner or a mixture of water and mild cleaner. For older decks with mildew or graying, a pressure washer works well. Keep the pressure low enough to avoid raising the wood grain. Step 2: Let It Dry Completely After washing, allow the deck at least 48 to 72 hours of drying time before painting deck surfaces. Wood that still holds moisture will cause the paint to bubble and peel. Step 3: Sand and Repair Sand rough areas, splinters, and any raised grain using medium-grit sandpaper. Check for loose nails or screws and hammer or tighten them down. Fill cracks and small holes with exterior wood filler, then sand again once dry. Step 4: Apply Primer Priming is especially important for new wood or previously bare surfaces. A quality exterior primer helps paint bond to the wood and improves coverage. Skip the primer and you may need extra coats to get an even finish. Paint vs. Stain: Which Option Is Best for Painting Deck? This is one of the most common questions when it comes to painting deck, and the answer depends on the condition of your wood and your goals. Option Best For Lifespan Finish Look Solid Paint Old or weathered decks, covering damage 3 to 5 years Opaque, solid colour Semi-transparent Stain Newer wood, showing natural grain 2 to 3 years Natural, tinted Solid Stain Mid-condition decks 3 to 4 years Opaque but thinner than paint Clear Sealant Brand new or recently stained decks 1 to 2 years Clear, natural For most homeowners doing painting deck work on older or worn surfaces, solid paint or solid stain is the better choice. It hides imperfections, covers old coatings, and provides stronger moisture protection. If the wood is in good shape and you want the grain to show through, a semi-transparent stain works well. What is the best option for painting deck in Winnipeg? A 100% acrylic exterior deck paint with a low-sheen or satin finish handles temperature swings well and resists cracking in freeze-thaw cycles. Look for paint rated for floor or deck use specifically, as wall paint is not designed for foot traffic. When Is the Right Time for Painting Deck in Canada? Timing your painting deck project correctly makes a big difference in how the finish holds up. For Canadian climates, the general rule is to paint when temperatures are between 10 and 30 degrees Celsius and when no rain is expected for at least 48 hours after application. Late spring through early fall is ideal for painting deck in Winnipeg. That typically means May through September. Avoid painting deck in full direct summer sun because the paint can dry too fast on a hot surface, leaving brush marks and reducing adhesion. Morning is the best time of day to start. The surface temperature is cooler, humidity is usually lower, and you have the full day ahead for the paint to cure before evening moisture settles in. Tools and Techniques for Painting Deck Like a Professional Getting the tools right speeds up the painting deck process and gives better results. For painting deck boards specifically, work with the grain rather than across it. Apply two thin coats rather than one thick coat. Thick coats trap air and are more likely to peel. Let the first coat dry fully before applying the second, usually four to six hours depending on the product and weather. How Many Coats Does Painting Deck Require? Most painting deck projects require two coats for even coverage and proper protection. New, bare wood or previously unpainted surfaces may need three coats if the first coat soaks in heavily. Surface Condition Coats Recommended New bare wood (primed) 2 coats after primer Previously painted, good condition 1 to 2 coats Weathered wood, stripped back 2 to 3 coats Painted over, worn through 2 coats after spot repair Allow full drying time between each coat. Painting deck too soon after the first coat can cause lifting or uneven texture. Read the product label for specific recoat times, as they vary by brand and temperature. Things To Know About Painting Deck Before you start your painting deck project, here are practical tips that can save you time and money: Why Hire a Professional for Painting Deck Projects? Some painting deck jobs are straightforward for a confident DIYer. However, larger
How Do You Get a Flawless Finish When Painting Baseboards?
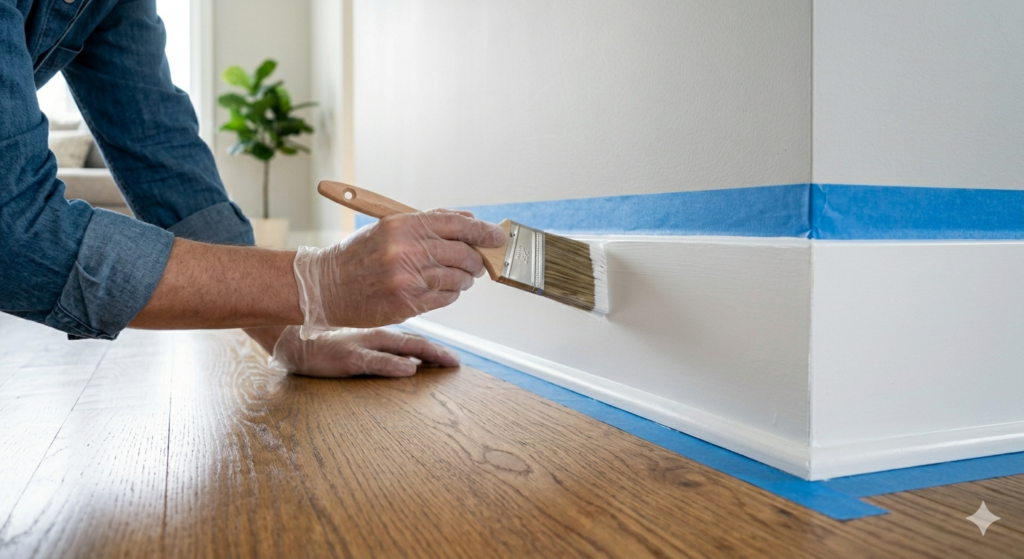
Painting baseboards gives any room a cleaner, more finished look without a full renovation. The best approach involves proper surface prep, the right paint type, a quality angled brush, and steady technique to avoid lap marks and drips. Whether you are refreshing scuffed trim or completely changing the colour, painting baseboards is one of the most budget-friendly ways to instantly lift the feel of a room. This article walks you through why it matters, how to do it step by step, which paint and tools to choose, common mistakes to avoid, and when it makes sense to call in a professional. Why Painting Baseboards Makes a Bigger Difference Than You Think Most homeowners focus on walls when refreshing a room, but scuffed or yellowed baseboards can drag down the whole space. Painting baseboards pulls the eye downward in a good way, framing the floor and tying the room together. Even a single coat of fresh white or off-white trim paint can make walls look cleaner and floors look newer. Painting baseboards also protects the wood or MDF underneath from moisture and minor impact damage. In a Canadian home where temperature swings cause expansion and contraction throughout the year, a well-painted baseboard holds up far better than an unprotected one. You can check out more ideas on how residential painting in Winnipeg can refresh your entire home beyond just the trim. What Is the Best Method for Painting Baseboards? The best method for painting baseboards starts with thorough preparation, because paint only looks as good as the surface underneath it. Skipping prep is the number one reason DIY trim jobs look uneven or peel within a year. Step 1: Clean the Surface Wipe down your baseboards with a damp cloth or mild degreaser to remove dust, grease, and grime. Pay extra attention to corners and along the floor edge where dirt tends to collect. Let the surface dry completely before moving on. Step 2: Sand Lightly Use 120 to 150-grit sandpaper to lightly scuff the existing paint. This helps the new coat bond properly. If there are any bumps, drips, or rough patches from previous paint jobs, sand those smooth. Wipe away sanding dust with a tack cloth. Step 3: Apply Painter’s Tape Run painter’s tape along the wall just above the baseboard and along the floor below it. Press the tape edge down firmly with a putty knife or your fingernail to prevent bleed-through. This step saves a lot of cleanup time. Step 4: Prime If Needed If you are painting over bare wood, stained MDF, or a very dark colour, apply a coat of primer first. Primer seals the surface, blocks stains, and helps the topcoat cover more evenly. Let it dry fully before painting. Step 5: Paint With an Angled Brush Use a 2 to 2.5-inch angled sash brush for painting baseboards. Load the brush lightly, then apply paint in long, smooth strokes following the length of the trim. Start from the top edge and work downward. Two thin coats always look better than one thick one. Step 6: Remove Tape and Touch Up Pull the painter’s tape off at a 45-degree angle while the paint is still slightly wet to get a clean edge. Let it dry completely, then do a final inspection and touch up any spots you missed. Which Paint Type Works Best for Painting Baseboards? Not all paints are created equal, and for trim work the choice really does matter. Painting baseboards with the wrong paint type leads to scuffs, yellowing, and a finish that wears out fast. Water-Based Alkyd or Acrylic Enamel is the most popular choice for painting baseboards in Canada. It dries harder than regular latex wall paint, resists scuffs and cleaning, and does not yellow over time the way oil-based paints can. It also cleans up with water, making it much easier to work with. Oil-Based Paint gives an extremely hard, durable finish and levels out beautifully, meaning brush marks disappear as it dries. The downside is longer dry time, strong fumes, and the tendency to yellow slightly over the years, especially in low-light areas. Sheen Level: Semi-gloss or gloss is the standard for painting baseboards. These sheens are easier to wipe clean and hold up to the regular bumping and scuffing that trim takes from feet, furniture, and vacuum cleaners. Paint Type Durability Dry Time Best For Water-Based Acrylic Enamel High 1-2 hours Most baseboard projects Oil-Based Very High 6-8 hours High-traffic areas, older homes Standard Latex Low-Medium 1 hour Not recommended for trim When painting baseboards in a home with young kids or pets, water-based acrylic enamel in semi-gloss is the most practical choice. It handles cleaning without dulling, and it stays white without yellowing for years. Should You Use a Brush or Roller for Painting Baseboards? A brush is almost always the better tool for painting baseboards. Rollers are great for large flat surfaces like walls, but they leave texture on trim and make it hard to stay within tight edges. An angled sash brush gives you control along the top and bottom edges where the baseboard meets the wall and floor. A 2-inch angle brush is ideal for standard residential trim. Some painters use a small foam roller on the flat face of the baseboard to speed things up, then go back over the edges with a brush. This can work well if the trim is wide and flat, but for most homes the brush-only method produces a cleaner result. Common Mistakes to Avoid When Painting Baseboards Even experienced DIYers run into problems with trim paint. Here are the ones that show up most often. Skipping the sanding step leaves the old surface too smooth for the new paint to grip. You end up with peeling within months. Applying too thick a coat causes runs, drips, and a finish that takes forever to dry properly. Two thin coats always beat one heavy one. Not pressing the tape down firmly leads to paint bleeding under the
How Do You Get a Clean Finish When Painting Popcorn Ceiling?
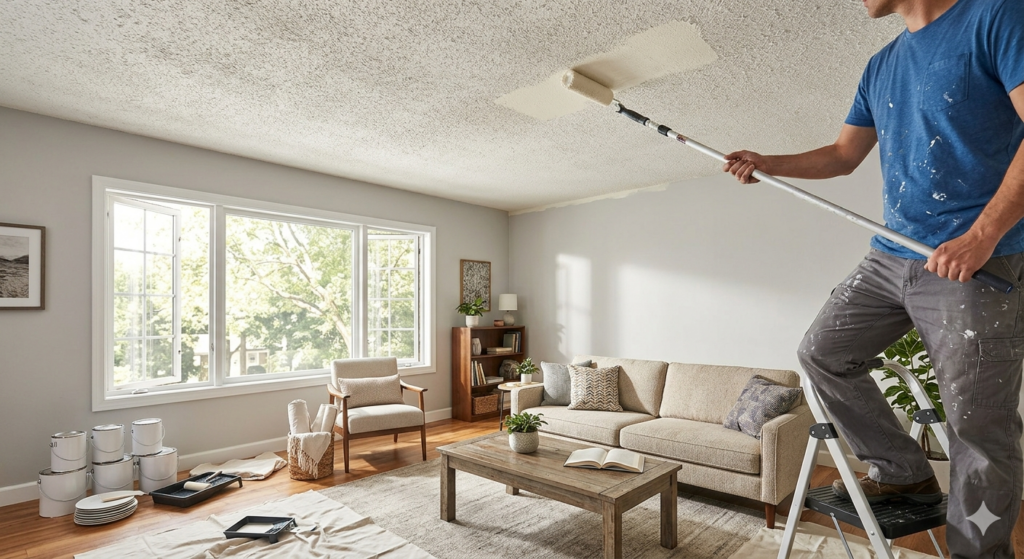
Painting popcorn ceiling is completely doable when you use the right paint, tools, and preparation steps. Flat or matte latex ceiling paint works best because it grips the bumpy texture without dripping or cracking. Before applying any paint, you need to prime the surface, protect your floors and walls, and pick a roller with at least a 3/4-inch nap. Whether your goal is a brighter white or just refreshing a yellowed surface, the technique and product choices you make directly affect the final look. What Is a Popcorn Ceiling and Why Is Painting Popcorn Ceiling a Challenge? A popcorn ceiling, also known as a stipple or acoustic ceiling, has a bumpy textured surface that was common in Canadian homes built between the 1950s and 1990s. It was sprayed on to reduce echo and hide drywall imperfections. The challenge with painting popcorn ceiling is that the rough surface absorbs much more paint than a smooth wall. Using too much water or the wrong consistency of paint can actually loosen the texture and cause chunks to fall off mid-stroke. Thin paint pools in the valleys of the texture rather than coating the peaks evenly, leaving a patchy result. Despite these hurdles, painting popcorn ceiling remains one of the most affordable ways to freshen up a room without tearing out the ceiling entirely. What Kind of Paint Do You Use on Popcorn Ceilings? The right paint makes or breaks a painting popcorn ceiling project. Here is what to look for: Finish: Always choose flat or matte. Sheen finishes like eggshell or satin catch light and emphasize every bump. A flat finish hides imperfections and looks uniform. Consistency: Thicker latex ceiling paints work best. They cling to the raised texture instead of running into the valleys and pooling. Colour: White or off-white are the most common choices for a textured ceiling because they reflect light and make rooms feel larger. If you want a colour, stay within one or two shades of white to keep things feeling open. Type: Stick with water-based latex. Oil-based paints are harder to apply on textured surfaces, take much longer to dry, and increase drip risk significantly. Look for products specifically labelled as ceiling paint. These formulas are built with higher viscosity and anti-drip properties, making painting popcorn ceiling far more manageable. For paint selection and colour consultation tailored to your space, True Coat’s residential painting services can take the guesswork out of the process. Do You Need to Prime Before Painting Popcorn Ceiling? Yes. Priming is one of the most important steps before painting popcorn ceiling, and skipping it is one of the most common reasons DIY projects end up looking uneven. A primer seals the porous texture and creates a stable base for the topcoat. Without it, you will need three or four coats to achieve even coverage, which adds cost, time, and extra weight to the ceiling. When priming matters most: Use a PVA-based drywall primer for standard ceilings and a stain-blocking primer for discoloured ones. Apply with the same thick-nap roller you will use for the topcoat and let it dry completely before moving forward. How to Prepare the Room Before Painting Popcorn Ceiling Good preparation is where the real work happens. Rushing through prep leads to messy edges, damaged texture, and a lot of unnecessary cleanup. Step-by-Step Prep Checklist How Do Professionals Paint Popcorn Ceilings? Professional painters approach painting popcorn ceiling with a consistent method that protects the texture while getting full, even coverage. The Professional Process 1. Inspection First: Professionals assess the ceiling’s condition, check for moisture damage, and confirm the texture is stable before anything else. 2. Full Masking: Walls, trim, and floors are fully protected before any paint goes on. 3. Primer Before Paint: A thick-nap roller is used to apply primer first. Professionals never use a brush directly on texture because bristles can pull chunks free. 4. Light, Consistent Strokes: The roller is loaded lightly and moved slowly in one direction. Pressing too hard flattens the bumps. Going over the same wet spot too many times tears the texture. 5. Two Thin Coats: Rather than one heavy coat, two thinner coats are applied, allowing each to dry fully. This gives better coverage without weighing down the surface. 6. Hand-Cut Edges Last: After rolling, a brush is used carefully along edges and corners. Professionals use minimal paint at this stage to avoid soaking the texture near the walls. If painting popcorn ceiling feels like more than you want to take on, the team at True Coat in Winnipeg handles jobs like this from prep through final coat. Do You Need a Special Roller for Painting Popcorn Ceiling? Yes. Roller nap thickness is one of the most important tool decisions for this type of ceiling project. Roller Nap Best For 1/4 inch Smooth walls only, not suitable for texture 1/2 inch Lightly textured surfaces 3/4 inch Standard popcorn ceilings 1 inch or more Heavy or older textured ceilings A 3/4-inch thick nap roller is the right choice for most painting popcorn ceiling projects. It carries enough paint to reach into the valleys of the texture without needing multiple passes. For ceilings with heavier texture, a 1-inch nap is even better. Pair your roller with an extension pole so you can work from the floor. This gives you better pressure control and reduces strain on your neck and shoulders. Avoid foam rollers entirely because they carry too little paint and can tear the texture on contact. Can I Just Paint Over a Popcorn Ceiling? Yes, you can paint over it directly without removing the texture, provided the surface is in stable condition. If the texture is firmly attached, dry, and free of peeling or mould, painting popcorn ceiling over it is a safe and practical choice. However, painting over it will not hide significant water stains without a stain-blocking primer layer applied first. It also will not fix sections where the texture is already falling away. Those spots need to be patched
What Exterior Painting Temperature Is Right for Your Home?
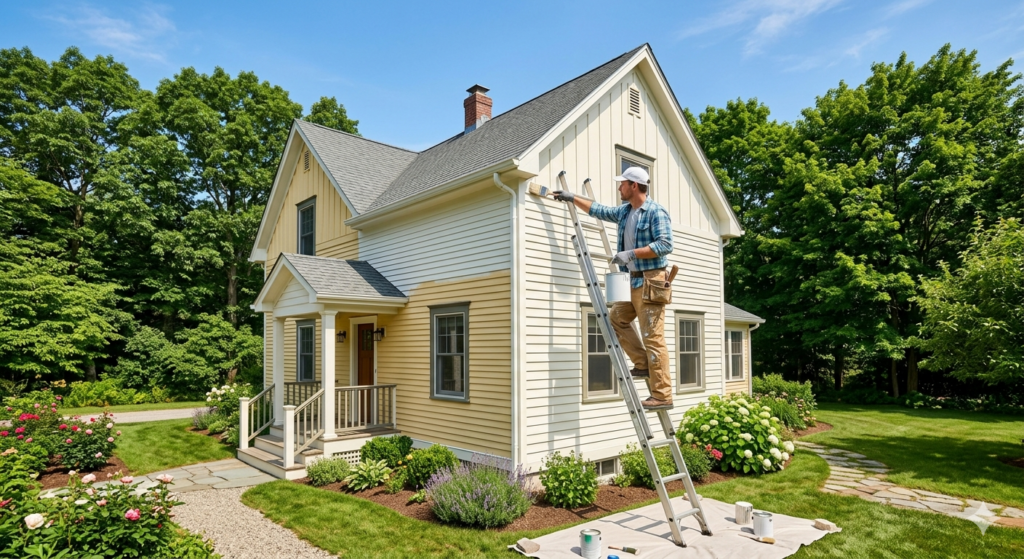
The right exterior painting temperature sits between 10°C and 29°C, making late spring through early fall the best window for painting the outside of your home in Canada. Painting outside this range causes peeling, bubbling, and poor adhesion, which means costly re-work down the road. Whether you plan to tackle the job yourself or hire a professional, knowing the ideal exterior painting temperature saves you time, money, and frustration. In the sections below, you will learn the exact temperature ranges to aim for, which conditions to avoid, how humidity and wind affect the job, what season works best in Winnipeg, and answers to the most common questions homeowners ask before scheduling their exterior painting project. What Is the Right Exterior Painting Temperature for Your Home? Most paint manufacturers recommend an exterior painting temperature range of 10°C to 29°C (50°F to 85°F). This window allows the paint to flow smoothly, bond firmly to the surface, and dry at a steady pace. In Winnipeg and across Manitoba, late May through early September typically falls within this safe range, making it the prime season for exterior painting projects. Latex or water-based paints are the most popular choice for exterior painting in Canada because they are flexible and handle temperature shifts better than oil-based options. That said, even latex paint struggles when temperatures drop below 10°C or spike above 30°C. Always check the label on your paint can, because some premium formulas tolerate slightly wider exterior painting temperature ranges. How Does Temperature Affect Exterior Painting Results? Temperature directly controls how paint behaves from the moment it leaves the brush to the moment it fully cures. When the exterior painting temperature is too low, the paint thickens, takes too long to dry, and may freeze before bonding with the surface. When it is too high, the paint dries too fast, leaving lap marks, brush strokes, and uneven colour across the wall. Cold Weather: What Happens Below 10 Degrees Celsius Painting below 10°C is one of the most common mistakes homeowners make when pushing the season. At this exterior painting temperature, the paint film forms a surface skin while the lower layers stay wet, leading to cracking and flaking within months. Dew point also becomes a serious concern in cold conditions. If the surface temperature of your siding is near the dew point, moisture condenses on the wall and prevents proper paint adhesion, no matter how good your technique. Hot Weather: What Happens Above 30 Degrees Celsius Extreme heat is just as damaging. An exterior painting temperature above 30°C causes water to evaporate from the paint too fast. This shortens the working time and traps air bubbles in the film. Dark-coloured surfaces sitting in direct sunlight can reach 10 to 15 degrees above the air temperature, meaning the actual surface you are painting may already be too hot even on a mild day. Always paint in the shade when possible or wait until the surface cools in the late afternoon. Humidity and Wind: The Hidden Factors Humidity and wind matter as much as air temperature. High humidity above 85% slows drying and promotes mildew growth under the paint film. Strong winds speed up drying unevenly and carry dust onto the wet surface. Ideal exterior painting temperature conditions include relative humidity between 40% and 70% and calm or light wind, so the paint can cure on its own schedule. Exterior Painting Temperature: Quick Reference Guide Condition Temperature Range Effect on Paint Recommended Action Ideal 10°C to 29°C Smooth application, proper bonding Safe to paint Too Cold Below 10°C Freezing, poor adhesion, cracking Delay the project Too Hot Above 30°C Fast drying, lap marks, bubbling Paint in the shade or wait High Humidity Above 85% RH Slow drying, mildew risk Choose a drier day Strong Wind Above 25 km/h Uneven drying, dust contamination Wait for calmer weather What Is the Best Season for Exterior Painting in Winnipeg? In Winnipeg, the best season for exterior painting is late May through early September. This window reliably delivers the exterior painting temperature range both latex and oil-based paints need. Early spring can fool homeowners with a warm afternoon followed by a frost overnight, which ruins paint that has not fully cured. Fall projects can work if you schedule them for late August or early September, before overnight temperatures drop below 10°C consistently. A practical tip: always check both the daytime high and the overnight low before starting an exterior painting project. Paint needs several hours to cure, and a cold night following a warm afternoon can still cause problems. Most professionals recommend starting no earlier than 9 a.m. so morning dew has dried off the surface, and stopping at least two to three hours before sunset to avoid the temperature drop in the evening. If you are planning a full home exterior refresh and want to get the timing right, explore our exterior painting services or check out our post on the best approach to exterior painting for house projects for more preparation tips. Which Paint Type Works Best at Different Exterior Painting Temperatures? Not all paints behave the same at every exterior painting temperature. Choosing the right formula for your climate makes a noticeable difference in durability and finish quality. Paint Type vs. Ideal Exterior Painting Temperature Paint Type Min. Temperature Max. Temperature Best Use Latex / Water-Based 10°C 29°C Siding, walls, general exterior Acrylic Latex 7°C 32°C All-purpose exterior in variable climates Oil-Based 15°C 30°C Trim, doors, metal surfaces Low-Temp Latex 4°C 27°C Fall or early spring projects Things To Know Before Starting Your Exterior Painting Project Before you pick up a brush, here are the most important practical points to keep in mind about exterior painting temperature and preparation: Why Hiring a Professional Makes Exterior Painting Temperature Management Easier Managing exterior painting temperature conditions is one of the most challenging parts of any exterior project. A professional painter knows when to start, when to stop, and how to adjust for changing weather throughout the day. True Coat
What Are the Best Deck Staining Colors for Your Home?
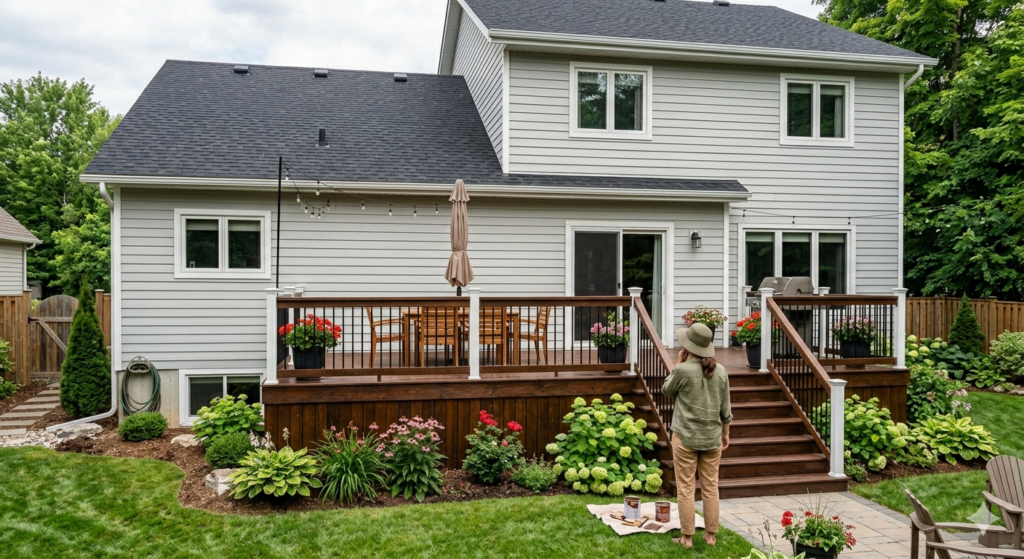
Deck staining colors play a major role in how your home looks from the outside and how long your deck stays protected. The best deck staining colors for most Canadian homes are medium to dark browns like walnut, espresso, and cedar tones, as these shades hide weathering well, pair with a wide range of exterior finishes, and hold up against seasonal temperature swings. Whether you want your deck to blend with your home or stand out as a feature, the right deck staining color depends on your siding, the wood type, how much sun the deck gets, and the finish you choose. This post covers the top color options, how to match your house exterior, which shades last the longest, and practical tips on applying stain over old coats. What Are the Most Popular Deck Staining Colors? When it comes to deck staining colors, most homeowners lean toward tones that bring out the warmth and texture of real wood. Natural hues like cedar, honey, and medium brown remain the most requested deck staining colors year after year because they feel inviting, complement most home styles, and age gracefully with the wood. Cooler options like driftwood grey have also grown in popularity, especially for modern or farmhouse-style homes. Here is a breakdown of the most common deck staining colors and where they work best: Deck Staining Color Best For Finish Look Durability Natural Cedar / Honey Wood grain fans, warm tones Semi-transparent 3-5 years Medium Brown / Walnut Classic homes, most siding types Semi-solid or solid 5-7 years Driftwood / Silver Grey Modern, coastal, or farmhouse style Semi-transparent 3-5 years Dark Espresso / Black Bold contrast, modern aesthetics Solid 5-8 years Redwood / Mahogany Traditional or craftsman homes Semi-transparent to solid 4-6 years For most homes in Winnipeg and across Canada, semi-transparent deck staining colors in the cedar or walnut range offer the best balance of visual appeal and wood protection. They let the grain show through while shielding the surface from UV rays, moisture, and freeze-thaw cycles. If you want deck staining colors with less maintenance over time, a solid stain in espresso or dark brown tends to cover grain imperfections and needs fewer touch-up coats compared to lighter semi-transparent options. You can also explore professional deck staining services to get the right color and finish applied properly the first time. What Color Stain Is Best for Decks? The best deck staining color depends on the condition of your wood, your home’s exterior palette, and your personal style. That said, medium brown deck staining colors are the most versatile choice for the widest range of homes. Shades like walnut, chestnut, and teak work with brick, vinyl, hardie board, and painted siding while keeping the wood looking rich and polished. Top Deck Staining Color Choices and Why They Work Choosing a deck staining color in the medium-to-dark range also offers a practical benefit: these tones absorb and retain heat in cooler seasons, which can extend how long the surface feels comfortable underfoot in spring and fall. For guidance picking a color that suits your specific deck and home, reach out to True Coat for a free consultation. True Coat is a licensed, fully insured painting company in Winnipeg offering deck staining and exterior painting services with a 3-year craftsmanship warranty. Should a Deck Be Lighter or Darker Than the House? A common question homeowners ask when choosing deck staining colors is whether to go lighter or darker than the house exterior. The short answer: your deck should generally be one to two shades darker than your home’s main exterior color. This creates a grounded, layered look that feels intentional without being jarring. A lighter deck can look washed out, especially on homes with dark siding, and it tends to show dirt, mildew, and weathering more quickly. Darker deck staining colors naturally hide discoloration between cleaning sessions and create a stronger visual base for the structure of the home. Here is a simple reference for pairing deck staining colors with exterior finishes: House Exterior Color Recommended Deck Staining Color White or Cream Siding Natural Cedar, Honey Brown, or Warm Walnut Grey or Stone Siding Driftwood, Charcoal, or Weathered Grey Red Brick Exterior Redwood, Dark Brown, or Espresso Dark Navy or Black Siding Light Driftwood or Natural Wood Tones Beige or Tan Siding Medium Brown, Mahogany, or Chestnut The exception is all-white or very light-coloured homes, where using a natural cedar or honey deck staining color provides enough contrast to define the deck space without looking too heavy. If your siding is already a deep colour like navy or hunter green, a lighter or neutral driftwood tone prevents the deck from visually competing with the walls. You can also check exterior painting projects by True Coat for real examples of how deck staining colors are matched to different home exteriors. What Deck Staining Color Lasts the Longest? When longevity is the priority, darker and more opaque deck staining colors generally outperform lighter semi-transparent options. Solid deck staining colors in deep brown, espresso, or dark walnut tones offer the best protection because the higher concentration of pigment creates a thicker barrier against UV rays, moisture, and foot traffic. Semi-transparent deck staining colors allow more UV light to reach the wood, which means they fade faster and require reapplication every two to three years in harsh climates. In contrast, solid deck staining colors can hold up for five to eight years before needing a full recoat, depending on sun exposure and how well the surface was prepared before application. Practical tips for extending the life of any deck staining color: For decks exposed to Winnipeg winters, oil-based or alkyd deck staining colors hold up better through freeze-thaw cycles compared to some water-based formulas. Talking to a professional can help you match the right product to your wood species and the local climate. You can also read about the best approach to exterior painting for house projects for broader guidance on exterior surface preparation and
What Is a Limewash Accent Wall and Why Should You Try It?
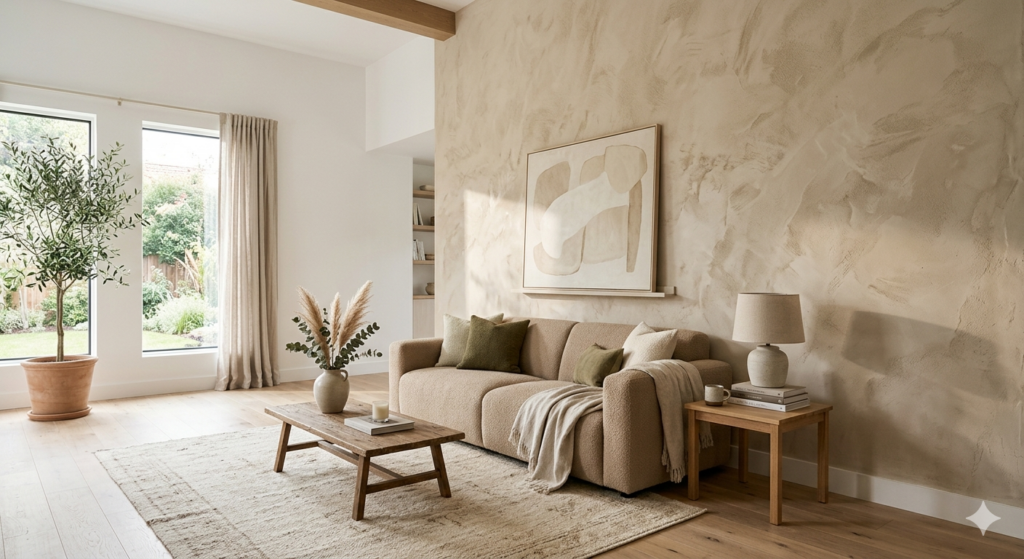
A limewash accent wall is one of the most effective ways to add depth, character, and warm texture to a room without overwhelming the space. It works on brick, drywall, and plaster, making it one of the most flexible wall treatments in Canadian homes today. This post covers why it works, how to apply it properly, which rooms benefit the most, how long it lasts, and whether the investment is worth it. What Is a Limewash Accent Wall? A limewash accent wall is a single wall treated with limewash paint, a centuries-old finish made from slaked lime and water, sometimes tinted with natural pigments. Unlike regular paint, limewash soaks into the wall surface rather than sitting on top of it. The result is a layered, matte, slightly translucent look that shifts in different lighting throughout the day. The reason it works so well as an accent is because limewash naturally creates variation in colour and tone. No two applications look exactly the same, which means your limewash accent wall becomes a genuinely unique feature in your space. That visual texture is exactly what makes it so appealing in interior design across Canada right now. It works especially well on brick or plaster, but it can also be applied to drywall with the right preparation. The key is a clean, slightly porous surface that allows the lime solution to bind properly. Why a Limewash Accent Wall Works So Well in Canadian Homes Canadian homes, particularly in cities like Winnipeg, often feature open-plan living areas, high ceilings, or wide feature walls that can feel flat or cold with standard paint. This type of finish solves that by adding warmth and visual movement to a single surface without requiring a full renovation. Here is why homeowners keep choosing it: If you are already thinking about a full refresh, combining a limewash accent wall with updated interior painting services can completely transform how a room feels. Which Walls Work Best for a Limewash Accent Wall? Not every wall in your home will benefit equally from this treatment. Choosing the right wall is actually one of the most important decisions you will make. Best Rooms and Wall Positions for a Limewash Accent Wall Living Room Feature Wall The wall behind a sofa or fireplace is the most popular choice. It immediately draws the eye and anchors the room. Neutral tones like clay, sand, or pale terracotta work especially well here. Bedroom Headboard Wall The wall behind the bed is a natural focal point. A limewash accent wall in a soft sage, warm white, or dusty blue creates a calming, spa-like atmosphere that feels both stylish and restful. Dining Room End Wall This treatment at the end of a dining room makes the space feel intentional and finished. Deeper tones like charcoal or burnt sienna can work well in dining spaces where you want a bolder statement. Home Office or Study A limewash accent wall behind a desk adds character to video calls and creates a more focused workspace without painting the entire room a distracting colour. Entryway or Hallway A narrow hallway or entry wall treated with limewash creates immediate visual interest when guests walk through the door. Room Best Wall Position Recommended Tone Living Room Behind sofa or fireplace Warm neutrals, clay, off-white Bedroom Behind the headboard Soft sage, dusty blue, warm white Dining Room End or feature wall Terracotta, charcoal, deep earth tones Home Office Behind the desk Stone grey, linen, muted sage Entryway The wall facing the front door Warm white, sand, pale clay How to Apply a Limewash Accent Wall the Right Way Getting the application right is what separates a beautiful result from a patchy, uneven mess. This is not a standard paint job. The process requires intentional technique to achieve that layered, organic look characteristic of a limewash accent wall. Step-by-Step Application Process Step 1: Prepare the Surface Clean the wall thoroughly. Remove any dust, grease, or flaking paint. If the wall has a glossy finish, lightly sand it or apply a bonding primer so the limewash has something to grip. Drywall should be sealed first with a water-based primer. Step 2: Mix the Limewash Correctly If using a pre-mixed product, follow the instructions. If mixing from scratch, the ratio is typically one part lime putty to two or three parts water. A thinner mix gives a lighter, more washed effect. Step 3: Apply the First Coat Use a wide, natural-bristle brush and apply in loose, overlapping strokes at different angles. Do not aim for uniformity. The variation in your brush strokes is what creates the texture. Work in sections and blend edges while still wet. Step 4: Dry and Layer Allow the first coat to dry fully, usually between two and four hours. Then apply a second coat for more depth. You can dampen sections with water before the second coat to create softer transitions. Step 5: Seal if Needed In high-traffic areas or rooms with moisture, a matte topcoat sealer can protect the finish without dulling the natural texture. For best results, especially on brick or uneven plaster walls, working with professionals who specialize in limewash painting in Winnipeg can save a lot of time and give you a much more consistent result. How a Limewash Accent Wall Compares to Other Accent Wall Options Before committing, it helps to see how this option stacks up against other popular accent wall choices. Accent Wall Type Texture Durability Eco-Friendly DIY Friendly Cost Range Limewash Paint High 5-7 years+ Yes Moderate Mid Standard Paint Low 3-5 years Varies Yes Low Wallpaper Medium-High 5-10 years Varies Moderate Mid-High Wood Panelling High 10+ years Depends Low High Venetian Plaster Very High 10+ years Yes No High This option sits comfortably in the middle. It offers more character than standard paint, costs less than wood panelling or Venetian plaster, and is more forgiving to update than wallpaper. For homeowners who want a designer look without a major renovation budget, it is often
What Is a Drywall Sander and How Do You Use It the Right Way?
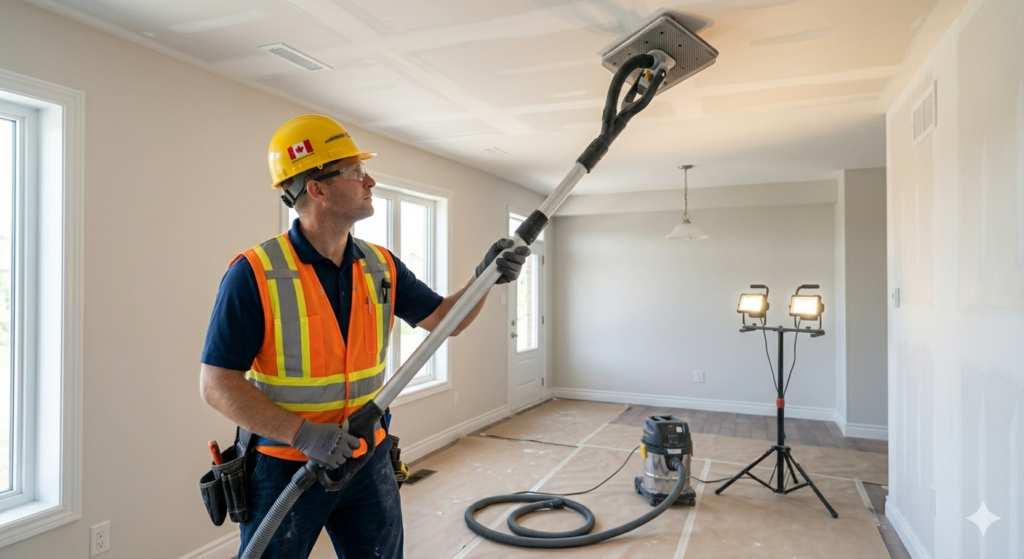
A drywall sander is a tool used to smooth dried joint compound on walls and ceilings, creating a flat, paint-ready surface after repairs or new drywall installation. Choosing the right drywall sander for your project saves time, reduces mess, and delivers a finish that looks clean and professional under paint. There are several types of drywall sanders available, from basic handheld blocks to electric models with built-in dust collection. The right choice depends on the size of your project, the location of the surface, and how much prep time you want to spend. Getting the grit level right also matters, since using the wrong screen can scratch the surface or leave it too rough for painting. What Is a Drywall Sander? A drywall sander is a tool made specifically for smoothing dried joint compound on drywall surfaces. It is different from a wood sander because it uses mesh screens instead of solid sandpaper. The mesh lets fine compound dust fall through rather than clogging the surface, which keeps the screen cutting evenly for longer. Joint compound is applied in layers during taping and finishing. Once each coat dries, it leaves ridges, tool marks, and feathered edges that must be sanded flat before paint goes on. Without sanding, these imperfections show through even after multiple coats of paint. The drywall sander is the tool designed for this step. It covers the surface in even passes, knocking down high spots and blending transitions between the compound and the surrounding wall. What Are the Different Types of Drywall Sanders? The type of drywall sander that works best depends on the size of the area, the height of the surface, and how much detail work is involved. Each type has specific strengths. Pole Drywall Sander A pole drywall sander has an extendable handle that lets you reach ceilings and high walls without a ladder. The head pivots to follow the wall angle. It is the most popular choice for finishing large flat surfaces because it moves quickly across wide areas and reduces back strain compared to working by hand. Hand Drywall Sander A hand drywall sander is a flat block held directly in your palm. It is the right tool for corners, edges, window and door trims, and small repair patches. It gives you full control over pressure and direction, which matters a lot in tight spots where a pole sander cannot fit properly. Electric Drywall Sander An electric drywall sander spins or oscillates the sanding head automatically, cutting down on manual effort. Many professional models connect directly to a vacuum for dust-free operation. This type is efficient on large commercial or residential projects where speed and cleanliness both matter. Orbital Sander on Drywall An orbital sander is not a dedicated drywall tool, but it works on small patches in a pinch. The circular motion leaves fewer marks than a straight-line sander, but standard sandpaper clogs quickly on joint compound. For anything beyond a single small patch, a proper drywall sander is the better choice. Here is a quick comparison to help you decide which type fits your project: Sander Type Best For Key Advantage Pole Drywall Sander Large walls and ceilings Covers wide areas, reduces strain Hand Drywall Sander Corners, edges, small patches Precise control in tight spots Electric Drywall Sander Large professional projects Speed and built-in dust collection Orbital Sander Small patches, flat surfaces Versatile, widely available How Do You Use a Drywall Sander Correctly? Using a drywall sander properly is just as important as choosing the right one. Poor technique causes gouges, uneven areas, and extra coats of compound to fix the damage you created. Start by confirming the joint compound is fully dry. Sanding wet compound clogs the screen fast and tears the surface. A dry coat will look lighter in color and feel firm when you press it lightly. Set up dust control before you start. Drywall dust spreads quickly and settles on every surface in a room. Seal off doorways with plastic sheeting if needed, and wear a dust-rated respirator. Attach a 100 to 120 grit screen to your drywall sander for the main smoothing pass. Begin with longer strokes across the flat surface, keeping pressure even throughout. Avoid pressing harder in any single spot as this risks cutting through the compound and into the drywall paper underneath. After your main pass, hold a work light at a low angle to the wall. This raking light highlights any remaining bumps or depressions. Do a second light pass with 150 grit to bring the surface fully smooth before applying primer. Which Grit Should You Use on a Drywall Sander? The screen grit on your drywall sander controls how aggressively it cuts and how smooth the surface ends up. Using the correct grit at each stage makes the whole process faster and protects the wall from damage. Grit Level Stage of Work What It Does 60 to 80 Grit First pass, rough sanding Removes ridges, bumps, and joint lines 100 to 120 Grit Second pass, smoothing Blends seams and flattens surface 150 to 180 Grit Final pass, finishing Creates a paint-ready smooth finish A practical tip: always start with the coarser grit to remove bulk material, then move up to finer screens to refine the finish. Trying to smooth a rough surface with fine grit wastes time and wears out the screen quickly. Practical Tips for Using a Drywall Sander More Effectively A few habits make drywall sander work much more manageable, especially for first-time users or anyone doing a large room. For more on surface preparation and wall smoothing, read our post on skim coating a ceiling for a flawless finish. When Is It Better to Hire a Professional for Drywall Sanding? Not every drywall sander project is a good fit for DIY. Some situations call for professional help, particularly in older Winnipeg homes where walls may have multiple repair layers or hidden damage underneath the compound. If you are finishing an entire room or several rooms after
What Makes Deck Stain Oil Based the Best Choice for Your Deck?
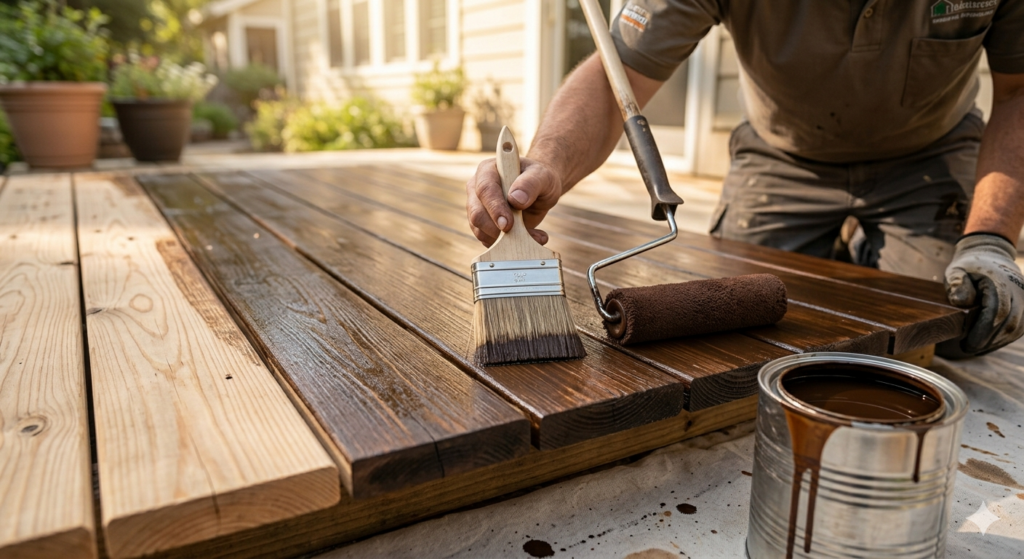
Deck stain oil based is the most effective option for protecting and preserving outdoor wood in Canadian climates. It penetrates deep into the wood fibres, seals out moisture, prevents cracking, and brings out the natural grain of your deck with a rich, lasting finish. Whether you have a brand new pressure-treated deck or an older structure that needs attention, using a deck stain oil based product offers clear advantages over surface-level coatings. From preparation and application tips to drying times and long-term maintenance, every step plays a role in getting results that last. Y ou can also explore our painting and staining services to see how True Coat handles these projects from start to finish. What Is Deck Stain Oil Based and How Does It Work? A deck stain oil based product is a penetrating finish that uses oil as its carrier, allowing it to soak below the surface of the wood rather than forming a film on top. This is what separates it from latex or water-based alternatives, which tend to sit on the surface and peel over time. When oil penetrates the wood, it nourishes and stabilises the fibres from within. This is especially important for aged or weathered decks that have started to dry out and crack. The oil replenishes the natural moisture balance of the wood, making it more flexible and better able to expand and contract with temperature changes throughout the year. Most deck stain oil based products also contain UV inhibitors and mildewcides, which protect against sun fading and fungal growth. This combination of deep penetration and added protection makes oil-based staining particularly well-suited to Canadian weather conditions where temperatures swing from very hot summers to harsh winters. Because a deck stain oil based formula does not form a surface film, it also does not peel or blister the way paint can. When it eventually wears away, it does so gradually and evenly, making reapplication far simpler with no heavy stripping needed. Is Deck Stain Oil Based Better Than Water-Based Stain? This is one of the most common questions homeowners ask before starting a deck staining project, and the honest answer depends on the condition of your wood and what you are trying to achieve. When Oil-Based Stain Wins A deck stain oil based formula is the stronger choice when you are working with older, more porous wood that has dried out over years of sun and rain exposure. The oil soaks in deeply and restores the wood’s natural character. It also handles heavily weathered boards better because the thinner formula reaches the deep fibres where protection is needed most. Oil-based deck stain also performs better in climates with extreme temperature swings. In Winnipeg and across much of Canada, decks experience freeze-thaw cycles that can be brutal on surface-level coatings. A penetrating deck stain oil based product moves with the wood as it expands and contracts, reducing the risk of visible wear over time. When Water-Based Stain Has the Edge Water-based stains dry faster, have lower VOC levels, and clean up with water rather than mineral spirits. For brand new pressure-treated lumber, water-based formulas are sometimes recommended because fresh treated wood can repel oil if it still contains high moisture content. That said, once wood is fully dried and seasoned, most professional painters still reach for a deck stain oil based product for the depth of protection it provides. To explore what option is best for your specific deck, reach out through our contact page and one of the True Coat team can advise you directly. Deck Stain Type Comparison Stain Type Penetration Durability Best For Deck Stain Oil Based Deep 3 to 5 years Aged, dry wood Water-Based Stain Moderate 2 to 3 years New or treated wood Solid Colour Stain Surface only 3 to 5 years Worn or damaged decks Semi-Transparent Moderate deep 2 to 4 years Healthy, visible wood grain How to Apply Deck Stain Oil Based the Right Way Getting a proper result with deck stain oil based products depends almost entirely on preparation. Even the best stain will fail prematurely if applied to a dirty, wet, or previously coated surface that was not properly cleaned first. Step 1: Clean and Prepare the Surface Start by sweeping the deck thoroughly and removing all furniture, planters, and debris. Use a deck cleaner or brightener to strip away dirt, mildew, and grey weathered fibres. If the deck has an old coating that is peeling or bubbling, you will need to strip it completely before applying a new deck stain oil based product. Allow the wood to dry for at least 48 hours after washing. Step 2: Check the Weather Oil-based stains require warm, dry conditions to absorb and cure properly. Aim for temperatures between 10 and 30 degrees Celsius, with no rain in the forecast for at least 24 to 48 hours. Applying a deck stain oil based product in cool or humid conditions will prevent it from curing correctly and can leave a tacky or uneven finish. Step 3: Apply Thin, Even Coats Use a brush, roller, or pump sprayer designed for oil-based products. Work in the direction of the wood grain and keep a wet edge to avoid lap marks. Apply the stain in thin coats, allowing the first coat to absorb fully before deciding whether a second coat is needed. Over-applying a deck stain oil based formula can lead to a sticky surface that takes much longer to dry. Step 4: Wipe Away Excess If any areas appear shiny or pooled after 15 to 20 minutes, wipe away the excess with a clean rag. This is a critical step with oil-based products, as too much stain sitting on the surface can prevent proper absorption and leave blotchy results. For large or complex decks, working with a professional ensures even coverage and proper technique. You can view our completed staining projects to see the kind of results a trained team can deliver. How Long Does Deck Stain Oil Based
What Is Drywall Compound and How Do You Use It?
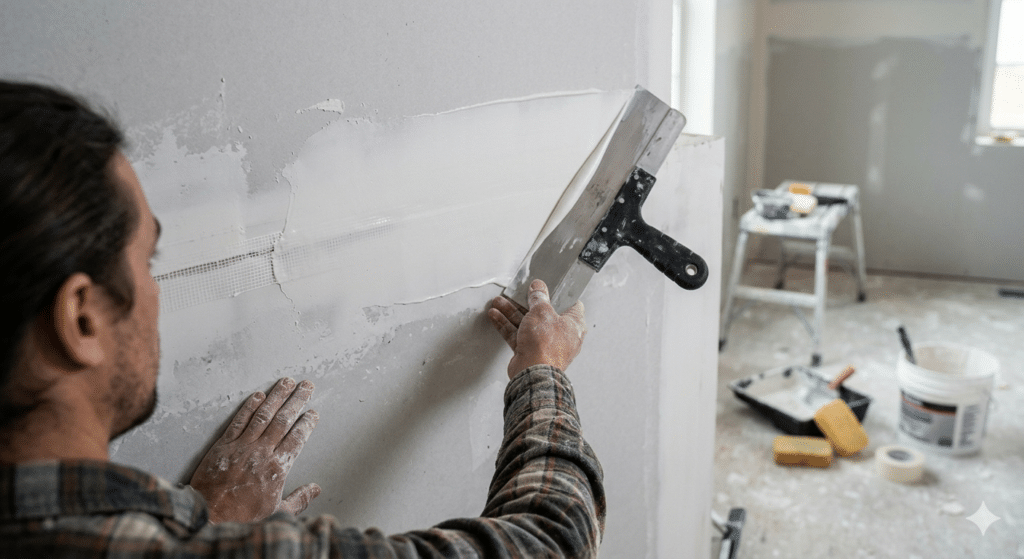
Drywall compound is a paste-like material used to fill joints, cracks, and imperfections in walls and ceilings, and it is one of the most important products in any wall repair or finishing project. Choosing the right drywall compound and applying it properly can mean the difference between a smooth, paint-ready wall and a surface full of cracks, bumps, or uneven spots. There are several types of drywall compound available, including all-purpose, lightweight, topping, and setting compound, each designed for a specific stage of the job. Knowing when to use each type, how to mix and apply it, and how to sand and prime correctly helps you get a professional finish. Whether you are patching a small hole, finishing new drywall, or prepping for paint, using the correct drywall compound technique makes the whole process faster and cleaner. For large or complex projects in Winnipeg, working with a licensed team like True Coat ensures the job is done right the first time. What Is Drywall Compound? It is called joint compound or mud, is a white paste made from gypsum dust mixed with water and other additives. It is spread over drywall seams, screw holes, corners, and damaged areas to create a flat, uniform wall surface. Once it dries and is sanded smooth, the wall is ready for primer and paint. Without it, you would see every joint line, nail pop, and seam through your finish coat. In Canada, drywall compound is sold in buckets ranging from small 1-litre containers to large 20-litre pails. It is used for both residential and commercial construction, renovations, and repairs. The product has a creamy consistency when fresh and shrinks slightly as it dries, which is why multiple coats are almost always needed. What Does Drywall Compound Do? Drywall compound serves several key purposes in wall construction and repair. Its primary job is to cover and blend drywall joints so they disappear under paint. It also fills screw or nail holes, patches surface damage, and creates smooth corner finishes. Without a proper layer of drywall compound, any wall would show all the seams where sheets of drywall meet, making it impossible to get a clean painted finish. Beyond hiding joints, drywall compound also bonds drywall tape to the wall. Paper or mesh tape is embedded into the first coat of wet compound, and additional coats are feathered out to blend the repaired area with the surrounding wall. This layered process, often called taping and mudding, is what creates that seamless look you see in finished rooms. What Kind of Compound Is Used for Drywall? Not all drywall compound is the same. Each type has a specific role, and using the wrong one at the wrong stage can cause cracking, poor adhesion, or a surface that is hard to sand. Here is a breakdown of the four main types: All-Purpose Drywall Compound This is the most commonly used product on job sites. All-purpose drywall compound can be used for taping, topping, and texturing. It is a solid choice for general repairs and smaller projects because you only need one product for multiple steps. However, it takes longer to dry than setting compound and may shrink a bit more. Lightweight Drywall Compound Lightweight drywall compound contains additives that reduce its weight by about 25 to 35 percent compared to all-purpose compound. It is easier to sand, dries faster, and is less likely to crack. This makes it popular for finish coats and skim coating. For projects in Winnipeg where humidity can slow drying times, lightweight compound is a practical choice. Topping Compound Topping compound is used for the final coat. It is the smoothest and easiest to sand of all the pre-mixed options. It is not strong enough for taping, but it gives you that super-fine finish coat before painting. Topping drywall compound is best used on new construction where large flat areas need to be finished. Setting Compound (Hot Mud) Setting compound, sometimes called hot mud, comes in powder form and mixes with water. Unlike pre-mixed products, it hardens through a chemical reaction rather than by drying. Setting drywall compound comes in different time ratings such as 20, 45, or 90 minutes. It is harder, denser, and much more difficult to sand. It is ideal for filling deep holes, building up thick areas, or working in cold or humid conditions where pre-mixed compound dries slowly. Drywall Compound Types at a Glance Type Best Use Key Benefit All-Purpose Taping, topping, and texturing Versatile, one product for all stages Lightweight Finish coats and skim coating Easy to sand, faster drying Topping Final coat only Smoothest surface for painting Setting (Hot Mud) Deep fills, cold/humid conditions Hardens by chemical reaction, very durable How to Apply Drywall Compound Step by Step Applying drywall compound correctly takes practice, but the basic process is straightforward. A proper application always involves at least three coats: a tape coat, a second filling coat, and a finish coat. Rushing through the steps or skipping drying time between coats leads to cracking and shrinkage. • First coat (tape coat): Spread a thin layer of drywall compound over the joint, embed your tape, and smooth it flat. Let it dry completely, which usually takes 24 hours depending on temperature and humidity. • Second coat: Apply a wider, thinner layer over the tape coat. Feather the edges out several centimetres on each side to blend with the surrounding wall. Allow full drying time. • Third coat (finish coat): Use lightweight or topping compound for a thin, smooth final layer. Sand lightly once dry using 120 to 150 grit sandpaper. • Prime and paint: After sanding, apply a coat of drywall primer before painting. Skipping primer causes paint to absorb unevenly and show lap marks. For walls that need more than just mudding, True Coat offers professional drywall and plaster repair services to restore any surface to a flawless condition. How Many Coats of Drywall Compound Do You Need? Most professionals recommend a minimum
What Limewash Color Is Best for Your Home?
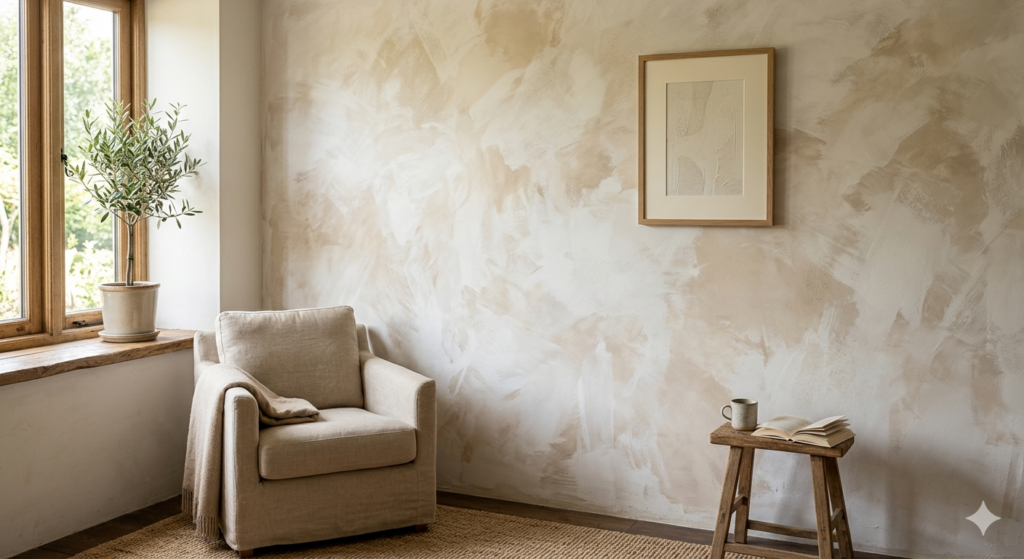
Limewash color is one of the most popular paint finishes in Canadian homes right now, known for its soft, textured look and breathable, natural formula. The best limewash colors for most homes range from warm whites and soft greys to earthy beiges and muted greens, depending on the room’s light and style. Choosing the right limewash color can change the entire mood of a space, so it’s important to pick the right tone before committing. This article walks through the most popular limewash color options, explains why certain shades work better in specific spaces, covers how professional application makes a big difference, and answers the most common questions homeowners ask about limewash color choices. Whether you’re refreshing a living room wall, updating an exterior, or adding character to a bedroom, you’ll find practical guidance here to help you move forward with confidence. What Is Limewash Color and Why Is It Trending? Limewash color refers to the finish produced by applying diluted lime-based paint to a wall in thin, overlapping layers. Unlike standard paint that sits on top of the surface, limewash color soaks into the material, creating a soft, mottled look that changes slightly as the light shifts throughout the day. It’s a finish that feels both old-world and modern at the same time. Homeowners across Winnipeg and the rest of Canada are choosing limewash color for several good reasons. First, it’s breathable, which means it allows moisture to pass through walls rather than trapping it. This is especially useful in older homes or spaces prone to humidity. Second, the natural ingredients make it a low-VOC option, which is better for indoor air quality. Third, the textured, layered look adds depth that flat paint simply cannot replicate. Practically speaking, limewash color works well on brick, plaster, drywall, and even exterior surfaces. The finish ages gracefully over time, developing a patina that actually improves the character of the wall rather than looking worn out. If you’re looking for a finish that brings both visual interest and function into the same choice, limewash color delivers on both fronts. Which Limewash Color Works Best for Each Room? Not every limewash color works equally well in every room. The right choice depends on the amount of natural light, the existing furniture tones, and the mood you want to create. Here’s a breakdown of the most popular shades and where they perform best. Warm Whites and Creamy Tones Warm white limewash color is the most versatile option available. It brightens a space without feeling stark or clinical. In Canadian homes where natural light can be limited during winter months, a warm white limewash color keeps rooms feeling open and airy year-round. This shade works especially well in living rooms, dining areas, and bedrooms where a relaxed, welcoming atmosphere is the goal. A creamy off-white limewash color also pairs beautifully with wood floors, linen textiles, and natural stone finishes. Soft Greys and Greige Shades Grey limewash color is a strong choice for modern or Scandinavian-inspired interiors. A soft grey limewash color adds a cool, calm tone to bedrooms and home offices. Greige (a blend of grey and beige) is particularly popular because it bridges warm and cool palettes, making it easier to match with a wide variety of furniture. This is one of the most requested limewash color choices among homeowners who want a neutral tone without going too stark. Earthy Beiges and Taupes Earthy limewash color tones like warm beige and taupe bring a grounded, organic feeling to any room. These shades work well in spaces where you want a cozy, enveloping atmosphere, such as a study, reading nook, or master bedroom. They also complement terracotta tiles, dark wood furniture, and woven natural textiles. An earthy limewash color tends to look richer and more saturated in spaces with warm lighting. Muted Greens and Sage Tones Muted green limewash color has been gaining serious traction as homeowners lean toward nature-inspired palettes. A sage or olive limewash color adds a sense of calm and brings the outdoors inside without being loud or distracting. This works well in bathrooms, kitchens, and sunrooms where a fresh, organic feel is wanted. Limewash Color by Room: Quick Reference Use the table below to match the best limewash color to each room based on light level and style. Room Best Limewash Color Why It Works Living Room Warm White or Creamy Beige Brightens space, pairs with most furniture Bedroom Greige or Soft Grey Calm, restful tone for relaxation Kitchen Sage Green or Warm White Fresh, clean feel with natural character Bathroom Soft Grey or Muted Green Cool tones work well with tile and fixtures Home Office Warm Beige or Taupe Grounded tone supports focus without distraction Exterior Walls Warm White or Natural Stone Weather-resistant and adds classic curb appeal How Professional Application Affects Your Limewash Color Results The technique used to apply limewash color matters as much as the shade itself. Two homes can use the exact same limewash color and end up with very different results depending on how it was applied. This is one of the biggest reasons why professional application is worth considering. The process typically involves applying two to three thin layers of diluted lime paint using a wide brush with crosshatch strokes. Each layer is allowed to partially dry before the next is applied, which creates the characteristic depth and variation that defines limewash color. Some areas are left slightly lighter while others absorb more pigment, producing an intentionally uneven finish that looks natural and organic. Surface preparation also plays a significant role. Walls that have not been properly cleaned, patched, or primed will not absorb limewash color evenly. A professional painter knows how to prepare the surface correctly so the final limewash color outcome looks consistent and intentional, not blotchy or patchy. If you’ve been researching limewash paint in Canada and why it works so well, you’ll know that the right technique and the right local expertise make all the difference in the final result.