
Exterior Paint Winnipeg: What Should Homeowners Know?
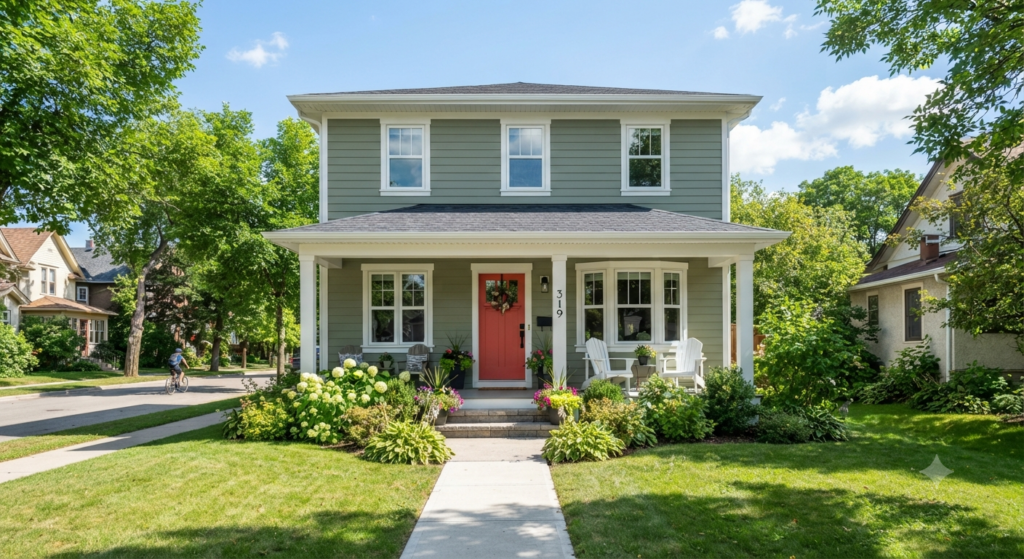
Exterior paint Winnipeg homeowners choose must be built tough enough to handle frigid winters, humid summers, and rapid temperature swings that crack and peel ordinary coatings within a season or two. The right exterior paint Winnipeg project protects your home’s structure, boosts curb appeal, and can add real value to your property when done correctly. Choosing the correct paint formula, colour, and application window is just as important as the painting itself. Winnipeg’s climate sits in a hardiness zone that demands 100% acrylic latex paint, proper surface preparation, and ideal temperature conditions during application. From picking colours that hold up in UV-heavy prairie summers to understanding why October may be too late to paint, every decision matters. Read on for a complete breakdown of what makes exterior painting in Winnipeg work and last. What Makes Exterior Paint Winnipeg Projects Unique? Winnipeg sits in one of Canada’s harshest climate zones. Temperatures swing from -35°C in winter to +35°C in summer. That 70-degree range puts enormous stress on any coated surface. Standard paint products sold in milder climates simply are not built for this. Quality exterior paint Winnipeg applications rely on 100% acrylic latex formulas. These paints flex with the surface as it expands in heat and contracts in cold, which prevents cracking and peeling. Alkyd or oil-based paints tend to become brittle in extreme cold and crack within a couple of seasons on Winnipeg homes. Surface preparation also matters more here than in gentler climates. Any moisture trapped under paint will freeze, expand, and lift the coating off the wall. Before any exterior paint Winnipeg job starts, surfaces must be clean, dry, and free of peeling layers. Skipping prep is the number one cause of early paint failure on local homes. For related reading on choosing a qualified professional, check out this post on best exterior painters near me in Winnipeg. When Is the Best Time for Exterior Paint Winnipeg Work? Timing is critical for any exterior paint Winnipeg project. Paint manufacturers require surface temperatures between 10°C and 29°C for proper adhesion and curing. In Winnipeg, that window lands squarely between late May and early September. The sweet spot is July and August. Days are long, humidity is moderate, and temperatures stay consistently warm enough for paint to dry and bond correctly. Early May and late September are borderline months where cold nights can undo a good daytime application. Seasonal Overview for Exterior Painting in Winnipeg Planning your exterior paint Winnipeg project for the correct window means your paint bonds properly, cures fully, and delivers the years of protection it was designed for. Winnipeg Exterior Painting Season Guide Month Temperature Range Suitable for Painting? Notes May 5°C to 20°C Sometimes Watch for cool nights June 10°C to 25°C Yes Check overnight temps July 18°C to 32°C Yes – Ideal Best conditions August 16°C to 30°C Yes – Ideal Best conditions September 8°C to 22°C Early weeks only Deteriorates fast October 2°C to 12°C No Too cold for curing What Exterior Colours Work Best for Winnipeg Homes? Colour selection for exterior paint Winnipeg jobs goes beyond personal taste. Winnipeg’s intense UV exposure during summer can fade certain pigments faster. Dark colours also absorb more heat, which increases thermal expansion on siding and trim. That said, colour still plays a huge role in curb appeal and perceived value. Homes painted in timeless, neutral palettes tend to feel more upscale and photograph better for listings. Here are colour approaches that work well in Winnipeg’s conditions: For more inspiration on exterior colour choices and how they affect a home’s appeal, see our post on the best approach to exterior painting for house projects. How Long Does Exterior Paint Last in Winnipeg? Durability expectations for exterior paint Winnipeg projects depend on several factors: paint quality, surface prep, number of coats, and how well the home is maintained afterward. A professional-grade 100% acrylic latex paint applied over properly prepared surfaces typically lasts 8 to 12 years in Winnipeg’s climate. Budget-grade paints or single-coat applications may start showing wear in 4 to 6 years. Certain premium paint lines marketed as lasting 25 years are formulated for durability, but that claim assumes ideal conditions, consistent maintenance, and a professional application. In Winnipeg’s freeze-thaw environment, 15 to 20 years is a realistic expectation for premium products applied correctly. Exterior Paint Longevity by Quality Tier Paint Tier Expected Lifespan (Winnipeg) Key Factors Budget Grade 4 to 6 years Fewer solids, less flex Mid-Range 7 to 10 years Good coverage, decent durability Premium / Professional 12 to 20 years High solids, full acrylic flex To get the most from any exterior paint Winnipeg investment, apply two full coats over a quality primer, start with clean and dry surfaces, and recheck caulking and trim every few years to catch early moisture entry points. Things To Know Before Starting an Exterior Paint Winnipeg Project Whether you plan to paint yourself or hire a professional for your exterior paint Winnipeg job, these key points save time, money, and frustration: If your home has siding or stucco that needs work beyond paint, take a look at our article on the benefits of professional siding and stucco painting services for more guidance. Should You Hire a Professional for Exterior Paint Winnipeg Work? Many Winnipeg homeowners attempt exterior paint Winnipeg work themselves to save money. For small, single-storey homes in good condition, a confident DIYer can get good results. However, most two-storey homes, stucco surfaces, and homes with significant peeling or moisture damage benefit from a professional crew. Professionals bring the right ladders, spray equipment, and surface prep knowledge that most homeowners do not have on hand. They also know how to read the weather and schedule work around Winnipeg’s unpredictable spring and fall conditions. True Coat is a licensed and insured painting company serving Winnipeg’s residential and commercial clients. If you are planning an exterior paint Winnipeg project and want an accurate estimate, reach out through the True Coat services page to get a free quote.
What Are the Best Exterior Paint Ideas for Home?
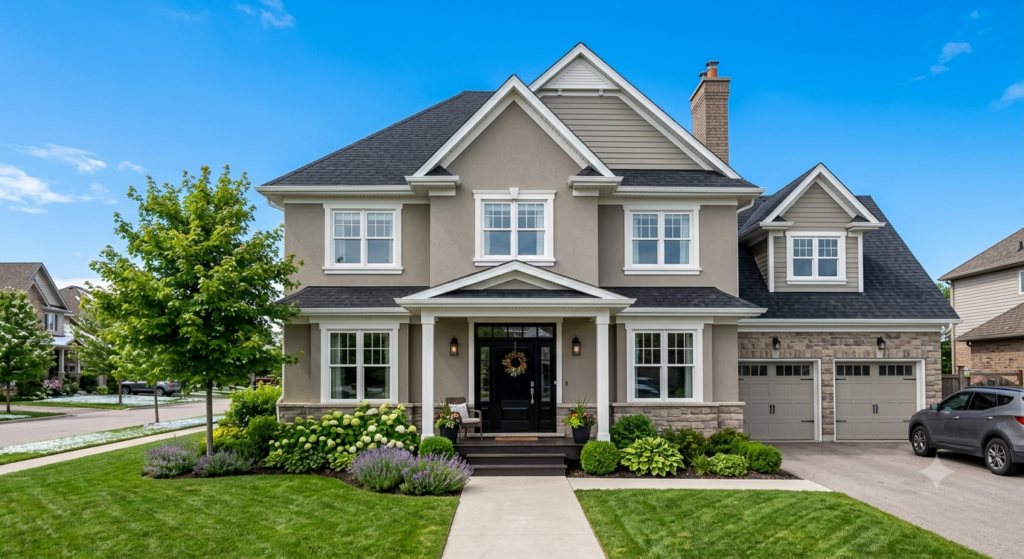
Exterior paint ideas for home can completely change how your property looks from the street. The right colour, finish, and technique not only boost curb appeal but also protect your home against Manitoba’s harsh winters and seasonal shifts. Whether you are working with brick, stucco, siding, or wood, there are exterior paint ideas for home that suit every style and budget. Timeless neutrals like warm whites and greiges continue to top the charts, while bold navy and forest green are gaining momentum in 2026. Choosing the best combination means looking at your home’s architecture, your neighbourhood, and how the colour holds up over time. Matte and low-sheen finishes work best on textured surfaces, while satin and semi-gloss perform on trim and doors. What Are Exterior Paint Ideas for Home and Why Do They Matter? Exterior paint ideas for home go beyond picking a favourite colour from a swatch. Paint is one of the most cost-effective ways to add value to a property, improve weather resistance, and express personal style. For Canadian homes, a quality exterior finish also acts as the first line of defence against moisture, UV rays, and freeze-thaw cycles that can cause cracking, peeling, and wood rot over time. A thoughtfully chosen colour scheme tells a story about the home before anyone steps inside. Light colours reflect heat and make smaller homes feel larger. Darker shades add drama and depth to larger properties. Trim colours, door accents, and shutter tones all work together to create a cohesive look that feels intentional rather than random. Thinking through exterior paint ideas for home as a full palette, not just a wall colour, is what separates a polished result from a forgettable one. Popular Exterior Paint Ideas for Home by Style Not every exterior paint idea suits every home. The architecture of your property plays a big role in which colours and finishes look right. Here is a breakdown of the most popular exterior paint ideas for home by house style: Classic and Traditional Homes White, cream, and soft grey tones are the gold standard for traditional exterior paint ideas for home. These colours never go out of style and pair beautifully with black, dark green, or burgundy trim. A white body with black shutters and a red front door is one of the most timeless exterior paint ideas for home available. Warm beige and taupe also complement brick accents common in older Canadian builds. Modern and Contemporary Homes Clean lines and flat surfaces call for bold, modern exterior paint ideas for home. Charcoal grey, deep navy, and warm black are top picks for modern builds. These colours look sharp with natural wood accents, metal railings, and large windows. A monochromatic approach, where the walls, trim, and eaves are all in the same colour family, is a strong exterior paint idea for home if you want a sleek, current aesthetic. Farmhouse and Cottage Styles Sage green, dusty blue, and warm barn red rank among the most beloved exterior paint ideas for home with a farmhouse or cottage character. Pairing a soft green body with white board-and-batten trim or a dusty blue siding with cream accents creates a relaxed, welcoming look. Wrap-around porch details can be highlighted with a contrasting trim colour to add visual interest. Exterior Paint Ideas for Home: Colour Pairing Guide Choosing a colour combination is easier when you have a reference point. Below are some of the most reliable exterior paint ideas for home pairings that work across Canadian climates and home styles. Wall Colour Trim Colour Door Accent Best For Warm White Crisp White Black Traditional & Colonial Greige (Grey-Beige) White Navy Blue Transitional Homes Charcoal Grey White Yellow or Red Modern & Contemporary Sage Green Cream Black or Bronze Farmhouse & Cottage Navy Blue White Brass or Copper Coastal & Heritage Styles Warm Taupe White Forest Green Craftsman & Bungalows How to Choose the Right Finish for Exterior Paint Ideas for Home Colour is only half the decision. The finish you pick for exterior paint ideas for home determines how the colour looks in different light conditions, how well it holds up, and how easy it is to clean. Here is what each finish level offers: For most exterior paint ideas for home in Manitoba, satin on the main body and semi-gloss on all trim is the most practical and durable combination. It handles temperature swings well and keeps its appearance through multiple seasons. Things to Know Before Trying Exterior Paint Ideas for Home Before committing to any of these exterior paint ideas for home, there are a few important factors every Canadian homeowner should keep in mind: What Are the Trending Exterior Paint Ideas for Home in 2026? Exterior paint ideas for home keep evolving, and 2026 is bringing some strong direction. Warm, earthy palettes are dominating, moving away from the cool greys that dominated the previous decade. Here is what is trending this year: Trending vs. Timeless: Exterior Paint Ideas for Home Compared Colour Category Trending in 2026 Timeless Classic Best Finish White/Off-White Warm Cream Crisp White Satin Green Forest/Olive Green Sage Green Satin Blue Ink Navy Slate Blue Satin Neutral Warm Greige Classic Taupe Satin Accent/Door Terracotta Black or Red Semi-Gloss or Gloss Practical Tips for Applying Exterior Paint Ideas for Home Getting the colours right is the starting point, but execution is what delivers a lasting result. Here are practical tips to make your exterior paint ideas for home work in the real world. For help with the actual painting, explore exterior painting services available for Winnipeg homeowners. If you want to see what professional results look like, take a look at exterior painting projects in Winnipeg for inspiration before making your final colour decision. Get Professional Help With Exterior Paint Ideas for Home Planning exterior paint ideas for home is one thing. Executing them properly on a Canadian home with complex surfaces, varying textures, and challenging weather windows is another. True Coat is a licensed and insured painting company in
What Kind of Paint Works Best for Exterior Paint Stucco Surfaces?
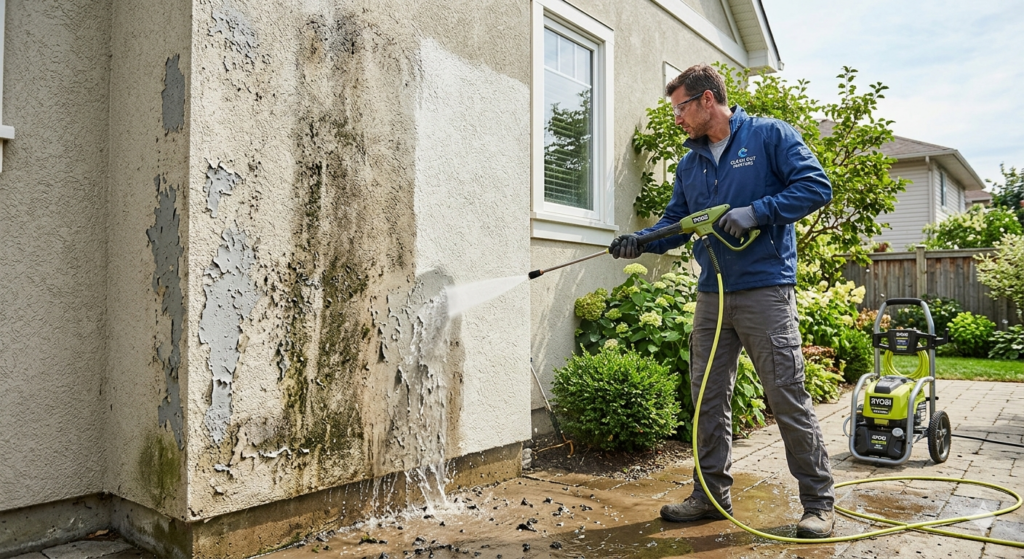
Exterior paint stucco surfaces require a specific type of paint that can handle the texture, porosity, and movement of the material. The best choice is elastomeric or masonry-grade paint, which bonds tightly, fills small cracks, and holds up against Canadian weather year-round. Choosing the wrong product leads to peeling, bubbling, and moisture damage within just a few seasons. Proper surface prep matters just as much as the paint itself, including cleaning, priming, and sealing any cracks before application. Latex-based exterior paint stucco formulas are the most popular because they breathe, stay flexible, and resist fading. Whether you are repainting an old stucco home or freshening up a newly textured commercial building, picking the right exterior paint stucco product and applying it correctly will give you a finish that lasts. What Makes Exterior Paint Stucco Different from Regular Paint? Stucco is a thick, textured surface made from cement, sand, and water. It is porous, meaning it absorbs liquids quickly and holds moisture if not properly sealed. Regular interior or all-purpose paints are not built for that kind of surface. Exterior paint stucco formulas are designed with higher solids content, better elasticity, and stronger adhesion so they can grip the rough texture and stay in place through freeze-thaw cycles. When temperatures drop in Winnipeg, stucco expands and contracts. A standard exterior paint may crack along with it. Elastomeric exterior paint stucco products stretch with the surface instead of splitting, which is why they are widely recommended for homes in colder climates. You also need a paint that prevents moisture from getting trapped behind the surface, which can cause damage from the inside out. Which Types of Paint Are Best for Exterior Paint Stucco? Not every can on the shelf is suitable for exterior paint stucco. There are three main categories worth knowing before you buy. Elastomeric Paint Elastomeric paint is the top recommendation for exterior paint stucco in Canada. It has a thick, rubber-like consistency that fills hairline cracks as it dries. It forms a waterproof barrier while still allowing the surface to breathe. This flexibility makes it ideal for stucco that shifts slightly with seasonal changes. One coat of elastomeric exterior paint stucco typically provides better coverage than two coats of standard masonry paint. Masonry and Latex-Based Paint Masonry paint is a reliable and widely available option for exterior paint stucco. It bonds well to porous cement-based surfaces and comes in a wide range of finishes. Latex-based masonry paints dry faster, are easier to clean up, and carry fewer fumes than oil-based alternatives. They also allow some moisture vapour to pass through, which is critical for stucco that may have trapped humidity underneath. If your stucco is in good condition with no major cracks, a high-quality latex exterior paint stucco product is a practical and cost-effective choice. Acrylic Paint 100% acrylic paint performs well on exterior paint stucco because it adheres tightly to rough surfaces and resists UV fading better than other types. Acrylic formulas stay vibrant longer and hold their colour through years of sun exposure. They also dry to a hard, durable finish that resists dirt and moisture. Acrylic exterior paint stucco is a solid mid-range option between standard masonry paint and premium elastomeric coatings. Comparing Paint Types for Exterior Paint Stucco Here is a straightforward comparison to help you choose the right product for your stucco surface: Paint Type Best For Key Benefit Durability Elastomeric Cracked or aging stucco Fills cracks, waterproof 10 to 15 years Masonry Latex Good condition stucco Breathable, easy to apply 7 to 10 years 100% Acrylic New stucco or repaints UV resistant, strong colour 8 to 12 years Oil-Based Not recommended for stucco Low breathability Less than 5 years How to Prepare Exterior Paint Stucco Before Painting Preparation is the most important part of any exterior paint stucco project. Skipping this step is the leading reason paint fails early on stucco surfaces. If your exterior paint stucco project involves repainting over an old coat, check whether the existing paint is peeling or chalking. Chalky paint must be removed or treated with a bonding primer before applying a new coat of exterior paint stucco. Painting over loose or peeling layers is a common mistake that causes the new coat to fail along with the old one. Things to Know Before Painting Exterior Paint Stucco Before you start your exterior paint stucco project, there are a few practical points that can save you time, money, and frustration. Why Choosing the Right Exterior Paint Stucco Product Matters The wrong product does more than look bad. It allows water to get behind the stucco layer, which can lead to mould growth, structural damage, and costly repairs. In Manitoba, where winters are long and freeze-thaw cycles are frequent, the stakes for using the right exterior paint stucco formula are high. Elastomeric exterior paint stucco protects against moisture infiltration better than any other type. Its thick coating seals the surface while remaining flexible enough to move with the stucco through temperature changes. Latex and acrylic options work well on stucco in better condition but may require more frequent repainting compared to elastomeric coatings. If you are unsure which product is right for your home, a professional assessment can help. Experienced painters know how to identify the condition of your stucco, choose the appropriate exterior paint stucco product, and apply it in a way that maximises the lifespan of the finish. You can learn more about professional exterior painting services or explore related topics like siding and stucco painting services for a closer look at what professional work involves. Exterior Paint Stucco: Application Method Comparison Choosing how you apply exterior paint stucco affects coverage, finish quality, and time on the job. Application Method Coverage Best For Skill Level Paint Sprayer Fast, even Large stucco surfaces Intermediate Thick-Nap Roller Good penetration Mid-size walls, back-rolling Beginner Paintbrush Slow, detailed Trim edges and repairs Beginner Sprayer + Roller Best overall Full exterior stucco jobs Intermediate Related Reading on Exterior Painting in Winnipeg
How Do You Choose the Best Exterior Painting Companies Near Me?
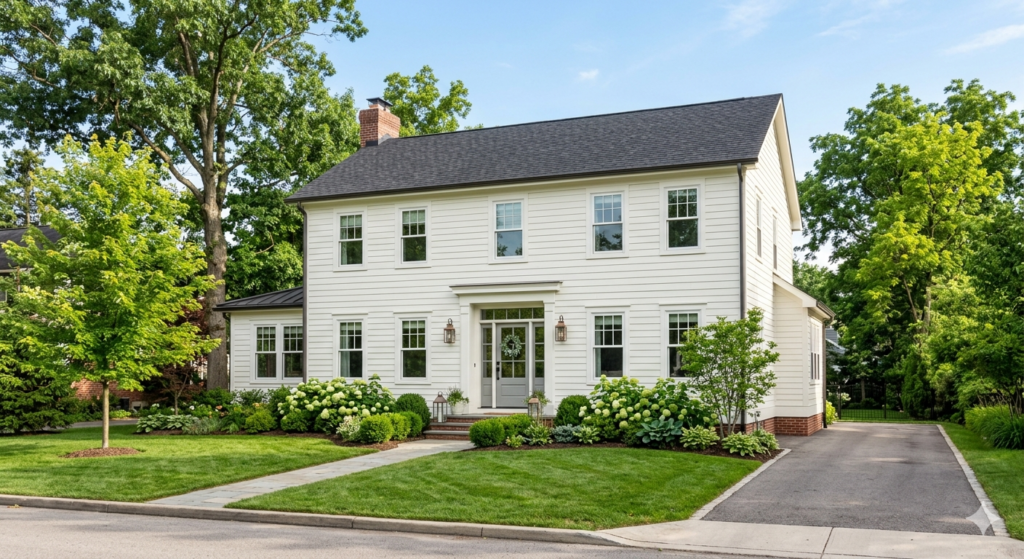
When searching for exterior painting companies near me, the best ones are licensed, insured, experienced with local weather conditions, and transparent about their process and pricing. Choosing the right exterior painting companies near me means looking at their credentials, past work, surface prep methods, and the quality of materials they use. Exterior paint does more than improve the look of your home. It acts as a protective barrier against moisture, temperature changes, and UV damage. In a place like Winnipeg, where winters are harsh and summers bring intense sun, working with exterior painting companies near me that understand local climate conditions is critical. The right team can extend the life of your paint job by years and save you from costly repairs down the road. From what to look for in a contractor to red flags to avoid and the smartest questions to ask before signing anything, this piece covers what every homeowner in Winnipeg needs to know before hiring exterior painting companies near me. What Do Exterior Painting Companies Near Me Actually Do? Exterior painting companies near me handle much more than just applying paint to walls. A professional job involves a full process that starts well before a brush ever touches your siding. Most exterior painting companies near me will begin with a detailed inspection of the surface. This includes checking for peeling, cracking, moisture damage, or rot that needs to be addressed before painting. Skipping this step is one of the biggest reasons exterior paint jobs fail early. After the inspection comes surface preparation, which typically includes power washing to remove dirt, mildew, and old loose paint. Gaps or cracks are caulked, and bare wood or metal may need a primer coat before the topcoat goes on. Only after all of this is done does the actual painting begin. Exterior painting companies near me also advise on colour selection, sheen levels, and the type of paint that holds up best in your area. In Winnipeg, elastomeric or 100% acrylic latex paints are often recommended because they flex with temperature changes and resist moisture better than cheaper options. How Do You Find Exterior Painting Companies Near Me That Are Trustworthy? The market for exterior painting companies near me is competitive, and not every contractor delivers the same level of quality. Here is how to narrow down your choices to the ones worth trusting. Check for Licensing and Insurance Any exterior painting companies near me worth considering should carry general liability insurance and Workers Compensation coverage. This protects you if something goes wrong on your property. Ask for proof of both before any work begins. Look at Their Portfolio Reputable exterior painting companies near me will have a portfolio of completed projects. Look for work done on homes similar to yours in style, material, and size. Before-and-after photos give you a realistic idea of what to expect. Read Reviews and Ask for References Online reviews on Google or local directories give you honest feedback from past clients. Strong exterior painting companies near me will also be willing to provide references you can contact directly. A quick call to a past customer can tell you more than any website. Ask About Their Prep Process The difference between a paint job that lasts five years and one that lasts fifteen often comes down to preparation. Ask exterior painting companies near me exactly how they prep surfaces before painting. If they skip the pressure wash or skip priming, that is a red flag. Get Multiple Quotes Comparing quotes from exterior painting companies near me helps you understand fair market pricing and spot bids that seem unusually low. A low quote often means corners are being cut on prep, paint quality, or labour. Table 1: What to Ask Exterior Painting Companies Near Me Before Hiring Question to Ask Why It Matters Are you licensed and insured? Protects you from liability if damage or injury occurs on site What surface prep do you do? Prep quality determines how long the paint job lasts What paint brands do you use? Premium paints outperform budget options in durability Do you offer a warranty? A written warranty shows confidence in their workmanship Can I see past project photos? Visual proof of quality and experience on similar homes How long will the project take? Helps you plan and sets clear expectations for the timeline What Makes Exterior Painting Companies Near Me Stand Out? Not all exterior painting companies near me operate the same way. The ones that consistently deliver top results share a few qualities that separate them from average contractors. First, they use high-quality paint from reputable manufacturers. Premium exterior paints contain better pigments, higher resin content, and additives that resist fading, mildew, and moisture. This matters especially in climates like Winnipeg where paint faces extreme seasonal shifts. Second, the best exterior painting companies near me employ experienced crews who understand how to work with different surfaces, from wood siding and stucco to brick and vinyl. Each material requires a slightly different approach, and experience makes that difference visible in the final result. Third, reliable exterior painting companies near me provide a written warranty on their work. A two to three year craftsmanship warranty is a reasonable minimum. If a contractor cannot commit to standing behind their work in writing, look elsewhere. You can also check out work done on homes similar to yours. Browse through completed projects from local painters on their website or ask your neighbours who they used. Word of mouth in your own neighbourhood carries significant weight when choosing exterior painting companies near me. Explore professional exterior painting services in Winnipeg to see what a full-service job looks like from start to finish. What Should You Know About Exterior Paint Before Hiring? Having some basic knowledge before talking to exterior painting companies near me puts you in a stronger position during the hiring process. You will ask better questions and be less likely to accept shortcuts. Exterior paint is formulated differently from
What Is the Best Exterior Paint for Stucco?
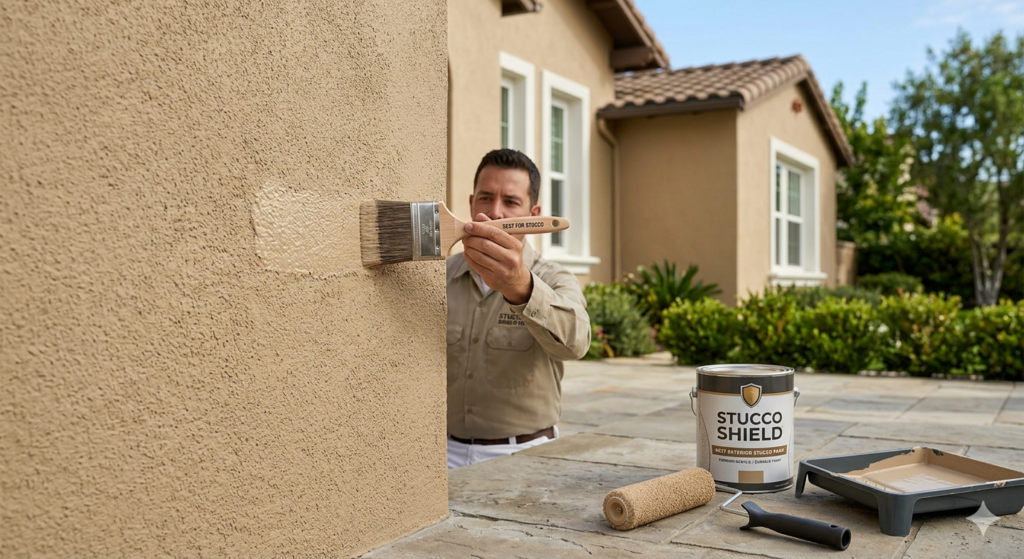
The best exterior paint for stucco is 100% acrylic paint because it flexes with the surface, resists cracking, and allows trapped moisture to escape. Elastomeric coatings work well for stucco with hairline cracks, while mineral silicate paint suits older or historic stucco that needs to breathe. Picking the right exterior paint for stucco protects the wall from Winnipeg’s freeze-thaw cycles and keeps the finish looking fresh for years. Stucco is a porous, textured surface that behaves differently from wood or vinyl siding, so not every paint formula holds up on it. A good exterior paint for stucco needs to stretch slightly as the wall expands and contracts with temperature changes, while also letting moisture pass through instead of trapping it inside. The wrong product can peel, blister, or trap water that damages the stucco from within. The right one, paired with proper prep and a breathable finish, can protect a home for a decade or longer. Why Stucco Needs a Different Type of Exterior Paint Stucco is made from cement, sand, and lime, which makes it porous and slightly absorbent compared to wood or metal siding. Because of this texture, exterior paint for stucco has to do more than just look good. It needs to manage moisture, handle small surface movements, and stand up to the grit of the textured finish without wearing thin in just a few years. Regular paint made for smooth surfaces can crack on stucco because it doesn’t stretch with the tiny shifts that happen as temperatures rise and fall. Winnipeg’s harsh winters and humid summers put extra strain on exterior walls, so the paint film needs enough flexibility to avoid splitting along hairline cracks. At the same time, stucco can hold moisture inside its pores, and a paint film that’s too thick or non-breathable can trap that water, leading to bubbling, peeling, or even mold growth behind the surface. This is why exterior paint for stucco is usually formulated with higher elasticity and better vapor permeability than standard wall paint. Choosing a product built for masonry surfaces, rather than a generic all-purpose paint, makes a measurable difference in how long the finish lasts. How to Choose the Best Exterior Paint for Stucco Choosing exterior paint for stucco comes down to matching the paint type to the condition of your walls, your climate, and how much maintenance you’re willing to do. Each option below has strengths suited to different situations, so the best choice depends on what your stucco needs most. Acrylic Paint for Stucco Acrylic paint is the most common exterior paint for stucco because it strikes a good balance between flexibility, breathability, and cost. It expands and contracts along with the stucco as seasonal temperatures shift, which helps prevent the fine cracking that rigid paints are prone to. Acrylic formulas also allow some water vapor to pass through the film, reducing the risk of trapped moisture. Most 100% acrylic exterior paints come in a range of finishes and colors, and they’re widely available at paint retailers. They typically last eight to twelve years when applied correctly over properly prepared stucco. For homeowners who want reliable performance without paying for specialty coatings, acrylic is usually the starting point. Elastomeric Coatings Elastomeric coatings are thicker than standard acrylic exterior paint for stucco and stretch significantly more, which makes them useful for walls with existing hairline cracks. The coating can bridge small gaps in the surface, filling minor imperfections while still flexing with the wall. These coatings tend to be more expensive and require careful application since they go on thicker than regular paint. They also reduce breathability more than standard acrylic, so they work best on stucco that’s already dry and in reasonably good shape, rather than walls with ongoing moisture problems. Mineral Silicate Paint Mineral silicate paint is a specialty option that chemically bonds with the mineral components in stucco rather than just sitting on top of it as a film. This creates a finish that breathes exceptionally well, making it a strong choice for older or historic stucco homes where moisture management is critical. Silicate paint costs more upfront and isn’t as widely stocked as acrylic, but it can outlast standard exterior paint for stucco by many years when applied on suitable surfaces. It’s worth asking a painting contractor whether your stucco’s age and condition make it a good candidate for this option. Comparing the Main Paint Types Paint Type Best For Breathability Typical Lifespan 100% Acrylic General use, most stucco walls Good 8–12 years Elastomeric Stucco with hairline cracks Moderate 10–15 years Mineral Silicate Older or historic stucco Excellent 20+ years Which Paint Finish Works Best on Stucco The right finish matters just as much as the paint type when choosing exterior paint for stucco. Because stucco already has texture built into the surface, the sheen level affects how that texture reads and how easily dirt or stains show up over time. Flat or matte finishes are the most popular choice for stucco because they hide surface imperfections well and give a soft, natural look that suits the material’s texture. They don’t reflect much light, which helps minor flaws blend in rather than stand out. Low-sheen or satin finishes offer a bit more durability and are slightly easier to wipe clean, though they can highlight texture more than a flat finish would. Glossy finishes are rarely recommended for stucco since they tend to emphasize every bump and ridge in the surface, making the wall look uneven rather than smooth. For most homes, a flat or low-sheen exterior paint for stucco strikes the right balance between appearance and practicality. How to Prepare Stucco Before Painting Preparation has a bigger impact on how long exterior paint for stucco lasts than the paint brand itself. Skipping steps here is the most common reason a paint job fails early, regardless of how good the product is. Cleaning the Surface Stucco collects dust, pollen, and mildew in its textured surface, so a thorough wash is the first
What Is the Best Exterior Paint Primer for Wood?
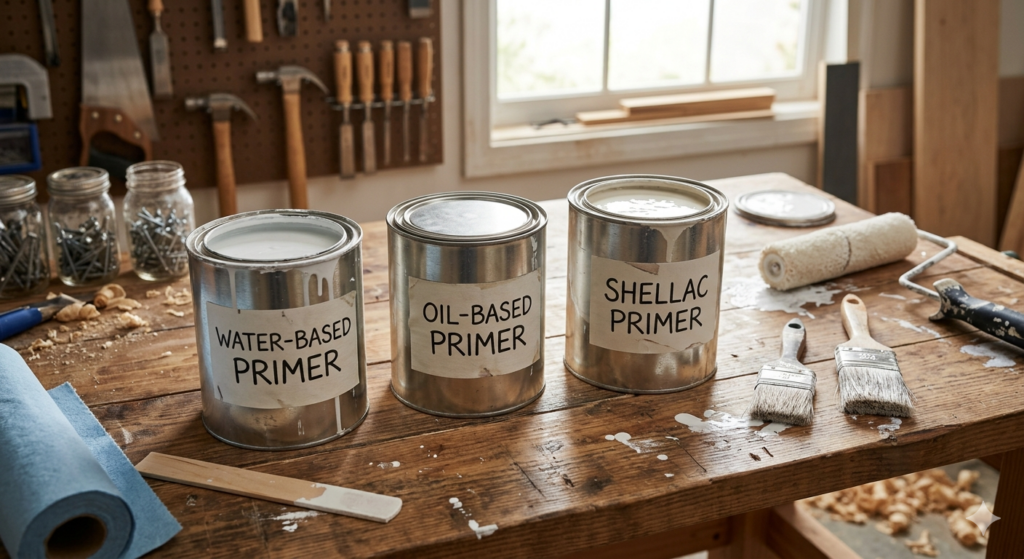
Exterior paint primer for wood is the layer applied before paint that seals the surface, blocks stains, and helps the topcoat stick properly. Oil-based primers work best on bare wood, raw cedar, and surfaces with tannin staining, while water-based acrylic primers suit previously painted wood and offer faster drying with easier cleanup. Choosing the right exterior paint primer for wood depends on the wood type, its condition, and the climate it will face. Why Exterior Paint Primer for Wood Matters Wood is a porous material that absorbs moisture, expands, and contracts with temperature changes. Without a proper exterior paint primer for wood, paint can peel, crack, or fade much faster because it has nothing to bond to evenly. Primer creates a stable base layer that paint can grip onto, which extends the life of the finish significantly. Bare wood also contains natural oils and tannins, especially in cedar and redwood, that can bleed through paint and cause yellow or brown stains. An exterior paint primer for wood with stain-blocking properties stops this discoloration before it starts. Primer also fills small pores and rough fibers in the wood, giving the topcoat a smoother surface to land on. Another reason exterior paint primer for wood is important is moisture protection. Untreated or unprimed wood absorbs rain and humidity, which can lead to swelling, warping, or even rot over time. A quality primer acts as a moisture barrier, sealing the wood before the paint goes on. Do You Need Primer Before Painting Exterior Wood? In most cases, yes. Bare or new wood almost always needs an exterior paint primer for wood because untreated surfaces absorb paint unevenly, leading to blotchy results and poor durability. If you’re working with wood that has never been painted, skipping primer often means the topcoat will fail within a year or two. There are situations where primer may not be strictly required. If the existing painted surface is in good condition, clean, and the new paint is the same type and similar color, a fresh coat of paint alone might be enough. However, even in these cases, applying exterior paint primer for wood to any bare spots, repairs, or sanded areas is still recommended for an even finish. Old wood that has been painted multiple times, has chalky residue, or shows signs of peeling will benefit from primer because it helps the new paint adhere to a clean, stable layer rather than fighting against old, deteriorating paint. When Primer Is Necessary When Primer May Be Skipped Types of Exterior Paint Primer for Wood There are three main categories of exterior paint primer for wood, and each one serves a different purpose depending on the wood’s condition and the climate. Oil-Based Primer: Oil-based exterior paint primer for wood is known for its strong stain-blocking ability. It penetrates deep into the wood grain, seals knots and tannins, and creates a hard, durable surface. This type works particularly well on cedar, redwood, and other woods prone to bleeding through paint. The downside is a longer drying time and the need for mineral spirits during cleanup. Water-Based Acrylic Primer: Acrylic exterior paint primer for wood dries quickly, has low odor, and remains flexible after curing, which helps it handle the expansion and contraction of wood in changing weather. It is easier to clean up with soap and water and is a good choice for previously painted surfaces or wood that does not have heavy tannin issues. Shellac-Based Primer: Shellac primers are excellent for blocking severe stains, including water damage and smoke stains, but they are less commonly used for general exterior wood priming because of strong fumes and limited flexibility outdoors. Below is a quick comparison to help decide which exterior paint primer for wood fits a specific project. Primer Type Best For Drying Time Stain Blocking Oil-Based Bare wood, cedar, tannin-prone surfaces 8-24 hours Excellent Water-Based Acrylic Previously painted wood, general surfaces 1-2 hours Good Shellac-Based Severe stains, water damage spots 30-60 minutes Outstanding How to Apply Exterior Paint Primer for Wood Correctly Applying exterior paint primer for wood properly makes a noticeable difference in how long the finished paint job lasts. Here is a practical breakdown of the process from start to finish. Step 1: Clean the Surface Remove dirt, dust, mildew, and loose debris from the wood before priming. A pressure washer on a low setting or a stiff brush with mild soap and water works well. Let the surface dry completely, ideally for 24 to 48 hours, before moving forward. Step 2: Sand and Repair Sand any rough spots, peeling paint, or uneven areas to create a smooth base. Fill cracks, holes, or gaps with exterior-grade wood filler and sand it flush once dry. This step ensures the exterior paint primer for wood adheres evenly across the whole surface. Step 3: Apply Primer Use a brush, roller, or sprayer depending on the size of the area. Apply a thin, even coat of exterior paint primer for wood, working in the direction of the wood grain. Avoid heavy application, which can lead to drips and uneven drying. Step 4: Let It Cure Follow the drying time listed on the product label. Oil-based primers typically need longer to cure than water-based options. Painting over primer before it fully cures can cause adhesion problems. Step 5: Inspect Before Painting Check for missed spots, especially around edges, corners, and knots. Touch up any thin areas with a second coat of exterior paint primer for wood before applying the topcoat. Choosing the Best Exterior Paint Primer for Wood by Project Type Different parts of a home’s exterior face different challenges, so the right exterior paint primer for wood can vary by location. Siding: Large surface areas benefit from acrylic primers for ease of application, unless the siding is cedar or has visible knots, in which case an oil-based exterior paint primer for wood is the stronger choice for stain blocking. Trim and Fascia: These areas are often made from softer woods and
Painting Interior Doors – How to Do It the Right Way
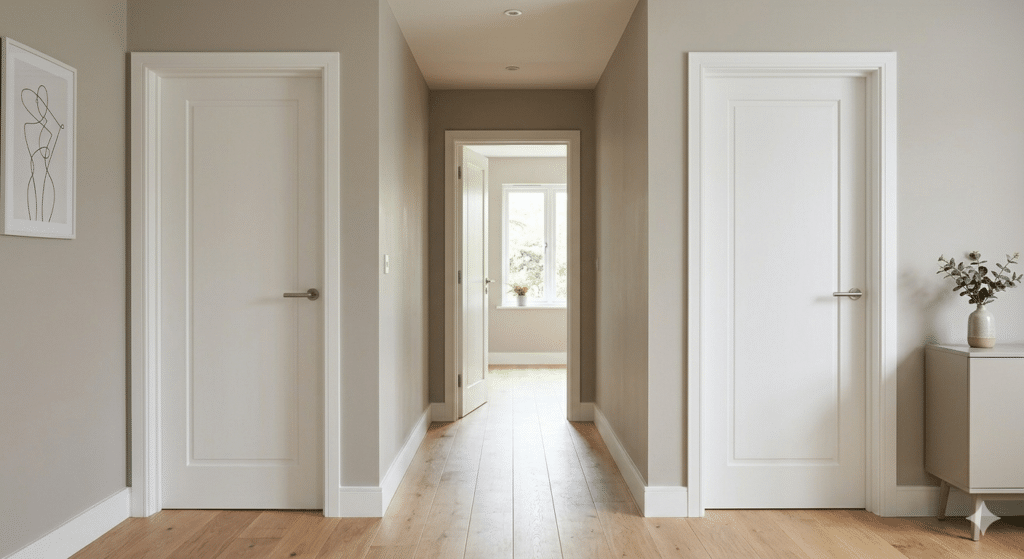
Painting interior doors the right way comes down to proper prep, the correct primer, and applying thin, even coats with the right tool for your finish. Most homeowners can refresh a door in a single weekend if they remove hardware, sand the surface, fill any dings, and let each coat dry fully before adding the next. A small foam roller works well for flat panels, while a brush handles corners and panel edges, and spraying gives the smoothest factory-like result if you have the setup for it. Semi-gloss or satin finishes are the most popular choices because they resist fingerprints and are easy to wipe clean. Painting interior doors also gives a quick, affordable way to update the look of a hallway, bedroom, or living space without a full renovation. Whether you tackle one door or every door in the house, following the right steps makes painting interior doors a simple project with a professional-looking outcome. Why Painting Interior Doors Makes Such a Big Difference Interior doors take a lot of daily wear. Hands touch them constantly, shoes sometimes scuff the bottom, and over the years the paint can turn dull or chipped. Painting interior doors is one of the ways to make a room feel fresher without spending money on new doors. A freshly painted door can truly unify a room’s design. When walls are recently updated but doors remain with old, yellowed paint, the contrast can make the space feel incomplete. Painting interior doors to complement your trim or wall color results in a polished, cohesive appearance. Beyond enhancing aesthetics, painting interior doors provides an extra layer of protection. Using a high-quality paint and primer combination effectively seals the wood or MDF surface, increasing its resistance to moisture, stains, and daily wear and tear. How to Prepare Doors Before Painting Preparation is the most important part of painting interior doors. Skipping this step is the main reason paint jobs look uneven or start peeling within months. Removing Hardware and Cleaning the Surface Start by removing doorknobs, hinges, and any other hardware you can take off. This keeps paint from getting on metal parts and gives you a cleaner edge. If hinges cannot be removed easily, cover them with painter’s tape. Next, clean the door with a mild soap and water solution to remove dust, grease, and fingerprints. Kitchen and bathroom doors often have grease buildup near the handle area, so give those spots extra attention. Let the door dry completely before moving to the next step. Sanding and Filling Imperfections Lightly sand the entire door with fine-grit sandpaper to rough up the existing finish so the new paint can grip properly. This step matters even if the door looks smooth, since glossy old paint can cause new paint to slide off or peel later. Fill any dents, holes, or scratches with wood filler. Once dry, sand the filled areas until they are flush with the surrounding surface. Wipe away all dust with a damp cloth or tack cloth before painting. What Is the Best Method for Painting Interior Doors? The best method for painting interior doors depends on the tools available and the finish you want. For most homeowners, a combination of a small foam roller and an angled brush gives the best balance of speed and smoothness. A foam roller spreads paint evenly across flat sections of the door without leaving heavy texture. The angled brush is used for corners, panel grooves, and edges where a roller cannot reach. Working in this order, paint the panel details first with the brush, then roll the flat areas, and finally smooth everything with light brush strokes in the direction of the wood grain. For those who want a flawless, showroom-style finish, spraying is the better option. Spraying interior doors requires removing them from their hinges and laying them flat or hanging them in a controlled space, but it eliminates brush marks completely. Method Best For Pros Cons Brush and Roller Most homeowners, doors left on hinges Affordable, easy cleanup, no special equipment Slightly more visible texture Spray Flawless finish, multiple doors at once Smoothest result, fast on flat surfaces Requires removing doors, more setup and overspray control Brush only Small touch ups, panel details Good control on edges and corners Slower, can leave brush marks on large areas Is It Better to Spray or Roll Paint on Doors? Spraying generally gives a smoother finish than rolling, but rolling is more practical for most households. Spraying interior doors requires a dedicated work area, proper ventilation, and time to mask off surrounding surfaces to avoid overspray on walls and floors. Rolling with a quality foam roller, paired with brush work on the details, gets you a finish that looks great once dry and is far more manageable for a single door or a few doors at a time. If you are painting interior doors throughout an entire home and want a consistent factory finish, spraying may be worth the extra setup, especially if the doors can be removed and worked on outside or in a garage. For homeowners who are unsure which approach fits their space, hiring professional house painters can help decide between spraying and rolling based on the number of doors and the desired finish. What Paint Do You Use for Interior Doors? The right paint for painting interior doors is a high-quality acrylic or alkyd-based paint in a satin, semi-gloss, or high-gloss sheen. These sheens are durable, easy to clean, and hold up well against the constant touching and bumping that doors go through daily. Satin finishes offer a soft glow and hide minor imperfections better than glossier options, making them a popular choice for bedroom and hallway doors. Semi-gloss and high-gloss finishes are more reflective and tend to be the top pick for kitchens, bathrooms, and high-traffic entry doors because they resist moisture and are simple to wipe down. Primer also plays a big role. If the door is bare wood, has stains, or is a
How Do You Go About Painting a Metal Door the Right Way?
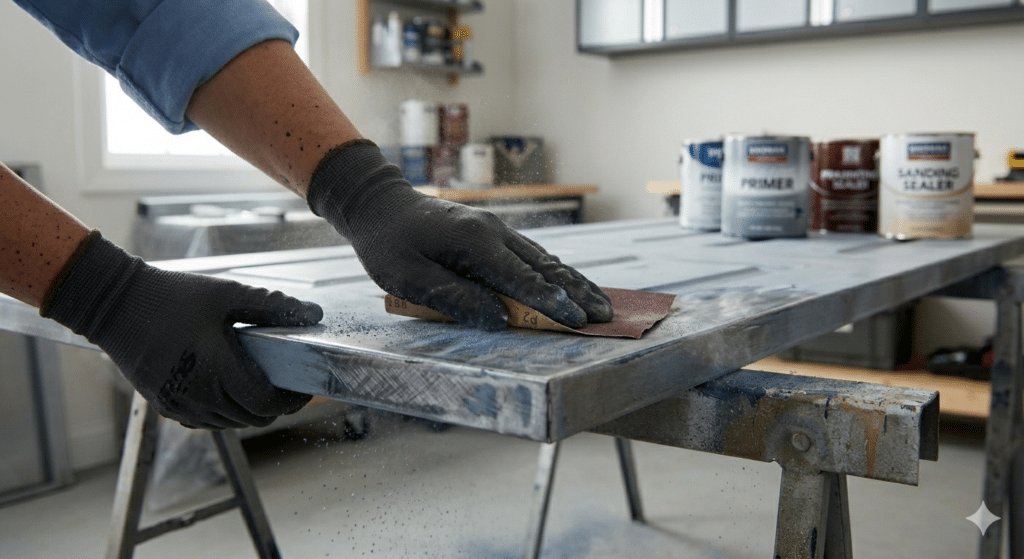
Painting a metal door the right way starts with thorough surface preparation, a rust-inhibiting primer, and the correct type of paint. Done properly, painting a metal door protects the surface from rust, moisture, and daily wear while giving your home a clean, refreshed look. The process involves cleaning, sanding, priming, and applying two thin coats of paint using the right tools. Whether your door is a bold statement colour or a classic neutral, knowing the correct steps ensures a result that holds up through Winnipeg’s harsh seasonal shifts. From choosing the right paint type to picking between a brush and roller, every decision you make affects how long the finish lasts. What Does Painting a Metal Door Actually Involve? Painting a metal door is not as simple as brushing on a coat of wall paint. Metal surfaces do not absorb paint the way wood does, so the finish depends entirely on proper adhesion. That means cleaning the surface, roughing it up with sandpaper, and applying a primer specifically designed for metal before any colour goes on. The full process of painting a metal door covers four key phases: surface preparation, priming, applying paint in thin coats, and allowing adequate curing time. Each phase plays a role in the overall durability of the finish. Rushing through prep work or skipping primer are the two most common reasons paint fails on metal within months. How to Prepare a Metal Door Before Painting Surface preparation is the most important part of painting a metal door. A well-prepped door holds paint far longer than one that was simply wiped down and painted over. Clean the Surface Thoroughly Wipe the door with a damp cloth to remove loose dirt, then follow up with a degreaser or mild detergent to scrub away oil, grime, and fingerprints. Any residue left on the surface will prevent the primer from bonding correctly. Rinse and let the door dry completely before moving forward. Sand the Metal Before Priming Use 120-grit sandpaper to lightly rough up the entire surface. This gives the primer something to grip. If the door has rust spots, address those first with 80-grit sandpaper and treat them with a rust converter before priming. After sanding, wipe away all dust with a tack cloth. Painting a metal door without sanding almost always leads to poor adhesion and early peeling. Remove Hardware and Mask the Surrounding Area Take off door handles, hinges, knockers, and house numbers before you start. Use painter’s tape to cover glass panels and the door frame. Place a drop cloth at the base of the door to protect the threshold. What Kind of Paint Do You Use on a Metal Door? Choosing the right paint is just as important as the prep work when painting a metal door. The most reliable choices are direct-to-metal (DTM) paint or a high-quality exterior latex enamel formulated for metal. These paints bond well with primed metal and flex slightly with temperature changes without cracking or peeling. Interior metal doors do well with water-based enamel paint, which dries hard and resists scuffs. For exterior doors exposed to Winnipeg’s freeze-thaw cycles, look for a paint with weather resistance built into the formula. Avoid standard interior wall paint as it lacks the adhesion strength needed for a durable finish when painting a metal door. Paint Type Best For Key Benefit Direct-to-Metal (DTM) Exterior metal doors Strong adhesion, built-in rust resistance Exterior Latex Enamel Exterior or interior doors Flexible through temperature changes Water-Based Enamel Interior metal doors Hard finish, easy to clean, no yellowing Oil-Based Enamel High-traffic entry doors Extremely durable, self-levelling finish How Do You Paint a Metal Door Step by Step? Apply a Rust-Inhibiting Primer Choose a primer rated for metal and apply it in thin, even strokes using a brush or foam roller. Allow the primer to cure fully, typically two to four hours, before applying any paint. This layer is what gives painting a metal door its lasting adhesion. Apply Two Thin Coats of Paint Start with a foam roller for flat panels and use a brush to cut into recessed areas and edges. Let the first coat dry to the touch before adding the second. Two thin coats always give a more even, durable result than one heavy coat. Allow Full Curing Time After the final coat, leave the door to cure for at least 24 hours before re-hanging hardware or repeatedly opening and closing it. The paint continues to harden for up to 72 hours. Brush or Roller: Which Is Better for Painting a Metal Door? For smooth, flat metal doors, a high-density foam roller gives the best result. It leaves a nearly texture-free surface that looks clean and professional. Brushes can leave stroke marks on large flat panels, which become very visible once the paint dries. If your goal when painting a metal door is a polished, even finish, a foam roller is the better tool for those open sections. For doors with raised panels, recessed grooves, or edge detail, a brush is necessary to work into the corners and ensure full coverage. The most practical approach combines both tools: use a brush to cut in around edges and detailed areas first, then follow with the foam roller across the larger flat sections. Tips for a Streak-Free Finish Things To Know Before Painting a Metal Door Factor What To Know Temperature Do not paint below 10 degrees Celsius or above 30 degrees; paint will not cure properly Humidity High humidity slows drying and can cause blistering in the finish Rust Treatment Treat rust spots with a rust converter before priming; do not paint over active rust Old Paint Condition If existing paint is flaking, strip it fully before repainting Curing Time Allow 24 to 72 hours of curing before heavy use, depending on paint type Number of Coats Always apply at least two coats of paint for even coverage and durability For exterior doors that are part of a larger home refresh, reading about the
Painting a Garage Door: A Step-by-Step Guide
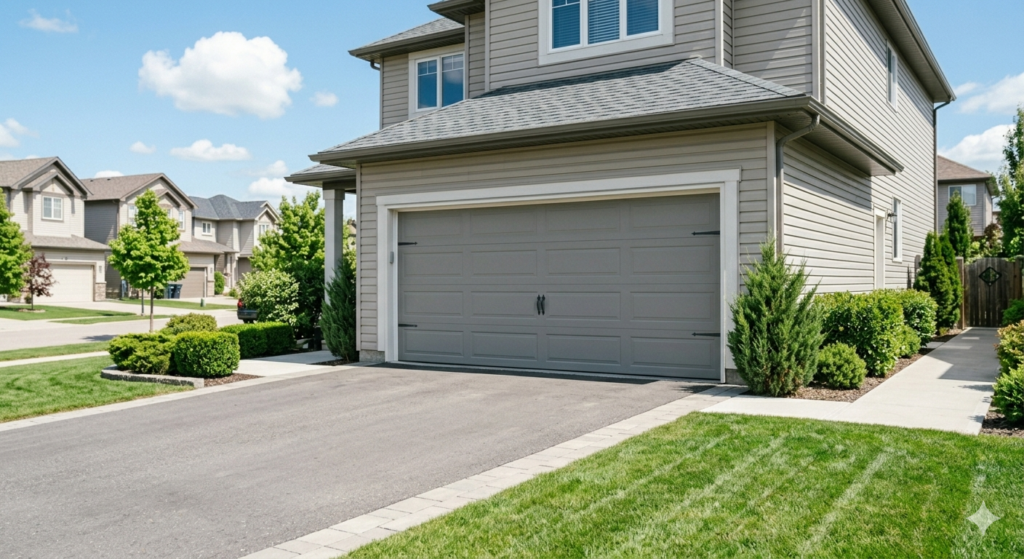
Painting a garage door is one of the easiest ways to refresh your home’s curb appeal and protect the door from weather damage. The process works best when you clean the surface, sand it lightly, apply a primer, and follow up with two coats of exterior-grade paint suited to your door’s material. Whether your door is steel, wood, or fibreglass, the right preparation and paint type make a significant difference in how long the finish lasts. Most homeowners can complete the job over a weekend with the proper tools and a bit of patience. A well-done paint job can hold up for five to seven years before needing a refresh, especially when quality materials are used from the start. How Do You Paint a Garage Door? Painting a garage door follows a straightforward process, but skipping steps often leads to peeling, bubbling, or uneven colour. Here is how to do it the right way from start to finish. Step 1: Clean the Surface. Wash the door with soapy water and a stiff brush to remove dirt and grease. Let it dry fully. Applying paint on a damp surface will cause it to lift early. Step 2: Sand and Scrape. If the existing paint is peeling, scrape it off and sand the area smooth. For a steel door, light sanding with 80 to 120 grit sandpaper helps primer bond properly. Step 3: Tape and Cover. Mask off hardware, windows, and surrounding trim with painter’s tape. Lay drop cloths on the driveway below. Step 4: Apply Primer. Use a primer suited to your door’s material. Rust-inhibiting primer works well on steel. Let it cure before painting a garage door with the topcoat. Step 5: Paint. Apply two thin, even coats of exterior paint. Let the first coat dry fully before the second. Thin coats prevent drips and look more professional. Step 6: Cure. After painting a garage door, wait at least 24 hours before operating it to avoid scratching the fresh finish. What Paint Works Best for Painting a Garage Door? Not all paints are equal, and choosing the wrong type is a common mistake when painting a garage door. The material of your door determines which paint will hold up the longest. Paint Types by Door Material When painting a garage door in a Canadian climate like Winnipeg, pick a paint rated for temperature extremes. Satin and semi-gloss finishes are popular for painting a garage door because they are easy to wipe clean and resist scuffs better than flat finishes. Door Material Best Paint Type Recommended Finish Steel Acrylic Latex Exterior Semi-Gloss or Satin Wood Acrylic Latex or Oil-Based Satin or Semi-Gloss Fibreglass Acrylic Latex Exterior Satin Aluminum Acrylic Latex (with self-etching primer) Semi-Gloss Should You Roll or Spray When Painting a Garage Door? Both methods work, and the right choice depends on your door’s texture, skill level, and the tools you have on hand. Rolling: A foam roller is the most common approach for painting a garage door at home. It delivers even coverage with no overspray risk and works well on flat or slightly textured steel doors. Use a 4-inch foam roller for panels and a brush for tight corners. Spraying: An airless sprayer gives the smoothest finish, especially on raised-panel or textured doors. It requires more masking preparation and more skill to avoid uneven coverage or runs. Brushing: A brush alone works for touch-ups or detail areas but tends to leave stroke marks across large flat surfaces. For most homeowners, rolling is the safer and more forgiving choice when painting a garage door. For a truly professional finish, consider contacting the exterior painting specialists at True Coat for a free estimate. Things to Know Before Painting a Garage Door A few practical details can save you time and money before you start. Surface Condition What to Do Mild surface dirt Clean with soapy water, let dry, then paint Peeling or flaking paint Scrape, sand down, prime, then paint Rust spots on steel door Sand off rust, apply rust-inhibiting primer, then paint Bare wood surface Sand smooth, apply wood primer, then paint Previously painted, good shape Light sand, clean, prime lightly, then repaint How Long Does a Paint Job Last on a Garage Door? When painting a garage door is done properly with good materials, the finish typically lasts five to seven years before showing signs of wear. Winnipeg’s harsh winters, UV exposure, and freeze-thaw cycles put extra stress on exterior surfaces. Using high-quality acrylic latex exterior paint with a proper primer coat gives the finish the best chance at longevity. Lighter shades tend to outlast darker ones on south-facing doors because dark colours absorb more heat, causing the paint to expand and contract faster over time. Washing the door once or twice a year removes grime and road salt that can break down the paint surface. Touching up chips quickly stops moisture from getting underneath and starting larger peeling. If your door’s paint is near the end of its life, reading about how to choose the best house exterior painters can help you decide whether to repaint or replace Get Help With Painting a Garage Door in Winnipeg True Coat is a licensed and fully insured painting and decorating company based in Winnipeg, Manitoba. Their team handles both residential and commercial projects with quality materials, transparent pricing, and a 3-year craftsmanship warranty. If painting a garage door feels like more than you want to tackle yourself, True Coat offers free estimates to get you started. Explore their completed work on the True Coat projects page to see real examples of their exterior painting results. More Exterior and Residential Painting Tips There is more to a home exterior refresh than painting a garage door alone. If you are planning a bigger project, reading about the best approach to exterior painting for house projects is a great place to start. You can also browse residential painting in Winnipeg to learn what homeowners in Winnipeg should know about year-round exterior
What Is a Painting Edger and How Does It Work for Clean Paint Lines?
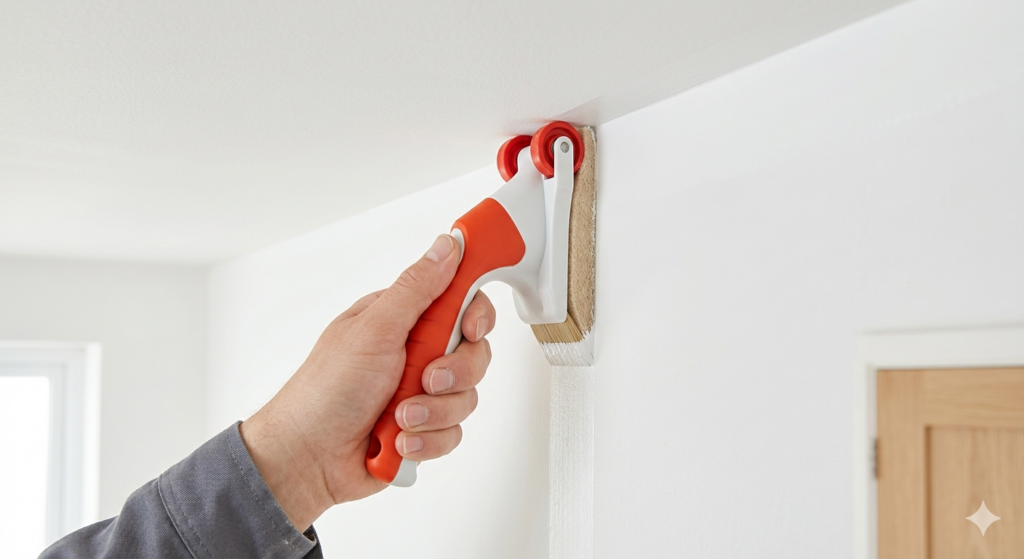
A painting edger is a handheld tool designed to apply paint along edges, corners, baseboards, and ceiling lines without needing painter’s tape. It gives you straight, clean paint lines by guiding the paint applicator right up to a boundary surface without bleeding over. Whether you are touching up a single wall or repainting an entire room, a painting edger saves time, reduces mess, and helps anyone achieve a professional-looking finish. It works for both beginners doing DIY projects and experienced painters who want faster, cleaner results. Choosing the right type, loading it correctly, and keeping it clean are what separate a sharp result from a frustrating one. What Is a Painting Edger? A painting edger is a specialized paint applicator that lets you cut in cleanly along edges without freehand skill or masking tape. Most models feature a flat paint pad or small roller attached to a frame with guide wheels or a plastic shield on the sides. The wheels ride along the adjacent surface, such as a ceiling or baseboard, keeping the pad at a consistent distance so the paint line stays straight. This tool is especially useful in spaces where two different colours meet, such as where the wall meets the ceiling, around door frames, along window trim, or above baseboards. Without a painting edger, those areas typically require steady brush control or careful taping, both of which demand either experience or a lot of prep time. The painting edger was created to make edging accessible for everyone. Even someone with no painting experience can produce a tidy line using one, as long as the tool is loaded properly and moved at a steady pace. It eliminates most of the common causes of uneven lines, including hand shake, over-brushing, and inconsistent pressure, making it one of the most practical additions to any paint kit. How Does a Painting Edger Work? Using a painting edger is straightforward once you understand the mechanics behind it. The guide wheels do the positioning work for you, so your job is simply to keep a smooth pace and manage your paint load. Here is the general process: One practical tip: wipe the guide wheels with a damp cloth after every few passes. Paint can build up on the wheels and transfer to the adjacent surface, leaving marks where you do not want them. For best results, always test the painting edger on a spare piece of cardboard or an inconspicuous area before committing to your wall. This lets you check the paint load and pressure before it matters. Types of Painting Edger Tools Not all painting edger options are built the same. Choosing the right type depends on your project, your surface type, and your comfort level with painting tools. Pad Painting Edgers These use a foam or fabric pad to apply paint. They hold a good amount of paint and glide smoothly along flat surfaces. Best for large wall areas near baseboards or along ceilings where you need consistent coverage over a long run. A pad painting edger is usually the easiest type to learn on and works well for standard interior rooms with smooth walls. Roller Painting Edgers A mini roller version of the standard tool, it lays paint on quickly and works well on textured walls. Some include an angled roller to reach corners more easily. The roller painting edger leaves a slightly more textured finish than a pad edger, which can actually blend better if your main walls are rolled rather than brushed. Brush-Style Edging Tools These look like a traditional paintbrush but have a built-in guide or shield on one side. They give more control on curved or irregular trim, such as ornate door frames or window moulding where other edger types cannot follow the shape accurately. If your home has detailed architectural trim, a brush-style painting edger gives you flexibility that a pad or roller cannot match. Electric or Battery-Powered Painting Edgers Battery-operated models spin a small pad or roller automatically. They are faster than manual tools and reduce hand fatigue on large projects. These suit intermediate or experienced users who want a consistent finish on big rooms without spending extra time on each pass. Type Best For Skill Level Pad Edger Flat surfaces, ceilings, baseboards Beginner Roller Edger Textured walls, quick coverage Beginner to Intermediate Brush-Style Edger Curved or detailed trim Intermediate Electric Edger Large rooms, high volume work Intermediate to Advanced Painting Edger vs. Painter’s Tape: Which Is Better? Both tools help you get clean paint lines, but they work differently and suit different situations. Understanding where each one shines helps you avoid wasted time and uneven results. Painter’s tape requires you to apply strips carefully along every edge before painting, let the paint dry, and then peel back the tape. If the tape is not pressed down firmly at every point, paint bleeds underneath and ruins the line. It also takes considerably more time to set up and remove, especially in a large room with lots of trim or multiple colour changes. A painting edger skips the tape entirely. You load it with paint, position the guide wheels, and start painting right away. For most straightforward edging jobs, such as painting a wall next to white trim or running a line along a ceiling, it is noticeably faster and just as clean when used correctly. However, tape still has real advantages. On highly textured surfaces, a painting edger’s wheels can sit unevenly and leave a crooked line. Tape conforms better in those cases. Tape is also the safer choice when you need to fully protect a surface, such as wallpaper or a stained wood panel, where even a small amount of bleed would cause damage. For smooth walls in standard rooms, a painting edger wins on speed. For complex surfaces or delicate boundaries, tape remains the more reliable option. Many painters actually use both on the same job: the edger for the main runs and tape on tricky corners or textured spots where