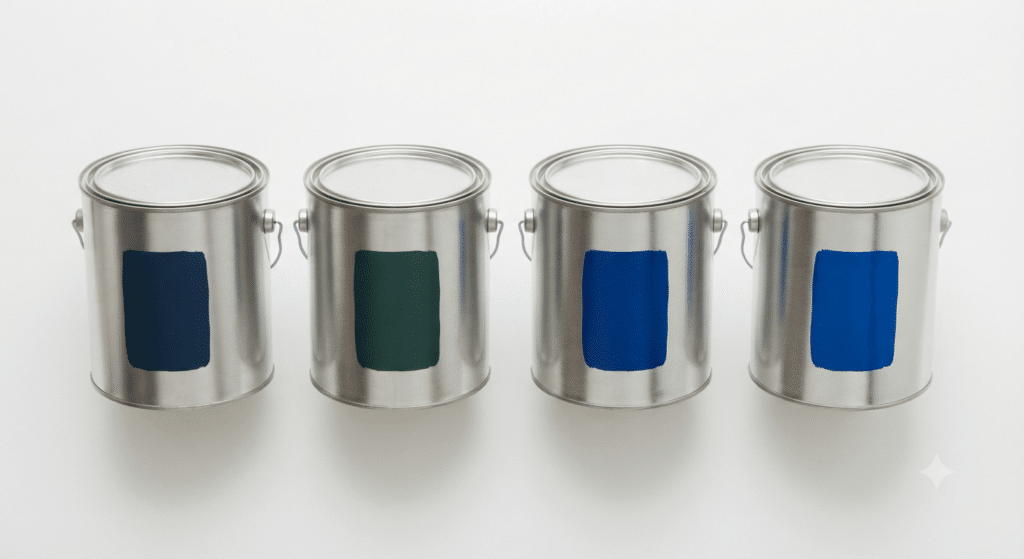
What Is a Paint Spray Gun and How Does It Work?

A paint spray gun is a tool that uses air pressure to atomize and apply paint in a fine, even mist across any surface. It covers large areas faster than a brush or roller, delivers a smooth, consistent finish, and works on walls, furniture, fences, and more. Choosing the right type of paint spray gun matters because each model suits different jobs and paint types. This article walks you through how they work, which types exist, what paints to use, how to get the best results, and the trade-offs you need to know before picking one up. What Is a Paint Spray Gun? A paint spray gun is a hand-held painting device that pushes liquid paint through a small nozzle using compressed air or an internal turbine. The paint breaks apart into tiny droplets and fans out in a controlled spray pattern, landing evenly on the surface in front of it. This technology replaces the back-and-forth motion of a brush and eliminates the texture left by rollers. It is widely used in automotive refinishing, furniture coating, cabinet painting, and large wall surfaces where a smooth, professional finish is the goal. There are three main categories of paint spray gun available today: Types of Paint Spray Guns How Does a Paint Spray Gun Work? The working principle of a paint spray gun is simple. Paint is fed into the gun from a cup or container attached to it. When you pull the trigger, air or mechanical pressure forces the paint through the nozzle tip. The nozzle breaks the paint into a fine mist through a process called atomization. Air cap holes then shape that mist into a fan-shaped spray pattern, which you guide across the surface in smooth, overlapping passes. The width and shape of the spray pattern can usually be adjusted with a dial on the gun. You can also control the paint flow rate and the air pressure to suit the type of paint and surface you are working on. Most guns let you choose between a round spray pattern for small areas and a wide flat fan for broad surfaces. Getting this setup right before you start is the key to avoiding drips and uneven coverage. Paint Spray Gun Types at a Glance Type Best For Overspray Level Skill Level HVLP Cabinets, trim, furniture Low Beginner to intermediate LVLP Detail work, small projects Low Beginner Airless Large walls, decks, fences Medium Intermediate Conventional Auto body, fine finishing High Advanced What Type of Paint Do You Use for a Paint Spray Gun? Not all paints work straight out of the tin in a paint spray gun. The right paint depends on the gun type and the nozzle tip size. Using the wrong consistency is one of the most common mistakes beginners make. Latex and water-based paints work well in most HVLP and airless guns. They clean up easily with water and are the safest choice indoors. Oil-based paints and primers also work but require mineral spirits for cleanup and need proper ventilation. Stains, lacquers, and varnishes can be sprayed too, but they are thinner by nature and require a finer nozzle tip to avoid runs. Many paints need to be thinned before spraying. You can test the right thickness using a viscosity cup. As a rough rule, paint should flow freely but still coat the back of a spoon. If it drips off too fast, it will create a runny finish. If it is too thick, the paint spray gun will clog or spit. If you are unsure about the right setup for your project, the team at True Coat can help you figure out what approach suits your space best. How to Get the Best Results from a Paint Spray Gun Getting good results comes down to preparation, settings, and technique. Here is how to set yourself up for success. Prepare the Surface Clean the surface thoroughly. Remove grease, dust, and loose paint. Sand rough areas smooth and apply primer if the surface is bare or porous. Skipping this step leads to peeling and poor adhesion no matter how good your spray technique is. Thin the Paint Correctly Check the paint manufacturer’s recommendation for spraying. Thin it gradually and test on a piece of cardboard first. A properly thinned paint will atomize cleanly through your paint spray gun without drips or spitting. Set the Right Distance and Speed Hold the gun 20 to 30 centimetres from the surface for most jobs. Move at a consistent speed in overlapping passes. Too close causes drips. Too far creates a dry, grainy texture. Practice on scrap material before starting your actual project. Keep Your Passes Overlapping Each pass should overlap the previous one by about 50 percent. This gives even coverage without thin spots. Keep the gun moving at all times. Stopping while the trigger is pulled will leave a heavy wet spot that drips. Protect What You Are Not Painting Cover floors, windows, trim, and anything nearby with plastic sheeting and tape. Overspray from a paint spray gun travels further than you expect, especially outdoors on a windy day. Common Paint Spray Gun Problems and Fixes Problem Likely Cause Fix Spitting or clogging Paint too thick Thin the paint and clean the nozzle Drips or runs Too close or moving too slowly Increase distance, speed up passes Uneven pattern Blocked air cap holes Clean air cap with solvent and a brush Dry, grainy finish Too far or paint too thin Move closer and reduce thinning What Are the Disadvantages of a Paint Spray Gun? A paint spray gun is fast and efficient, but it comes with real trade-offs that every user should understand before buying one. Setup and cleanup take time. You need to mix and thin the paint, set up masking, and clean the gun thoroughly after every use. If paint dries inside the gun, the internal parts can clog and require soaking in solvent. Overspray is another issue. Even HVLP guns produce some overspray, and conventional and
What Type of Paint Roller Should You Use for Every Surface?
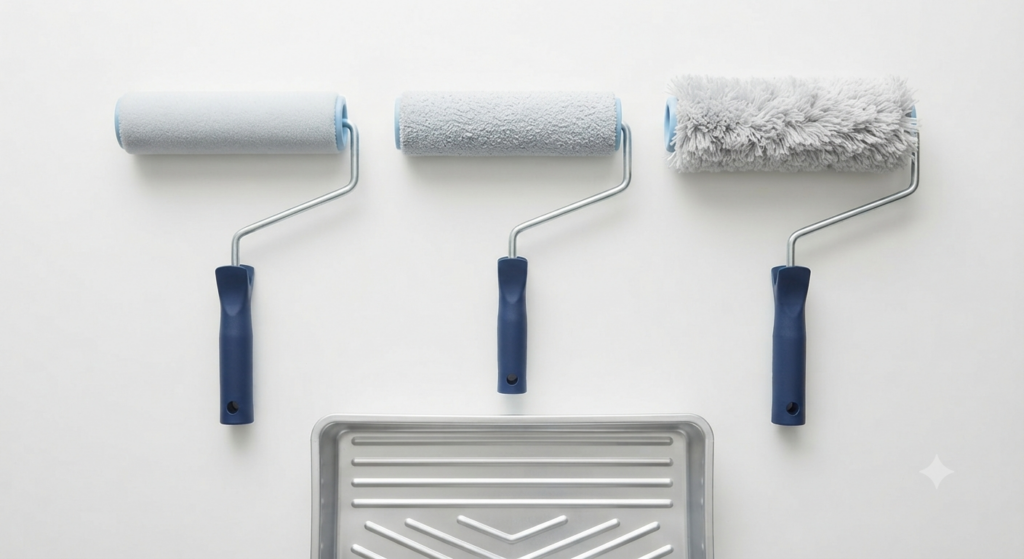
A paint roller is one of the most effective tools for covering large wall and ceiling surfaces quickly, evenly, and with a smooth finish. Choosing the right roller nap thickness, material, and size makes a measurable difference in your results — short nap for smooth walls, medium nap for standard drywall, and thick nap for rough or textured surfaces. This article breaks down every roller type, when to use each one, practical tips to avoid common mistakes, and when calling a professional is the smarter move. What Is a Paint Roller? A paint roller is a cylindrical painting tool made up of a metal or plastic frame and a removable fabric sleeve called a cover or nap. You load the cover with paint by rolling it across a paint tray, then apply it to a surface using back-and-forth or W-shaped strokes. The main advantage over brushes is speed. A paint roller can cover a square metre in seconds, making it the go-to tool for walls, ceilings, and floors. The nap absorbs paint and releases it evenly as you roll, which reduces streaks when used correctly. Rollers come in a range of widths, frame sizes, and cover materials. Each combination suits a different job — and using the wrong one often means extra coats, roller marks, or wasted paint. Does a Paint Roller Actually Make a Difference? Yes, and the difference is significant. Compared to a brush, a paint roller applies paint far more evenly across flat surfaces, cuts application time in half or more, and gives a consistent texture. Brushes are better for trim and tight corners, but for large open areas, a roller wins every time. The type of roller also affects how the finished surface looks. A low-nap roller on a smooth wall leaves an almost seamless finish, while a high-nap roller on the same wall can leave a heavy stippled texture that looks uneven once dry. Getting this match right is as important as choosing the right paint colour. Types of Paint Rollers and What They Are Best For Not all rollers are built the same. The cover material and nap thickness determine how much paint is held, how it releases, and what texture gets left behind. Nap Thickness Guide Nap Size Best Surface Finish Result 6mm (1/4 inch) Very smooth walls, ceilings, metal Ultra-smooth, minimal texture 10mm (3/8 inch) Standard drywall, light orange peel Smooth with slight texture 13mm (1/2 inch) Semi-rough surfaces, wood siding Medium texture 19mm (3/4 inch) Rough stucco, brick, cinder block Heavy texture, full coverage Cover Material Options Synthetic fibers (polyester or nylon blends) work well with latex and water-based paints. They hold their shape through multiple uses and are easy to clean. Natural fibers like lambswool or mohair are traditionally used with oil-based paints because they absorb and release thick paint smoothly without matting. Foam rollers work on very smooth surfaces where you want zero texture, such as cabinets or furniture, but they can leave air bubbles if overloaded. Which Paint Roller Size Should You Use? Roller width matters for efficiency and control. Standard sizes range from 9 inches to 18 inches wide, and the right choice depends on what you are painting. Roller Width Best Use 4-6 inches Trim, narrow spaces, accent walls 9 inches Standard walls and ceilings indoors 12-14 inches Large flat walls, floors, commercial spaces 18 inches Wide open surfaces, gymnasium floors, large exteriors A 9-inch roller is the most common choice for residential interior work. It covers enough area per stroke to stay efficient without becoming hard to control. For most Winnipeg homeowners tackling a living room or bedroom, a 9-inch roller with a 10mm to 13mm nap is a solid starting point. How to Use a Paint Roller Properly Using a paint roller correctly prevents lap marks, uneven coverage, and wasted paint. Follow these steps for the best result. Step-by-Step Roller Technique Always paint wet edge to wet edge. If one section dries before you connect the next, you will see a visible line in the finish. Common Paint Roller Mistakes and How to Fix Them Even experienced painters make roller mistakes. Knowing what causes them makes them easy to avoid. Roller marks and lines are usually caused by pressing too hard or using a dry cover. Keep consistent pressure and reload before the cover runs out. Stippling or heavy texture happens when the nap is too thick for a smooth surface. Switch to a shorter nap. Drips and runs come from overloading the tray and not rolling out excess paint before hitting the wall. Keep the roller moving and avoid stopping mid-stroke. Lint from new covers is a common complaint. Before using a new roller, wrap it with tape and peel it off a few times to remove loose fibers, or rinse it under water first. Things To Know Before Buying a Paint Roller When to Call a Professional Instead A paint roller is simple to use, but the results depend heavily on surface preparation, the right materials, and technique. Uneven walls, peeling old paint, water damage, or hard-to-reach exterior areas are situations where doing it yourself often costs more in corrections than hiring someone from the start. True Coat is a licensed and insured painting company serving Winnipeg’s residential and commercial clients. Whether you need interior walls done cleanly or an exterior refreshed before winter, the team brings the right tools and experience to finish the job properly. You can explore their residential painting services in Winnipeg or browse completed projects to see the quality of their work. For pricing, reach out through the True Coat contact page for a free estimate. Wrapping Up Your Paint Roller Choice Picking the right paint roller comes down to three things: surface texture, paint type, and the size of the area you are covering. Match your nap thickness to the surface, choose the right cover material for your paint formula, and use proper technique to get an even finish without extra coats. For large or
How Do You Paint a Cabin the Right Way?
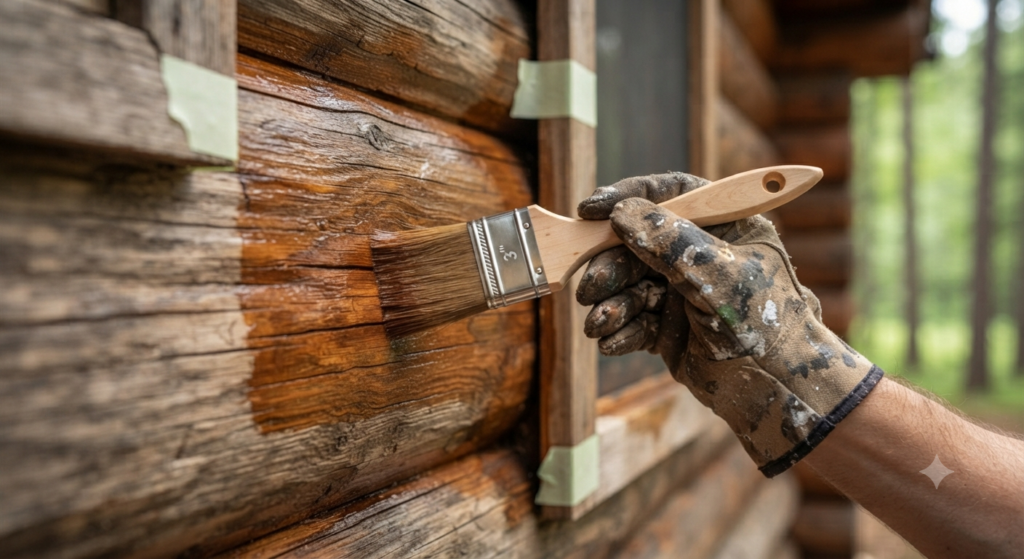
To paint cabin surfaces correctly, you need to clean and prepare the wood, choose the right paint type for the climate, and apply at least two coats with proper drying time in between. Whether you are working on the interior or exterior of a log cabin, the results depend on choosing the right products and following the right steps. This covers the best paints to use, how to prep surfaces, common mistakes to avoid, the difference between interior and exterior cabin painting, and when to call in a professional. What Does It Mean to Paint a Cabin? Painting a cabin is different from painting a typical house. Cabins are often built with exposed logs, rough-sawn wood, or natural timber, which require specific products and methods that differ from standard drywall or stucco surfaces. When you paint cabin walls, you are protecting the wood from moisture, UV rays, insects, and seasonal temperature changes. In a place like Winnipeg, where winters are harsh and summers can be humid, the right cabin paint does more than just add colour. It extends the life of the wood and keeps the structure sealed against the elements. Many homeowners also paint cabin interiors to add character, brighten dark wood tones, or match a modern design style. For interior work, the focus shifts to air quality and finish quality rather than weatherproofing. If you want to explore what professional residential painting in Winnipeg looks like for unique properties like cabins, it is worth understanding what goes into the process. How to Paint Cabin Exterior Surfaces Exterior cabin painting requires more preparation than interior work. Wood expands and contracts with the seasons, so the paint you use needs to be flexible and breathable enough to move with it. Step 1: Clean the Surface Wash the exterior thoroughly to remove dirt, mildew, and old peeling paint. A pressure washer works well for log cabins, but keep it on a lower setting to avoid damaging the wood grain. Let the surface dry completely before moving forward, which usually takes 24 to 48 hours depending on the weather. Step 2: Sand and Repair Sand down any rough patches or raised grain. Fill cracks and gaps with a flexible exterior wood filler or caulking that is rated for wood movement. This step is critical because skipping it leads to peeling paint within a season or two. Step 3: Apply Primer Use a penetrating oil-based primer on bare wood before you paint cabin exteriors. This seals the wood and helps the topcoat bond properly. Skip the primer and the paint will not last, especially in areas exposed to rain, snow, or direct sunlight. Step 4: Apply Paint in Thin Coats Use a brush or roller designed for rough surfaces. Apply the first coat in a thin, even layer and allow it to dry fully. Sand lightly between coats, then apply a second coat. For full log cabins, a brush gives better penetration into the wood than a roller or sprayer. How to Paint Cabin Interiors Interior cabin painting is less about weatherproofing and more about aesthetics and air quality. Many people choose to keep the natural wood look inside, but painting interior walls, ceilings, or trim can make a space feel brighter and more modern. Before you paint cabin interiors, clean the walls to remove grease, dust, or smoke residue, especially if the cabin has a wood-burning fireplace. Use a bonding primer if you are painting over bare wood, knotty pine, or cedar, since these woods contain tannins that bleed through regular primer. For colour selection, lighter shades open up the space, while warm neutrals enhance the natural cabin feel. Low-VOC paints are a good choice for enclosed spaces where ventilation may be limited. If you are unsure about finishes, best interior painting companies can guide you through the right options for wood surfaces. Use a satin or semi-gloss finish in high-traffic areas like kitchens and bathrooms, as these are easier to clean. Flat or eggshell finishes work well in bedrooms or living areas where you want a softer appearance. Best Paint Types for a Cabin Choosing the right paint is one of the most important decisions when you paint cabin surfaces. Not all paints perform the same way on wood, and using the wrong type leads to cracking, peeling, and early wear. Paint Type Best Used For Key Benefit Acrylic Latex Exterior walls, siding Flexible, water-resistant, easy cleanup Oil-Based Trim, railings, doors Hard finish, high durability Log and Timber Stain Full log exteriors Penetrates deep, shows wood grain Low-VOC Acrylic Interior walls and ceilings Safer air quality in enclosed spaces Deck Paint or Stain Cabin porches and decks Slip-resistant, moisture-proof For most exterior cabin surfaces in Canada, a high-quality acrylic latex paint or a penetrating log stain gives the best results. These products handle freeze-thaw cycles well and resist moisture without sealing the wood so tightly that it traps humidity inside. If you want a unique finish, limewash paint in Canada is an option worth considering for interior feature walls. It creates a soft, textured look that pairs well with the natural feel of a cabin. Things To Know Before You Paint a Cabin There are a few important things to keep in mind before starting any cabin painting project, whether it is big or small. Exterior vs Interior Cabin Painting Compared Knowing the differences between exterior and interior cabin painting helps you plan the right approach for each area. Factor Exterior Cabin Interior Cabin Main goal Weatherproofing and protection Aesthetics and air quality Paint type Acrylic latex or log stain Low-VOC acrylic or oil-based Primer needed? Always, especially on bare wood Yes, especially over knots and tannins Coats required 2 to 3 coats minimum 2 coats standard Reapplication Every 3 to 5 years Every 5 to 10 years Drying conditions Weather-dependent, above 10C Ventilate the space well When to Hire a Professional to Paint a Cabin Some cabin painting projects are manageable on your own. But others are better handled
Paint Stripper: Which Type Works Best and When to Use It
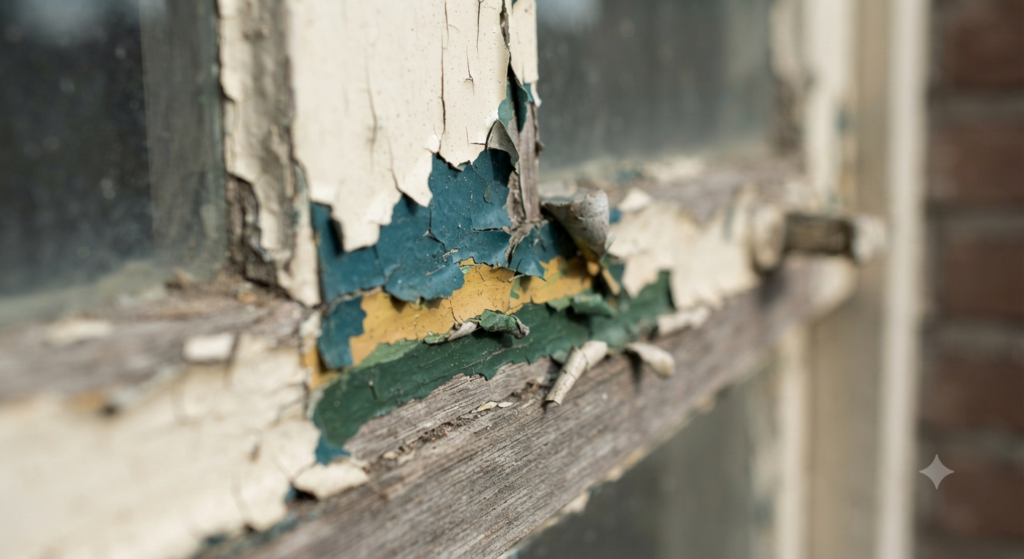
Using a paint stripper is one of the most effective ways to remove old, stubborn, or peeling paint from surfaces without damaging the material underneath. Whether you are dealing with layers of latex paint on drywall, oil-based coatings on wood trim, or weathered finishes on brick, the right paint stripper makes the job significantly faster and more manageable. Why Removing Old Paint the Right Way Actually Matters Skipping proper paint removal often leads to bigger problems down the road. Paint applied over a failing surface, whether it is peeling, chalking, or bonded poorly, will not adhere well regardless of how premium the new coat is. The result is blistering, flaking, and premature failure, which costs more to fix than getting the surface prep right the first time. In older Canadian homes, especially those built before 1978, there is also the question of lead-based paint. Health Canada advises that paint in homes constructed before that era should be tested before any sanding, scraping, or chemical removal begins. Lead exposure is a serious health risk, particularly for children and pregnant women. If you suspect lead paint is present, chemical stripping with proper containment is generally considered safer than mechanical methods like sanding, which can release fine particles into the air. Moisture is another factor that Winnipeg homeowners deal with constantly through True Coat’s services. Manitoba winters are brutal, and freeze-thaw cycles create real stress on exterior surfaces. Moisture trapped beneath paint layers accelerates peeling, which is why thorough surface preparation, including proper stripping when needed, is not optional for lasting results. The Different Types of Paint Stripper and How They Work Not all paint strippers are the same. Each type has a different chemical makeup, a different application method, and a different set of surfaces it works best on. Understanding the differences helps you choose the right product for your specific project. Chemical-Based Strippers Chemical strippers work by breaking down the bond between the paint film and the surface below. They are applied as a gel, paste, or liquid, left to dwell for a set period, and then scraped away along with the loosened paint. There are two broad categories here: Heat-Based Removal Heat guns and infrared paint removers soften paint by raising the surface temperature, allowing you to scrape it away cleanly. Heat tools are effective on wood trim, doors, and furniture but should never be used near lead paint because heating lead-based coatings releases toxic fumes. They are also not ideal near glass, as rapid temperature changes can crack window panes. Mechanical Methods Sanders, wire brushes, and scrapers are the most basic approaches. They work fine for small areas or lightly bonded paint but are slow, physically demanding, and generate significant dust. For interior walls, mechanical removal risks gouging drywall paper, which then requires skim coating to repair. If you want to understand how different paint types respond to stripping methods, the formulation of the existing coating matters just as much as the method you choose. Comparing Paint Stripper Types: A Quick Breakdown Type Best For Speed Safety Level Cost (CAD) Solvent-based Multiple layers, fast jobs Fast (15-30 min) Low (high VOC) C$20-C$50 per litre Caustic (lye) Metal, masonry, heavy buildup Medium (1-2 hrs) Moderate C$15-C$40 per litre Biochemical/low-VOC Indoor use, wood, DIY projects Slow (4-24 hrs) High C$25-C$60 per litre Heat gun Wood trim, furniture, doors Medium Moderate C$40-C$120 (tool cost) Mechanical sanding Small patches, lightly bonded paint Slow Moderate (dust) Minimal (labour-heavy) How to Use Paint Stripper Safely and Effectively Applying a paint stripper is straightforward when you follow the right steps. Rushing the process or skipping safety precautions is where most DIY projects go sideways. Step 1: Test and prepare the surface. Clean the area of grease, dirt, and loose paint flakes. If you suspect lead paint, use a lead test kit available at most Canadian hardware stores before doing anything else. Step 2: Protect surrounding areas. Cover floors and adjacent surfaces with plastic sheeting. Remove hardware, outlet covers, and anything that could be damaged by chemical contact. Step 3: Apply the stripper generously. Use a natural-bristle brush or a chemical-resistant applicator. Apply in one direction and do not overwork it. Thickness matters: a thin coat dries out before it can work. Step 4: Allow adequate dwell time. Follow the manufacturer’s instructions. Biochemical strippers often need significantly longer dwell times than solvent-based options. Step 5: Scrape and clean. Use a plastic scraper to avoid gouging the surface. Work in sections and dispose of the paint waste according to your municipality’s hazardous waste guidelines. In Winnipeg, the City of Winnipeg’s Eco-Stations accept paint and chemical waste at no charge. Step 6: Neutralise and rinse. Some strippers, especially caustic types, require a neutralising wash before the surface is ready for new paint. Skip this step and the new coating may fail to bond properly. If you are planning to paint a wall after stripping, make sure the surface is completely dry and free of residue before applying primer. Surface-Specific Considerations: Wood, Brick, Metal, and Drywall Different surfaces respond differently to stripping methods, and using the wrong one can cause lasting damage. Surface Recommended Stripper Caution Wood (interior trim) Biochemical or heat gun Avoid caustic lye; raises wood grain Brick or masonry Caustic or pressure wash Test small area first; porous surfaces absorb chemicals Metal (railings, doors) Caustic or solvent-based Rinse thoroughly to prevent rust Drywall Avoid chemical; use light scraping or sanding Chemical strippers damage drywall paper Concrete floors Caustic or mechanical grinder Requires neutralisation before recoating For exterior surfaces like brick, the prep work is especially important. If you are working on masonry and plan to repaint afterward, understanding exterior paint for brick is essential for choosing a coating that bonds properly to the stripped surface. Things to Know When to Call a Professional Instead of DIYing It There is a point where the scale, the surface complexity, or the safety risk of a stripping project makes it smarter to hire a professional rather than tackle it
What Are the Different Paint Types and Which One Should You Use?
Paint types refer to the base and finish categories that determine how paint performs on different surfaces. Choosing the right formula for your project, whether latex, oil-based, acrylic, or a specialty coating, directly affects how long it lasts, how it looks, and how easy it is to apply. The four main categories most homeowners work with are water-based latex, oil-based alkyd, acrylic, and specialty coatings, each suited for specific surfaces and conditions. If you’re painting an interior room, a wooden deck, or a commercial space in Winnipeg, picking the right option saves you time, money, and frustration. Read on to learn how each formula works and which one fits your next project best. What Are Paint Types? These categories are defined by their base ingredients, finish level, and intended use. The base determines how paint adheres to a surface, how quickly it dries, and how durable it becomes once cured. The finish refers to the sheen level, from flat matte to high gloss, which affects both appearance and cleanability. Every formula is designed with a specific job in mind. Some are built to resist moisture in bathrooms. Others are formulated to withstand Canadian winters on exterior walls. Using the wrong option can lead to peeling, poor adhesion, or a finish that simply does not hold up over time. What Are the Main Paint Types Used in Homes? There are four main categories that cover most residential and commercial painting needs. Each has a distinct formula, dry time, and best-use scenario. Here is a breakdown of each one and what it does best. Water-Based Latex Paint Latex is the most widely used paint type in Canada. It uses water as a carrier, which makes it low in odour, fast-drying, and easy to clean up with soap and water. Latex formulas are ideal for interior walls, ceilings, and even some exterior surfaces. They expand and contract with temperature changes, making them a great fit for homes in Winnipeg where winters are harsh. Latex comes in several finishes: flat, eggshell, satin, semi-gloss, and gloss. Flat is best for ceilings and low-traffic areas. Satin and eggshell work well in living rooms and bedrooms. Semi-gloss and gloss hold up in kitchens, bathrooms, and trim where scrubbing is common. Oil-Based Alkyd Paint Oil-based formulas use a petroleum or alkyd resin as the base. They take longer to dry, usually 24 hours or more, and require mineral spirits or paint thinner for cleanup. However, this formula creates a very hard, durable finish that resists stains and wear. It works well on doors, trim, cabinets, and metal surfaces where a tough coat is needed. One downside is the strong odour and higher VOC content. In Canada, many homeowners are moving toward water-based alternatives, but oil-based alkyd remains a top choice for high-traffic surfaces and furniture refinishing. Acrylic Paint Acrylic formulas are water-based but use acrylic polymers for a stronger, more flexible finish than standard latex. They dry faster than oil-based options and offer better resistance to fading, cracking, and moisture. Acrylic is a popular choice for exterior painting because it holds up well against sun, rain, and temperature swings. Indoors, acrylic is used where durability matters most, such as in high-traffic hallways, kids’rooms, and laundry areas. It is also easier to touch up than oil-based coatings because water cleans the tools. Specialty Paint Types Specialty paint types are formulated for very specific surfaces or effects. Examples include primer-sealer formulas for bare drywall, masonry coatings for concrete and brick, rust-resistant options for metal, and limewash for a natural, textured finish. Floor coatings are another example, designed to handle foot traffic, vehicle weight, and moisture in garages or basements. If you’re considering a specialty finish like limewash for your home, you can read more about limewash paint in Canada to see if it suits your space. Paint Types at a Glance Category Base Best For Dry Time Latex Water Interior walls, ceilings 1-2 hours Oil-Based Alkyd Petroleum/Alkyd Trim, doors, cabinets 24+ hours Acrylic Water + Acrylic Polymer Exterior, high-traffic interiors 2-4 hours Specialty Varies Concrete, metal, limewash, floors Varies Which Paint types Is Best for Interior Walls? For most interior walls, a water-based latex or acrylic formula is the best option. These dry quickly, have low odour, and are easy to clean. The finish you choose matters just as much as the base. Here is a quick guide to choosing the right coating by room: Living Rooms and Bedrooms Eggshell and satin finishes work well in these spaces. They offer a soft sheen that hides small imperfections while still being wipeable. Flat finishes can be used on ceilings to reduce glare and give a clean, uniform look. Kitchens and Bathrooms Semi-gloss and gloss finishes are ideal in areas exposed to steam, grease, and frequent cleaning. These options resist moisture and allow you to wipe down surfaces without damaging the coating. Trim, Doors, and Cabinets For woodwork and trim, oil-based or high-gloss acrylic formulas give the hardest finish. They stand up to daily contact, resist chipping, and clean up easily. Many painters in Winnipeg prefer a water-based alkyd for trim because it offers similar durability with less odour. For kitchen cabinets specifically, it helps to know what professionals recommend. You can check out our guide on the best kitchen cabinet painting approach in Winnipeg for more detail. Which Paint Types Work Best for Exterior Surfaces? Exterior surfaces need coatings that can handle UV rays, moisture, and temperature changes. Acrylic latex formulas are the most popular for exterior use because they stay flexible in cold weather, breathe through the surface to prevent peeling, and resist fading better than oil-based options. For wood siding, acrylic bonds well and expands with the wood as temperatures shift. For masonry, concrete, or stucco, masonry-specific coatings are formulated to penetrate the porous surface and create a lasting seal. If you want to know how exterior painting projects are approached in detail, take a look at our article on the best approach to exterior painting for house
How Do You Paint a Wall? A Complete Beginner’s Guide
To paint a wall properly, you need to clean and prime the surface, choose the right paint type, and apply it in smooth, even coats using the correct tools. A successful paint wall project starts with surface prep, uses quality latex or water-based paint for most interiors, and follows a top-to-bottom painting order to avoid drips and uneven coverage. Knowing which paint finish works best for each room, how to cut in edges cleanly, and how many coats to apply makes the difference between a result that looks professional and one that peels or streaks within months. Whether you are repainting a bedroom, refreshing a living area, or tackling a first-time paint wall project, the steps covered here will walk you through every stage clearly and simply. What Does It Mean to Paint a Wall? When people say they want to paint a wall, they mean applying a layer of coloured or neutral paint to an interior or exterior wall surface to protect it, refresh its look, or change its colour. A paint wall job is more than just rolling colour onto a surface. It covers filling in cracks, sanding rough spots, priming bare or patched areas, choosing the right sheen, and applying two or more even coats for a smooth finish. The technical term for the coated finish left behind after you paint a wall is called the paint film. This film is what protects the wall from moisture, staining, and everyday wear. Getting that film right means following proper steps from start to finish. What Type of Paint Is Best for Walls? Choosing the right paint before you paint a wall saves you time, money, and extra coats. The two main categories are water-based (latex) and oil-based paint, and each has a specific purpose. Water-Based Paint Water-based or latex paint is the most widely used option when you want to paint a wall indoors. It dries fast, has low odour, cleans up with water, and holds colour well over time. It works well on drywall, plaster, and previously painted surfaces. If you are doing a paint wall project in a bedroom, hallway, or living area, water-based paint is almost always the right call. Oil-Based Paint Oil-based paint creates a harder, more durable finish. It is sometimes used to paint a wall in high-traffic areas or on trim and cabinets where extra toughness is needed. The downside is longer drying time and stronger fumes that require proper ventilation. For most interior walls, water-based paint handles the job better. Paint Finishes Compared The sheen level you choose also affects how the finished paint wall looks and how well it holds up. Here is a quick comparison: Finish Best For Key Benefit Flat / Matte Ceilings, low-traffic rooms Hides imperfections well Eggshell Living rooms, bedrooms Soft glow, easy to clean Satin Hallways, family rooms Durable and washable Semi-Gloss Kitchens, bathrooms, trim Moisture resistant Gloss Doors, cabinets, wood trim Very durable, shiny For most standard paint wall projects indoors, eggshell or satin finish gives the best balance of looks and durability. What Tools Do You Need to Paint a Wall? Using the right tools makes it much easier to paint a wall cleanly and evenly. You do not need a lot of equipment, but skipping key items leads to streaks, uneven coverage, and more cleanup work. If you want to learn more about edge work, our post on residential painting in Winnipeg covers how professionals handle tight corners and tricky areas when they paint a wall. How Do You Paint a Wall Step by Step? Following a clear process is the key to a clean result when you paint a wall. Rushing through prep or skipping primer can cause the paint to peel, crack, or show brush marks within months. Step 1: Prepare the Surface Before you paint a wall, wash it with a mild soap solution to remove dust, grease, and stains. Let it dry fully. Fill any holes or cracks with spackling compound, let it dry, then sand it smooth. For walls with shiny paint already on them, lightly sand the surface so the new paint has something to grip. Step 2: Apply Primer Primer is a must when you paint a wall that is bare, heavily patched, or switching from a dark to a light colour. It creates a uniform base that helps the topcoat stick and look even. Apply one coat of primer, let it dry completely, then lightly sand before painting. Step 3: Tape and Protect Apply painter’s tape along baseboards, window frames, door trim, and the ceiling line. Lay drop cloths on the floor. This step might feel slow, but it saves a lot of time cleaning up edges after you paint a wall. Step 4: Cut In the Edges Use an angled brush to cut in along the ceiling, corners, and trim before rolling. This is the part of how you paint a wall where precision matters most. Work about 2 to 3 inches from the edge and blend into the wet rolled area while it is still wet. Step 5: Roll the Paint Load your roller evenly and start from the top of the wall, working in a W or M pattern to spread paint without heavy streaks. Keep a wet edge as you work across the wall. Apply two coats for even coverage, letting the first coat dry fully before the second. Most latex paint dries in one to two hours before recoating. Things to Know Before You Paint a Wall Here are some practical points that most beginners miss the first time they paint a wall: Which Option Is Best: DIY or Professional Painting? Deciding whether to paint a wall yourself or hire a professional depends on the size of the project, your skill level, and how much time you have. Both options have real advantages. Factor DIY Paint Wall Professional Paint Wall Cost Lower materials cost Higher upfront, better long-term value Time Longer, especially for prep Faster with experienced crew
What Is the Best Exterior Paint for Brick and How Do You Apply It Right?
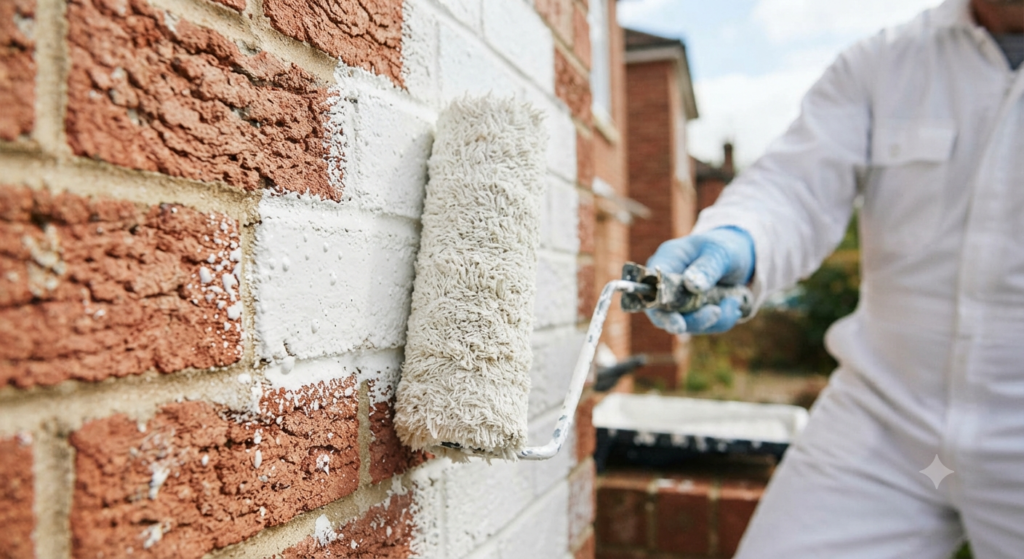
Exterior paint for brick should be 100% acrylic latex — it bonds to porous brick surfaces, allows moisture to escape, and holds up against harsh weather. Choosing the wrong exterior paint for brick can trap moisture inside the wall, cause peeling, and lead to expensive repairs. The right product, applied correctly, can refresh the look of a home and protect the brick for 10 years or more. What Is Exterior Paint for Brick? Exterior paint for brick is a coating specifically designed to stick to masonry surfaces. Standard wall paint is made for smooth drywall or wood and will not hold on brick the same way. Brick is porous, uneven, and expands and contracts with temperature changes. A paint that cannot flex or breathe will crack and peel within a season or two. Acrylic latex paint is the most widely recommended exterior paint for brick because it is water-based, flexible, and breathable. It lets moisture vapor pass through the wall without trapping it, which is the leading cause of paint failure on masonry. Elastomeric coatings are another option — these are much thicker and stretch across cracks, making them useful for older brick with hairline fractures. When shopping for exterior paint for brick, look for labels that say “masonry,” “elastomeric,” or “concrete and brick” on the can. These formulas are built for the texture and movement of masonry walls. Can You Paint Brick with Exterior Paint? Yes, you can paint brick with exterior paint, but not just any formula will work long term. Many homeowners grab standard exterior paint without checking the label, apply it over bare brick, and wonder why it starts peeling within a year or two. Bare brick needs a masonry primer first. The surface is too porous for paint to grip directly without a proper base coat. A masonry primer seals the brick, fills tiny gaps, and gives the topcoat something solid to bond to. Skipping this step is one of the most common mistakes people make when applying exterior paint for brick. Once primed, two coats of a high-quality acrylic latex or elastomeric paint will give you a finish that lasts. Apply each coat when temperatures are between 10 and 30 degrees Celsius and avoid painting in direct sunlight or rain. Which Types of Exterior Paint for Brick Work Best? There are a few main options for exterior paint for brick, and each one has a different purpose. Knowing which type fits your situation will save you time and money. Acrylic Latex Paint This is the most common and practical choice for exterior paint for brick. It cleans up with water, dries fast, stays flexible as temperatures change, and allows the wall to breathe. It comes in a wide range of finishes and colours, making it easy to match your home’s look. For most residential brick projects, this is the best starting point. Elastomeric Coating Elastomeric exterior paint for brick is thicker than standard acrylic. It stretches to bridge small cracks and creates a waterproof barrier. This option is ideal for older brick walls that show minor cracking or for homes in climates with extreme freeze-thaw cycles, like Winnipeg winters. The downside is that it seals the surface more heavily, which means any moisture that does get inside has fewer ways to escape. Mineral-Based Paint Mineral paints, including lime wash and silicate mineral paint, bond chemically to brick rather than sitting on top of it. They are highly breathable and last a very long time. They do not peel the way film-forming paints can. The trade-off is a more textured, weathered finish and a narrower colour range. If you want a natural, old-world look on your exterior brick, this category is worth considering. Paint Type Comparison for Exterior Brick Paint Type Best For Breathability Durability Acrylic Latex Most residential brick High 8 to 12 years Elastomeric Cracked or aged brick Medium 10 to 15 years Mineral / Lime Wash Breathable natural finish Very High 15+ years How to Prepare Brick Before Applying Exterior Paint Surface preparation is the most important part of any brick painting project. Even the best exterior paint for brick will fail fast if the surface is not ready. Here is what proper prep looks like: What Are the Best Colors for Exterior Paint on Brick? Colour choice is one of the most exciting parts of working with exterior paint for brick. Brick already has natural warm tones, and the right exterior paint colour can either lean into that warmth or cool it down for a more modern look. Neutral shades like warm white, greige (grey-beige), soft grey, and charcoal are among the most popular choices for painted brick exteriors. These tones work well against the natural texture of masonry and complement most roof colours, window frames, and landscaping. If your brick has red or orange undertones, warmer neutrals like cream, tan, or muted sage green tend to look more natural. For homes with cooler-toned brick or grey mortar, true greys, whites, and navy tones often give a cleaner finish. A flat or low-sheen finish is usually the best choice for exterior paint for brick. High-gloss finishes highlight every imperfection in the texture. Flat and satin finishes are more forgiving and still hold up well to the elements. You can also learn more about approach to exterior painting for house projects to see how colour and finish work together on the whole exterior. Learn more about best approach to exterior painting for house projects. Things to Know Before Painting Exterior Brick Before you commit to exterior paint for brick, there are a few important things worth knowing so you go in with the right expectations. Painting Brick Is a Permanent Decision Once brick is painted, it is very difficult to reverse. Removing exterior paint for brick requires chemical strippers or sandblasting, both of which can damage the masonry surface. Make sure you are committed to the look before starting. Moisture Is the Enemy Brick walls need to breathe. If water gets
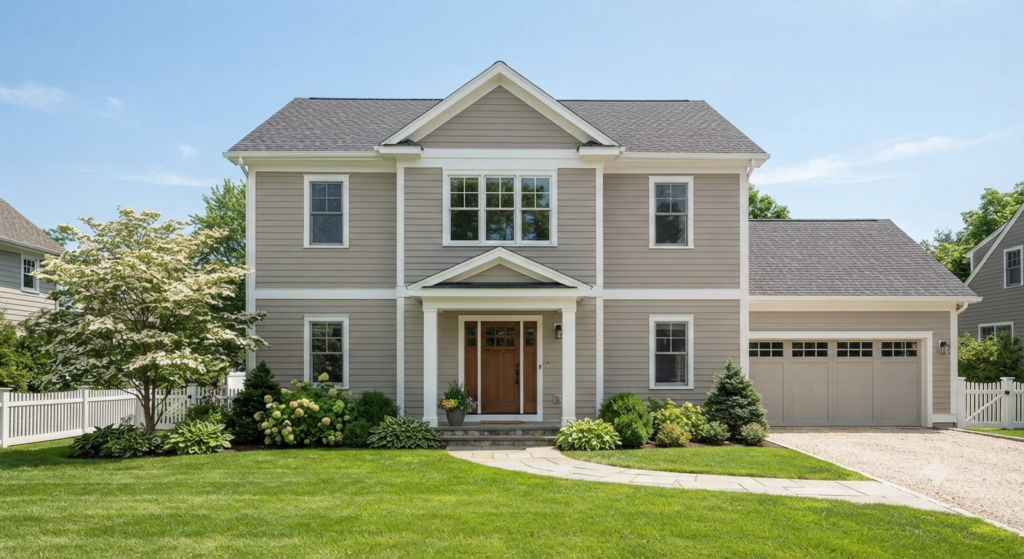
What Is the Best Exterior Paint Color for House in Winnipeg?
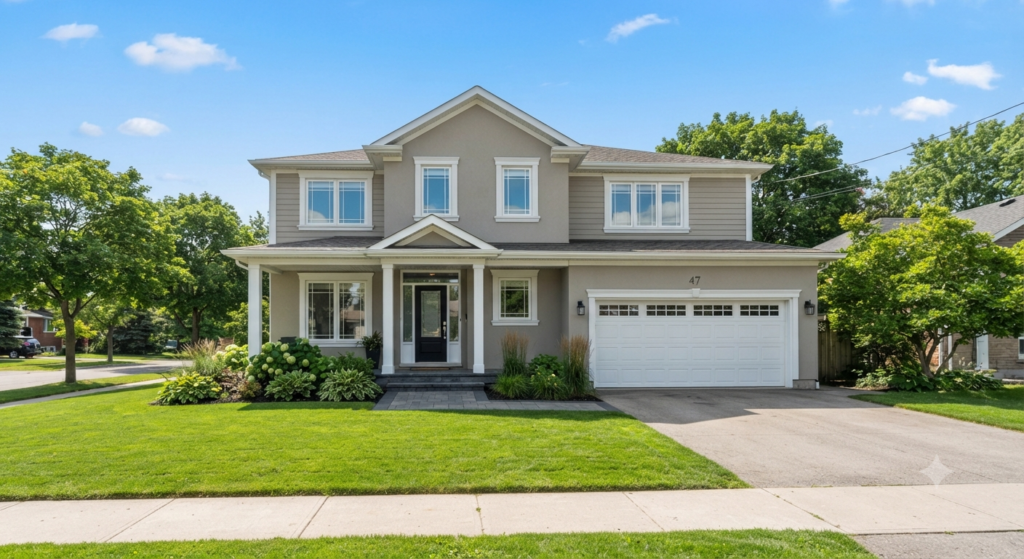
Warm white, greige, and deep charcoal are the top choices for exterior paint color for house projects across Canada, because they hold up through extreme weather, suit most home styles, and add real curb appeal. Picking the right exterior paint color for house protects your siding from moisture and UV damage while giving your property a polished, well-kept look year round. What Is the Best Exterior Paint Color for House? The best exterior paint color for house is one that works with your architecture, suits your surroundings, and holds up through every season. While personal taste plays a role, certain shades perform consistently well regardless of home style. Warm whites and off-whites are the most universally flattering option. They reflect light, make a structure look larger, and pair with almost any trim or roof tone. Greige, a blend of grey and beige, has become a go-to pick for homeowners who want something current without chasing a short-lived trend. Deep tones like navy blue, forest green, and charcoal grey are strong contenders when you want your exterior paint color for house to read polished and intentional. These shades hold their pigment longer under UV exposure. In Winnipeg, where winters stretch for months and landscapes turn white, a bold paint choice makes a property stand out against the snow beautifully. Colors That Work for Different Home Styles Matching your exterior paint color for house to the architectural era of your home gives the finished result a cohesive look rather than a random application of colour. Exterior Paint Color for House by Home Style Home Style Recommended Color Best Trim Pairing Modern Farmhouse Charcoal Gray or Matte Black Crisp White Colonial / Traditional Soft White or Navy Blue Bright White or Cream Craftsman Warm Olive or Deep Teal Brown or Off-White Bungalow Sage Green or Warm Taupe Ivory or Light Cream Victorian Forest Green or Slate Blue Burgundy or Cream Why the Right Exterior Paint Color for House Matters Paint is not purely cosmetic. A quality exterior paint color for house application protects your siding from moisture, UV damage, and temperature swings. In Winnipeg, where temperatures drop to -35 degrees Celsius in winter and climb to +35 degrees Celsius in summer, the paint you select needs to handle constant expansion and contraction. Darker shades absorb more heat, which can warp vinyl siding if the product is not rated for it. Lighter tones reflect heat and are more forgiving in extreme climates. Always confirm that your chosen product is rated for your specific siding material before purchasing. Beyond protection, the right exterior paint color for house signals care. A freshly painted home tells potential buyers that the property is well-maintained, and real estate professionals consistently note that curb appeal delivers one of the highest returns on any home improvement spend. If you are still deciding between doing it yourself or hiring out, read about choosing the best house exterior painters for your home to understand what professionals bring to the job. Which Exterior Paint Color for House Makes It Look Expensive? Certain combinations instantly elevate a home’s appearance. The key is contrast and consistency. A home painted with one primary colour, a complementary trim tone, and a bold accent on the front door will always look more deliberate than one painted a single flat shade throughout. Deep, saturated options like charcoal, navy, hunter green, and matte black are the top exterior paint color for house choices when homeowners want a high-end finish. These shades require more coats and precise application, which is part of why they read as premium. A dark base combined with white trim and a bold front door creates a striking, expensive-looking result. Warm white with black accents is another combination that reads immediately as high quality. Think white body, black shutters, and a matte black front door. Soft sage green paired with natural wood accents and warm white trim is also gaining ground as a premium pick, especially on renovated mid-century homes and newer builds that lean toward an organic, nature-connected aesthetic. For real examples of what premium results look like on Winnipeg homes, take a look at our completed projects How to Choose the Right Exterior Paint Color for House in Winnipeg Start with your fixed elements. Your roof colour, brick or stone accents, driveway material, and landscaping are permanent, so your exterior paint color for house needs to complement them rather than compete. A home with a warm brown roof will clash with a cool grey exterior unless the undertones align closely. Always test before committing. Paint a large sample directly onto the wall and observe it at different times of day. Morning light is blue-toned, afternoon light is warm, and overcast days flatten everything. A colour that looks perfect at noon can look completely different under winter’s flat light. Think about your street context. You do not need to match your neighbours, but a dramatically out-of-step exterior paint color for house can affect resale appeal. A mid-toned neutral that complements rather than copies what is nearby is always a reliable approach. Consider upkeep. Lighter options show dirt more readily but make chips and fading less obvious. Darker shades hide everyday grime but make peeling more visible. Factor in how often you plan to repaint when making your final call. Things To Know Before Picking an Exterior Paint Color for House Finish Types and Best Uses for Exterior Paint Finish Type Best Used On Key Benefit Flat / Matte Stucco, rough surfaces Hides imperfections well Satin Siding and main walls Easy to clean, good weather resistance Semi-Gloss Trim, doors, shutters Moisture-resistant, crisp appearance Gloss Front doors, metal details Highly durable, high-impact look Most Used Exterior Paint Color for House Across Canada Warm white remains the single most used exterior paint color for house in Canada. It is clean, adaptable, and flatters every province’s natural light. Shades with a slight cream or yellow undertone feel warmer in winter and avoid looking stark under summer sun. Grey has grown
How Does Painting Bathroom Tile Work and Will It Last?
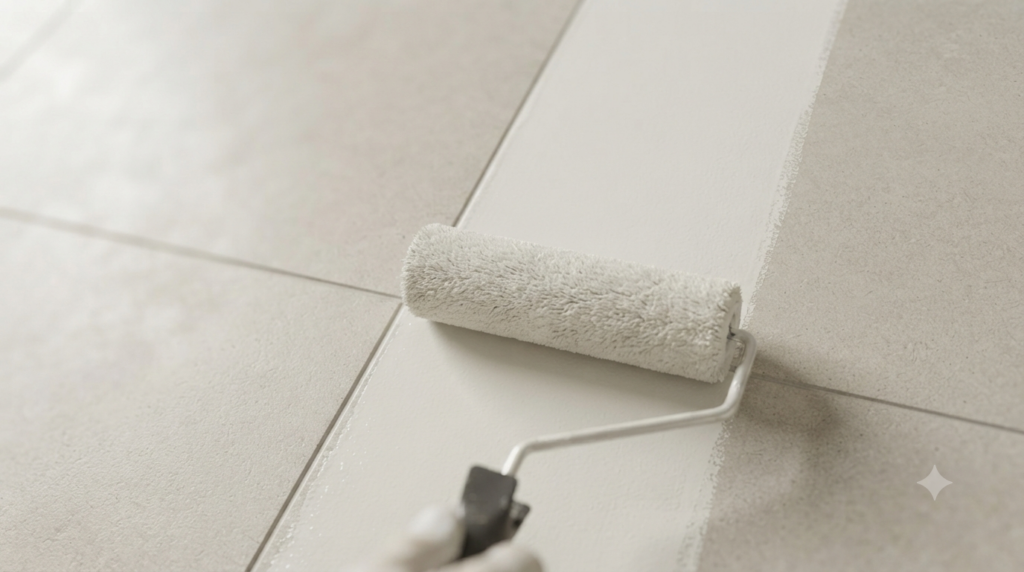
Painting bathroom tile is the process of cleaning, sanding, priming, and coating existing tile with paint made to stick to hard, glossy surfaces, changing the color of the tile without removing it. When the surface is prepared properly and the right products are used, painting bathroom tile can hold up for three to five years on walls and one to two years on floors or tub surrounds before it needs a touch-up. The process works in stages, starting with prep work, then primer, then paint, then a protective topcoat, and each stage needs time to dry or cure before the next one begins. Choosing between painting bathroom tile and tearing it out for new material usually comes down to the condition of the existing tile, the budget available, and how long the bathroom needs to look its best. A few extra details, like ventilation, grout color, and gentle cleaning afterward, make a noticeable difference in how long the finished surface holds up. How Does Painting Bathroom Tile Work and Will It Last? Painting bathroom tile depends on creating a bond between paint and a surface that is naturally smooth, hard, and slightly glossy. Standard wall paint cannot grip that kind of surface, which is why it tends to peel or chip off tile within days of being applied. A bonding primer made for tile, glass, or laminate changes that by giving the surface a slight texture on a microscopic level, so the paint that goes on top has something to hold onto. Once the primer cures, two thin coats of paint go on, followed in most cases by a clear protective topcoat. This layered approach is what gives the finished surface its strength, since the topcoat acts as a barrier against water, soap, and everyday scrubbing. How long the result lasts depends on where it is in the bathroom. Painted tile on walls tends to last the longest, often three to five years, because walls stay mostly dry and see less direct contact. Floors and tub surrounds deal with more moisture, foot traffic, and temperature changes, so a recoat is often needed within one to two years. With careful prep and a solid topcoat, painting bathroom tile gives most homeowners several years of good results before another refresh is needed. What You Need Before Painting Bathroom Tile Most of the work in painting bathroom tile happens before any paint goes on. A clean, dry, and slightly roughened surface is what allows paint to bond, so gathering the right materials ahead of time keeps the project moving without delays or surprises. Materials Checklist for Painting Bathroom Tile Having these items ready before starting keeps things on track, since stopping partway through to find a missing item can leave primer or paint drying unevenly. For anyone who would rather skip the prep work, professional painting services can handle tile cleaning, priming, and painting from start to finish. Step-by-Step Process for Painting Bathroom Tile Painting bathroom tile follows a set order, and the most common reason a tile paint job fails early is skipping steps or rushing the drying time between them. Steps for Painting Bathroom Tile Walls with deeper damage, like cracks or uneven patches behind the tile, may need extra repair work first, and the same principles behind skim coating a ceiling apply just as well to smoothing out bathroom walls before painting begins. Each stage builds on the one before it, so patience with drying and curing times matters more than the specific paint brand chosen. Choosing the Right Paint for Painting Bathroom Tile Not every paint works on tile, and using the wrong product is the most common reason painting bathroom tile results look patchy or start peeling within weeks. Three main paint types work well on tile surfaces, and each one fits a different part of the bathroom. Paint Type Best For Notes Two part epoxy paint Floors, tub surrounds, high moisture spots Most durable choice, strong fumes, short working time before it sets Urethane based tile paint Walls, backsplashes, lower traffic areas Easier to apply, wide color range, usually needs a separate topcoat Latex paint with bonding primer Accent walls or decorative tile away from water Least durable option, best kept to areas with minimal moisture For most bathrooms, a urethane based tile paint paired with a strong bonding primer gives a good mix of ease and durability for walls. Epoxy paint is worth the extra effort on floors and tub surrounds, where the surface needs to handle standing water, foot traffic, and frequent cleaning over time. Painting Bathroom Tile vs Replacing Tile: Which Option Is Best? Choosing between painting bathroom tile and removing old tile for new material comes down to a few practical factors: the condition of the existing tile, the available budget, and how long the bathroom needs to look its best. Painting makes sense for tile that is structurally sound but outdated in color or style. It costs far less than retiling, takes a few days including dry time instead of a week or more, and avoids the dust and mess of demolition. For a rental property or a home heading toward a sale, it offers a quick visual update without a major investment. Replacing tile makes more sense when tiles are cracked, loose, or sitting on a surface with water damage underneath, since paint cannot fix problems with the structure behind the tile. New tile also lasts for decades with normal care, while a painted finish eventually needs a recoat. Factor Painting Bathroom Tile Replacing Tile Upfront cost Lower Higher Project length A few days, including cure time Several days to over a week Result lifespan A few years before a recoat Many years with normal care Best suited for Cosmetic updates on sound tile Cracked, loose, or water damaged tile Which option works best really depends on what is happening underneath the tile. If the surface is solid and the only issue is color, painting bathroom tile is the practical
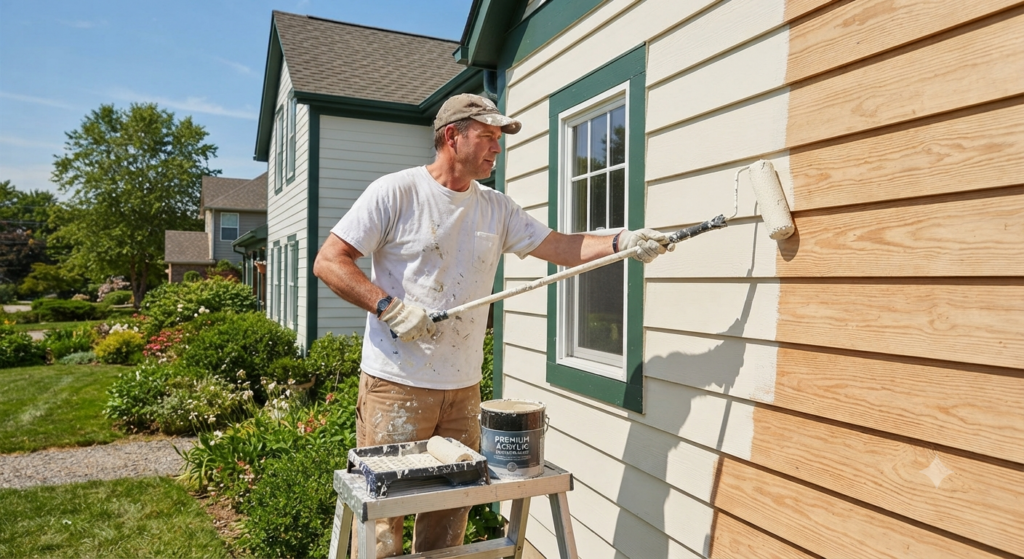
What Paint Should You Use for an Exterior Paint House Project?
The best exterior paint house choice is a 100% acrylic latex formula rated for your local climate, offering strong adhesion, flexibility, and weather resistance. Picking the right product means your paint job lasts longer, holds its colour, and keeps moisture out of your walls. Whether you are dealing with Winnipeg winters or hot prairie summers, the type of paint you choose for an exterior paint house project affects everything from peel resistance to how long you wait before repainting. What Is Exterior Paint House and Why Does It Matter? An exterior paint house product is a paint specifically formulated to handle outdoor conditions. It is different from interior paint because it has to withstand rain, UV rays, freezing temperatures, heat, humidity, and physical wear. Using the wrong product on the outside of your home leads to early cracking, fading, bubbling, and peeling. A proper exterior paint house formula contains binders, pigments, additives, and solvents that are designed to expand and contract with your siding as temperatures change. This flexibility is what prevents cracks. Without it, your finish fails within a few seasons. Beyond protection, an exterior paint house project improves curb appeal and can even raise your property value. A clean, well-painted home signals that the structure is maintained. For homeowners in Winnipeg and across Canada, where freeze-thaw cycles are harsh, the quality of your exterior paint house product directly determines how often you repaint. Cheap or wrong-type paint in a cold climate means repainting every three to four years instead of every eight to ten. If you want to know more about how professional painters approach these projects in our city, check out this detailed post on the best approach to exterior painting for house projects. What Paint Is Best for an Exterior Paint House? The best paint for an exterior paint house project in Canada is 100% acrylic latex. It outperforms oil-based and alkyd paints on almost every measure that matters for residential use: flexibility, moisture resistance, mildew resistance, and drying time. Acrylic latex also produces fewer fumes and cleans up with water, making it easier and safer to apply. Here is a breakdown of the main exterior paint house product types and when each one applies: Paint Type Best For Key Advantage Limitation 100% Acrylic Latex Most exterior surfaces including siding, trim, stucco Flexible, breathable, durable in cold climates Costs more than basic latex Alkyd/Oil-Based Metal surfaces, heavily chalked surfaces Excellent adhesion on problem surfaces Longer dry time, more VOCs Elastomeric Concrete, stucco, masonry with hairline cracks Fills small cracks, highly waterproof Very thick, harder to apply evenly Latex Blend Budget projects with mild weather exposure Lower cost Less durable, not ideal for harsh winters For most Canadian homes, 100% acrylic latex is the clear winner for an exterior paint house job. It expands and contracts without cracking and resists mould in wet seasons. If your home has stucco or masonry walls, elastomeric paint is worth considering because it bridges minor surface cracks while still providing a clean finish. You can read more about how professional painters handle residential projects on the page about residential painting in Winnipeg. What Are the 5 Types of Exterior Paint Finishes for an Exterior Paint House? The finish level of your exterior paint house product controls how shiny the surface is and how well it resists dirt, moisture, and wear. Each finish has a specific use on different parts of your home’s exterior. Flat / Matte Finish Flat finishes hide surface imperfections very well and give a clean, non-reflective appearance. They work best on siding with rough or uneven surfaces. The downside is that flat paint is harder to wipe clean and shows scuffs more easily. It is a popular choice for large siding areas where you want a low-glare look on your exterior paint house. Eggshell Finish Eggshell has a subtle sheen that is slightly easier to clean than flat. It holds up better in moderate weather conditions and gives your exterior paint house a softer, warmer look than higher-gloss finishes. It is a common choice for body walls that need durability without high shine. Satin Finish Satin is one of the most popular choices for an exterior paint house project. It has enough sheen to repel moisture and dirt while still looking elegant. Satin finishes are durable, easy to clean, and hold up well under direct sun exposure. Most professional painters recommend satin for siding and body walls in Canadian climates. Semi-Gloss Finish Semi-gloss is ideal for trim, window frames, doors, and shutters on an exterior paint house. It reflects light, making these architectural details stand out. It is also highly resistant to moisture and easy to wipe down, which is why it is the standard for all areas that take more contact or exposure. Gloss / High-Gloss Finish High-gloss paint is used sparingly on an exterior paint house, usually just for front doors, decorative shutters, or metal fixtures. It provides the most protection against moisture and the easiest cleaning, but it also highlights any surface imperfections more than any other finish. Proper surface prep is critical when applying gloss paint. How Many Coats Does an Exterior Paint House Need? Most exterior paint house projects require a primer coat plus two topcoats. Primer is not always optional. On bare wood, repaired surfaces, or surfaces where the old colour is dramatically different from the new one, skipping primer leads to uneven coverage, poor adhesion, and reduced lifespan. Two topcoats of your chosen exterior paint house product give you full opacity, better colour consistency, and improved durability. One coat may look fine at first but tends to fade and peel sooner. On highly porous surfaces like raw stucco or rough cedar siding, three coats may be needed for a uniform, long-lasting finish. Surface condition plays a big role in how many coats your exterior paint house needs. Clean and lightly sanded surfaces in good condition can often get by with fewer coats. If you are painting over a dark colour