How Can You Successfully Paint in Cold Weather? Complete Guide for Winnipeg Homeowners
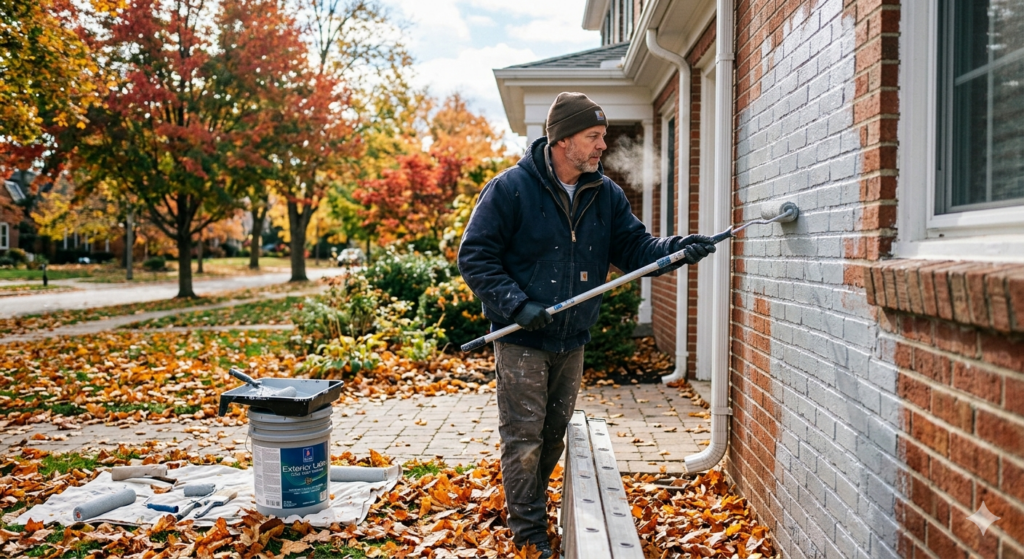
Paint in cold weather requires careful planning to avoid costly failures. Temperatures below 50°F slow paint drying, weaken adhesion, and can ruin your finish before it cures. The chemical process transforming wet paint into durable coating needs warmth to work properly. Cold conditions make paint thick and difficult to apply, while moisture from dew or frost gets trapped beneath surfaces, causing bubbling and peeling. Success is possible with cold-weather paint formulas, proper timing, and temperature monitoring. Can You Paint in Cold Weather Successfully? Paint in cold weather is possible with proper techniques and products. Temperature affects every painting stage. Paint contains pigments, binders, and solvents undergoing chemical transformation to become protective coating. When temperatures drop, this process slows or stops completely. Cold paint becomes thick and hard to spread evenly. You’ll see streaks and lap marks. Moisture from morning dew and frost creates additional problems when you paint in cold weather. Trapped moisture under paint film causes bubbling and poor adhesion that ruins your work. Surface temperature matters as much as air temperature. Shaded walls stay cold even when air temperature seems adequate. Most standard paints need 50°F or above for 48 hours after application to cure properly. Temperature Range Paint Behavior Recommended Action Above 50°F Normal drying Ideal conditions 40-50°F Slower drying Cold-weather formulas only 35-40°F Delayed curing High failure risk Below 35°F Cannot cure Do not paint Professional painters track daytime highs and nighttime lows because overnight drops ruin fresh paint. This matters for exterior painting projects facing temperature fluctuations. What Happens If I Paint in Cold Weather? Painting without proper precautions creates immediate and long-term problems. Cold paint is thick and difficult to work with from opening the can. It doesn’t flow smoothly onto brushes or rollers, making even coverage nearly impossible. Paint sits on top of cold surfaces rather than bonding properly. Within weeks, it begins lifting, especially in moisture-exposed areas. Frost forming before paint cures creates tiny ice crystals disrupting the film, leaving pockmarks and weak spots. Long-term consequences include poor durability and premature failure. Blistering and peeling occur when trapped moisture expands during warmer weather, pushing paint away from surfaces. Color problems emerge from uneven curing. Some areas appear darker or lighter as paint ages. For residential painting in Winnipeg, avoiding these problems means timing projects carefully and understanding how to paint in cold weather conditions properly. Will Paint Dry in 40 Degree Weather? Paint can dry in 40-degree weather, but success depends on paint type and conditions. Standard latex paints struggle at this temperature, while cold-weather formulas handle these conditions better. Many confuse drying with curing. Drying means the surface feels dry within hours. Curing is the complete chemical process hardening paint throughout, taking days or weeks. At 40°F, latex paint may feel surface-dry but hasn’t cured underneath, remaining soft and vulnerable. Specialized cold-weather paints cure at lower temperatures, working in conditions as low as 35°F. These formulas contain different binders remaining flexible in cold. Cold-weather formulas cost more but prevent failures requiring complete repainting. Even with these products, you need several hours above 40°F for proper curing. Working with a Winnipeg painting company ensures you get products that work best for local conditions. Working with a Winnipeg painting company ensures you use the right products for local conditions. What Is the Coldest Temperature You Can Paint In? The coldest safe temperature to paint in cold weather is 35°F when using specialized formulas. Standard latex paints need 50°F or above, while regular oil-based paints require at least 40°F. Understanding these limits is critical for project success when you paint in cold weather. Standard Latex Paint requires minimum 50°F during application and for 48 hours afterward. Standard Oil-Based Paint needs at least 40°F, though 45°F provides better results. Cold-Weather Latex Paint is formulated to cure at temperatures as low as 35°F using modified binders. Acrylic Latex Paint falls between standard latex and cold-weather formulas, typically requiring 40-45°F minimum. Surface temperature matters as much as air temperature. Direct sunlight can warm walls 10-15 degrees above air temperature. Check surface temperature with infrared thermometer before starting. Working with True Coat ensures proper temperature monitoring. Is October Too Late to Paint Outside? October is not too late for exterior work in Winnipeg, but it requires careful planning and the right approach when you paint in cold weather. Early October typically offers suitable weather, while late October becomes risky as temperatures drop and conditions become unpredictable. Early October daytime temperatures often reach 50-59°F, providing adequate conditions. However, nighttime temperatures frequently drop near or below freezing. The key is checking forecasts for 48-72 hours after application. A warm October day seems perfect, but overnight lows below 40°F prevent standard paint from curing and create lasting problems. Mid to late October brings increased frost risk. Frost forms at 32°F or below and damages fresh paint. Shortened daylight hours mean surfaces stay cooler longer, making success more difficult when you paint in cold weather. Success during October depends on choosing the right days and using appropriate products. Watch for weather patterns providing consistent temperatures for consecutive days. Cold-weather paint formulas are essential. Start early in the month when conditions are more stable. Complete projects by mid-October at the latest for optimal results. Focus on urgent repairs only in late October. For aesthetic projects, waiting until spring provides better conditions. Consult with the best house painters Winnipeg homeowners trust to evaluate whether October projects should proceed. How Cold Can Paint Get Before It’s Ruined? Paint can be damaged by cold before and after application. Stored paint freezes at 32°F, causing permanent damage. Fresh paint faces risks depending on curing time. Proper storage is essential whether you paint in cold weather or store leftover supplies. Latex paint freezes at about 32°F. When paint freezes, water forms ice crystals breaking apart chemical structure. Once thawed, frozen paint appears lumpy or separated. You cannot restore frozen latex paint to original quality because binders are permanently damaged. Store paint in climate-controlled spaces above 50°F. Keep
How to Choose Home Painting Design for Your Winnipeg Space?
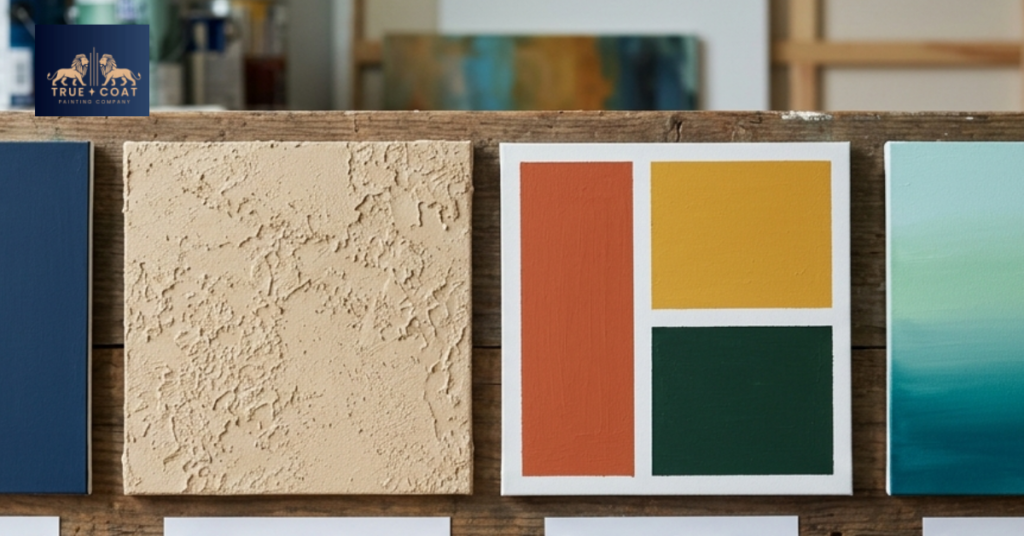
Home painting design starts with selecting colors and finishes that reflect your style while enhancing your space’s natural features. Your home painting design choices influence mood, perceived room size, and overall aesthetic appeal in both residential and commercial settings. Choosing the right home painting design involves understanding color psychology, current trends, surface preparation needs, and how different finishes interact with lighting. Popular approaches include accent walls, two-tone combinations, and specialized techniques like limewash or faux finishes. The selection process becomes easier when you consider your existing decor, room function, and long-term satisfaction. Whether refreshing a single room or planning a whole-house transformation, strategic home painting design decisions create spaces that feel cohesive, inviting, and uniquely yours. What Is Home Painting Design? It refers to the intentional selection and application of paint colors, finishes, and techniques to create a specific aesthetic in your living or working space. This process goes beyond simply picking a color you like from a paint chip. A thoughtful home painting design considers how colors work together across different rooms, how natural and artificial light affects appearance throughout the day, and which finishes best suit each surface. Interior designs focus on creating atmosphere and complementing furnishings, while exterior home painting design must withstand weather conditions and enhance curb appeal. Professional painters in Winnipeg understand that home painting design isn’t just about aesthetics. Proper surface preparation, primer selection, and application technique all contribute to the final appearance and durability. At True Coat, our color consultation services help clients navigate these decisions with confidence. Why Does Home Painting Design Matter for Your Space? The colors and finishes you choose dramatically impact how you experience your home every single day. Home painting design affects your mood, energy levels, and even how spacious rooms feel. Psychological Impact of Color Choices Colors trigger emotional responses that influence comfort levels in your space. Warm tones like terracotta and golden yellow create cozy, welcoming environments perfect for living rooms. Cool colors such as blues and greens promote calmness and focus, working well in bedrooms and home offices. Neutral palettes offer versatility and timeless appeal. Many Winnipeg homeowners combine neutrals with bold accent walls to add personality without overwhelming the space. How Design Affects Perceived Room Size Light colors make small rooms feel larger by reflecting natural light. If you have compact spaces, choosing whites or pale blues expands the visual area significantly. Dark colors create intimacy and drama but can make rooms feel smaller, working beautifully in large spaces where you want cozier atmosphere. Ceiling color matters too. Painting ceilings lighter than walls draws the eye upward and creates height. Value Addition Through Strategic Design Well-executed home painting design increases your property value. Potential buyers notice fresh, modern paint choices that showcase your home’s best features. Quality home painting design also protects your investment by preventing moisture damage and extending wall life. Our interior painting services ensure both beauty and protection. How to Choose the Right Home Painting Design? Selecting the perfect home painting design involves balancing personal preferences with practical considerations. Following a structured approach prevents costly mistakes and ensures satisfaction with your finished space. Assess Your Current Space and Lighting Start by observing how natural light moves through each room during different times of day. North-facing rooms receive cooler light that can make colors appear darker. South-facing spaces get warm, bright light that intensifies color vibrancy. Test paint samples directly on your walls rather than relying solely on small chips. Paint large swatches and observe them in morning light, afternoon sun, and evening artificial lighting. Colors shift dramatically based on these conditions. Consider your existing elements that won’t change. Flooring, countertops, and built-in features all influence which the choices work best. Match Design to Room Function Different rooms serve different purposes, and your painting design should reflect this reality. High-traffic areas like hallways and kitchens need durable, washable finishes. Living and Dining Rooms These gathering spaces benefit from warm, inviting colors that encourage social interaction. Bedrooms Restful spaces work best with calming colors and matte finishes that don’t reflect harsh light. Bathrooms and Kitchens Moisture-prone areas require semi-gloss or satin finishes that resist mold and clean easily. Consider Current Design Trends Two-tone walls create visual interest without overwhelming spaces. Accent walls remain popular with textured finishes and limewash paint applications adding depth. Earthy, nature-inspired palettes like sage greens and terracottas create organic environments that work across various design styles. What Are the Best Home Painting Design Techniques? Beyond color selection, the techniques used in your home painting design significantly impact the final result. Professional application methods create polished, lasting finishes. Standard Application Methods Traditional roller and brush techniques remain the foundation of quality home painting design. Proper surface preparation, including cleaning, patching, and priming, ensures paint adheres correctly and looks smooth. Two-coat application provides even coverage and true color representation. Professional Winnipeg painting companies understand that patience during application prevents problems later. Specialty Finishes Faux finishes add texture and visual interest beyond flat color. Techniques like color washing create depth and disguise wall imperfections. Ombré effects blend multiple shades from dark to light across a wall, creating stunning focal points. Geometric patterns and color blocking define spaces without physical barriers. Limewash painting offers a unique, breathable finish with subtle texture variations perfect for vintage charm or contemporary minimalism. Choosing Between DIY and Professional Application Simple, single-color rooms might suit confident DIYers with time and patience. However, complex home painting design involving multiple colors or specialty finishes benefits from professional expertise. Professional painters bring experience that prevents common mistakes and complete projects faster with superior results. For pricing on your specific home painting design project, contact True Coat for a free estimate. Common Home Painting Design Mistakes to Avoid Even well-intentioned home painting design projects can go wrong without proper planning. Recognizing these common pitfalls helps you achieve better results. Skipping Proper Surface Preparation Paint only looks as good as the surface beneath it. Failing to clean walls, fill holes, or sand
What Is the Best Deck Stain Remover for Your Winnipeg Home?
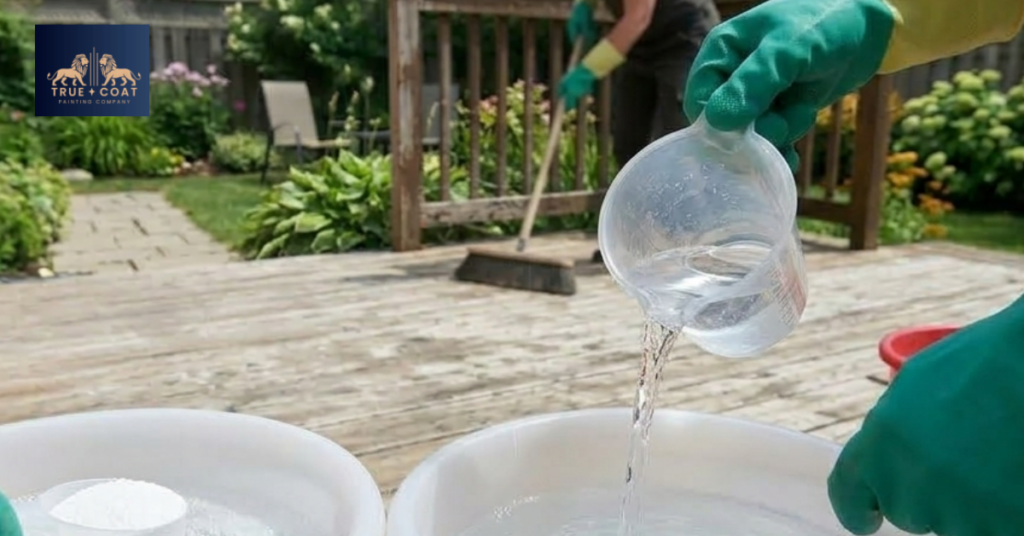
A deck stain remover is a specialized cleaning solution designed to strip old finishes, dirt, and discoloration from wooden deck surfaces. Commercial deck stain removers typically contain powerful ingredients like sodium hydroxide or oxalic acid that break down old stain molecules, while natural alternatives like vinegar offer gentler cleaning for lighter stains. Choosing the right product depends on your deck’s wood type, the stain’s age, and whether you plan to refinish afterward. When your deck starts looking tired and worn, you need more than just soap and water. The right deck stain remover can restore your outdoor space to its original beauty, preparing it for fresh stain or simply revealing the natural wood beneath. From powerful chemical formulas to eco-friendly options, there are multiple ways to tackle stubborn deck stains, each with its own benefits and best-use scenarios. Why You Need a Quality Deck Stain Remover Old deck stain prevents new stain from bonding properly. When you apply fresh stain over old, peeling finish, you get uneven, blotchy results that won’t last. A good deck stain remover strips away years of buildup including old stain, dirt, mildew, and weathering. This opens up the wood grain, allowing new coatings to penetrate deeply. Professional painters in Winnipeg know that surface preparation accounts for 80% of successful deck staining projects. Your deck needs stain removal when you notice peeling finish, dark spots, uneven color, or rough, splintered wood. What Is the Best Deck Stain Remover? The best deck stain remover depends on what you’re trying to remove and your deck’s condition. Commercial products offer the strongest results, while natural solutions work better for maintenance cleaning. Commercial Deck Stain Removers Professional-grade stain removers contain powerful chemicals that dissolve old finishes quickly. These products typically use sodium hydroxide, sodium percarbonate, or oxalic acid as active ingredients. Sodium hydroxide formulas work fast on oil-based stains and solid-color finishes, showing results within 15-30 minutes. Oxalic acid products excel at removing tannin stains and brightening weathered wood, making them ideal for cedar decks. Sodium percarbonate cleaners offer gentler cleaning with less odor, perfect for residential projects. Natural and Homemade Solutions For lighter cleaning jobs or ongoing maintenance, natural deck stain removers provide effective results without harsh chemicals. Vinegar solutions can remove light surface stains. Mix one part white vinegar with one part water for basic cleaning, or use full-strength for tougher stains. Oxygen bleach brightens wood and removes mildew without damaging fibers. Mix it with warm water and apply with a pump sprayer for best results. Baking soda paste tackles specific stain spots effectively. Create a thick mixture with water and scrub problem areas using a stiff brush. Product Type Best For Application Time Safety Level Sodium Hydroxide Oil-based stains, solid colors 15-30 minutes Use protection Oxalic Acid Tannin stains, brightening 30-60 minutes Moderate care Vinegar Solution Light stains, maintenance 30 minutes Very safe Oxygen Bleach Mildew, general cleaning 20-40 minutes Safe What Is the Best Way to Remove Stains from a Deck? Removing deck stain requires proper technique to avoid damaging your wood. Following the right steps ensures complete removal without creating new problems. Preparation Steps Start by clearing everything off your deck. Remove furniture, planters, grills, and any other items. Sweep away loose debris, leaves, and dirt using a stiff broom. Cover nearby plants, siding, and windows with plastic sheeting. Deck stain remover can harm vegetation and discolor certain materials. Use painter’s tape to secure the sheeting in place. Test your chosen deck stain remover on a small, hidden section first. Apply it according to directions and wait the recommended time. This test reveals how your specific wood reacts and helps you adjust your approach. Application Process Apply deck stain remover on a cool, cloudy day to prevent quick drying. Work in sections of about 100 square feet at a time. Pour your deck stain remover into a pump sprayer or paint tray. Spray or brush it onto deck boards, working with the wood grain. Apply a thick, even coat and keep it wet. Wait the manufacturer’s recommended time, usually 15-30 minutes. Watch for the finish to bubble or change color. Scrub the surface using a stiff-bristled brush, working with the grain. Rinsing and Finishing Rinse thoroughly with a garden hose or pressure washer set to low pressure (500-1000 PSI). Rinse from top to bottom on multi-level decks to prevent dirty runoff. Continue rinsing until water runs clear. Let your deck dry completely for 48-72 hours before applying new stain. The wood should feel dry with no dark moisture spots. For expert help, consider working with Winnipeg’s trusted painting professionals who handle deck restoration regularly. How to Get Rid of Stains on Decking Different stain types require specific approaches. Knowing what caused your deck stains helps you choose the most effective removal method. Common Deck Stain Types Water Stains: Dark gray or black areas need oxalic acid deck stain remover to brighten and restore original color. Mildew and Mold: Green or black spots require oxygen bleach to kill spores and lift discoloration. Rust Stains: Orange or brown marks from metal need oxalic acid treatment applied directly to affected areas. Grease and Oil: Kitchen spills require sodium hydroxide formulas that cut through oily residue. Tannin Bleed: Cedar and redwood release tannins creating brown streaks that need specialized wood brighteners. Targeted Stain Removal Techniques For isolated problem spots, apply deck stain remover only where needed using a brush or sponge. Let the product sit until you see the stain lifting, then scrub gently with a soft brush. Rinse carefully, keeping water away from unstained sections to maintain color consistency. Repeat if stains remain after the first application. Some deep stains require multiple treatments. What Is the Best Homemade Deck Stain Remover? Homemade deck stain removers offer affordable alternatives to commercial products. While they may not work as quickly on heavy buildup, they handle regular maintenance effectively. Vinegar-Based Cleaner White vinegar contains acetic acid that breaks down many types of stains. Mix equal parts white vinegar and warm
How Does Exterior Paint Acrylic Protect and Beautify Your Home?
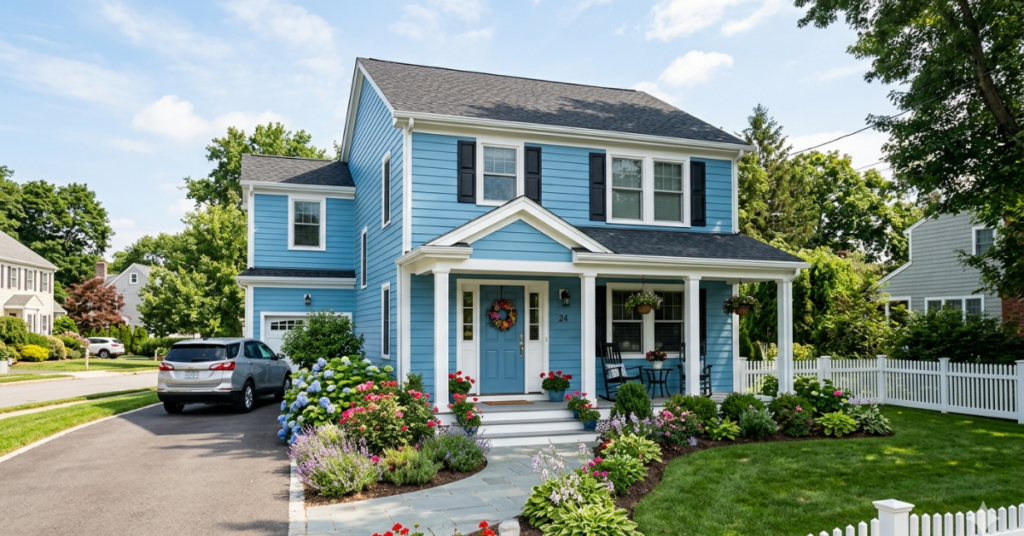
Exterior paint acrylic has become the top choice for homeowners looking to protect and enhance their property’s appearance. This water-based exterior paint acrylic coating combines durability with flexibility, making it resistant to cracking, fading, and weather damage while maintaining beautiful color for years. When properly applied, quality exterior paint acrylic can last 7 to 10 years or more, resisting rain, UV rays, and temperature changes. The exterior paint acrylic forms a protective barrier that expands and contracts with your home, preventing peeling and blistering. This coating breathes better than oil-based options and cleans up easily with soap and water. What Is Exterior Paint Acrylic? Exterior paint acrylic is a water-based coating made from acrylic resin polymers that create a flexible, protective film bonding to outdoor surfaces like wood, vinyl, fiber cement, and stucco. Unlike oil-based paints using chemical solvents, exterior paint acrylic uses water as its primary carrier, making it safer and easier to clean. When applied, the water in exterior paint acrylic evaporates and leaves behind a tough, elastic coating. This coating moves with your home’s surfaces as they expand and contract with temperature changes, preventing the cracking and peeling common with rigid paints. How It Differs From Other Coatings Oil-based paints create a harder, less flexible finish that cracks over time. Latex paint is also water-based, but premium latex formulas contain acrylic resins. Pure exterior paint acrylic has higher concentrations of acrylic polymers, offering better adhesion and longer-lasting color. Paint Type Base Durability Flexibility 100% Acrylic Water Excellent (7-10+ years) High Acrylic-Latex Blend Water Good (5-7 years) Medium Oil-Based Solvent Good (5-8 years) Low Vinyl acrylic costs less but doesn’t perform as well. The vinyl component makes it less breathable and more prone to dirt collection. Is Acrylic Paint Good for the Outside? Yes, exterior paint acrylic is excellent for outdoor use. Its chemical structure makes it naturally suited for exterior applications where weather resistance matters most. The paint’s flexibility prevents cracking when surfaces expand in heat or contract in cold. This quality is especially important in climates with temperature swings like Winnipeg’s harsh winters. Exterior paint acrylic resists moisture better than many alternatives. The coating allows water vapor to escape while blocking liquid water from entering. This breathability prevents blistering and peeling caused by trapped moisture. UV resistance keeps colors vibrant longer through UV-blocking ingredients. Weather Resistance Exterior paint acrylic handles various weather conditions without breaking down. Rain doesn’t wash away properly cured coatings. The paint performs well in both hot and cold climates, remaining flexible in cold and stable in heat. Snow and ice don’t damage cured surfaces. For professional exterior painting services ensuring proper application, True Coat provides expert solutions tailored to Winnipeg’s climate. Surface Compatibility Exterior paint acrylic bonds with many surfaces, adhering well to wood, fiber cement siding, masonry, stucco, and brick. Adhesion improves with proper surface preparation, including cleaning, scraping loose paint, and priming. For comprehensive residential painting Winnipeg services, experienced professionals understand which preparation methods work best. What Are the Advantages of Using Exterior Paint Acrylic? This exterior paint acrylic coating offers multiple benefits that make it the preferred choice for most home painting projects. Long-Lasting Color and Finish Color retention sets exterior paint acrylic apart from other options. The exterior paint acrylic maintains its original shade for years, avoiding fading. The finish stays consistent throughout its lifespan, whether you choose flat, satin, or gloss. Quality exterior paint acrylic formulas resist chalking much longer than vinyl-acrylic blends or oil-based alternatives. Easy Application and Cleanup Applying exterior paint acrylic is straightforward, flowing smoothly from brush or roller. Water-based cleanup is a huge advantage, as tools clean with soap and water. The paint has lower VOC content and faster drying time, with second coats possible within 4 to 6 hours. For those interested in what is the best approach to exterior painting for house projects, understanding application techniques ensures professional results. Cost-Effectiveness While premium exterior paint acrylic may cost more upfront, it delivers better value over time through extended lifespan, better coverage, and lower maintenance needs. What Is the Disadvantage of Acrylic Paint? Despite its many advantages, exterior paint acrylic has some limitations. Temperature Sensitivity Most exterior paint acrylic formulas need air and surface temperatures above 50 degrees Fahrenheit during application and drying. Cold temperatures prevent proper film formation, leading to poor adhesion and early failure. This requirement limits the painting season in colder climates like Winnipeg. Surface Preparation Needs Exterior paint acrylic demands thorough surface preparation for best results. The paint won’t hide defects or bond well to poorly prepared surfaces. Glossy surfaces must be dulled through sanding, and all loose paint must be removed. Wood surfaces often need priming for optimal adhesion. Cost Quality exterior paint acrylic typically costs more per gallon than economy latex paints. Premium 100% acrylic represents the top of the price range. For pricing specific to your project, contact True Coat for a free estimate. Is Exterior Paint Latex or Acrylic? This question confuses many homeowners because the terms are often used interchangeably. The word “latex” doesn’t refer to natural rubber latex but is a general term for water-based paints. Today, most paints labeled as “latex” actually contain acrylic or vinyl-acrylic binders. Reading paint labels carefully reveals what you’re buying. “100% acrylic” indicates pure acrylic resin offering the best performance. “Acrylic latex” contains acrylic resins but might not be 100% acrylic. “Vinyl acrylic” indicates a lower-quality binder. Label Term What It Means Quality Level 100% Acrylic Pure acrylic resin binder Premium Acrylic Latex Acrylic-based, may include blends Good to Very Good Vinyl Acrylic Vinyl and acrylic blend Budget to Standard For exterior applications, 100% exterior paint acrylic formulas deliver the best results. For guidance on best exterior painters near me in Winnipeg, professional contractors can recommend the optimal product. How Long Will Acrylic Paint Last Outside? Properly applied exterior paint acrylic typically lasts 7 to 10 years, though several factors affect actual lifespan. What Affects Longevity Surface preparation is the biggest factor. Paint applied over properly
How to Plan the Interior Painting of House Projects Successfully
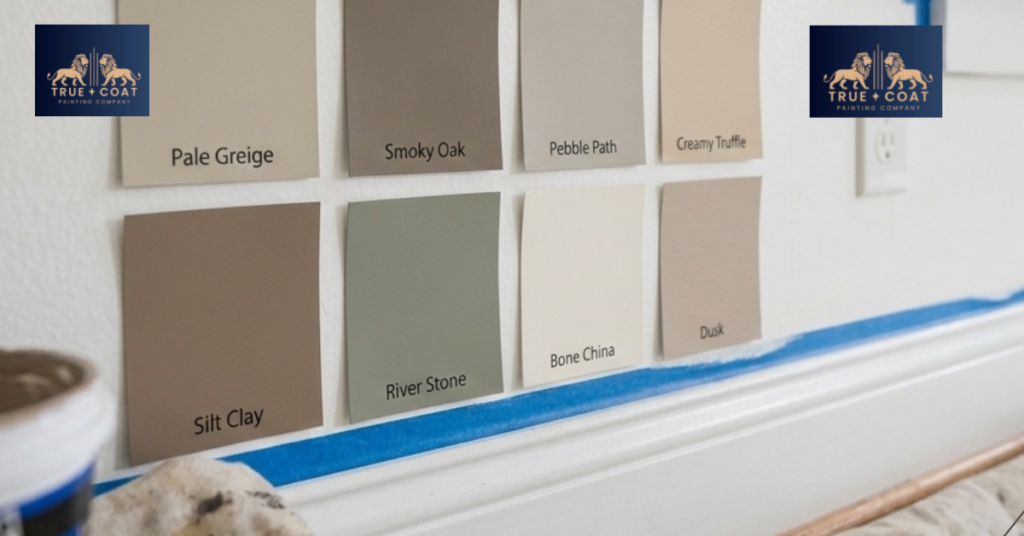
Interior painting of house projects starts with proper planning, surface preparation, and choosing the right colors and finishes for each room. Whether you refresh one room or transform your entire home, understanding the process helps you achieve professional results. The right approach involves selecting quality paints, preparing walls correctly, using proper techniques, and knowing when to hire professionals versus handling the work yourself. From color selection and paint types to preparation steps and application methods, every decision impacts your final results. Budget considerations, timing, and understanding different paint finishes all play crucial roles in creating beautiful, long-lasting interior spaces. How to Plan the Interior Painting of House Projects Successfully Planning the interior painting of house projects requires a systematic approach that covers preparation, execution, and finishing touches. Start by assessing every room you plan to paint and creating a detailed list of materials needed. Walk through your home and note wall conditions, ceiling heights, and any repairs needed before painting begins. Create a realistic timeline based on room sizes and complexity. A single bedroom might take a weekend, while an entire house could require several weeks. Consider your schedule and whether you will work on weekends only or take time off for larger projects. Budget planning helps avoid surprises. Calculate paint quantities by measuring wall square footage and checking coverage rates on paint cans. Most quality paints cover 350-400 square feet per gallon. Add 10-20% extra for touch-ups and second coats. Include costs for brushes, rollers, painter’s tape, drop cloths, and any repair materials. Choose your color scheme early in the planning process. Gather paint samples and test them on walls in different lighting conditions. Natural light in the morning looks different from artificial light in the evening. Live with test patches for a few days before committing to full room colors. Prepare a detailed supply checklist. Beyond paint and basic tools, you might need spackling compound, sandpaper, primer, extension poles, and cleaning supplies. Having everything ready before starting prevents frustrating mid-project trips to the hardware store. Consider the order of rooms. Paint from top to bottom of your house and from back to front. This approach prevents tracking paint through finished areas. If you are painting multiple rooms, complete one fully before moving to the next to maintain momentum and see progress. Essential Steps Before Starting Clear rooms completely or move furniture to the center and cover it with drop cloths. Remove outlet covers, light switch plates, and hanging decorations. Patch holes and cracks with spackling compound and let dry completely. Sand patched areas smooth and wipe walls clean of dust. Apply primer to new drywall, patched areas, or when making dramatic color changes. Primer ensures even coverage and helps paint adhere properly. For professional interior painting services, experts handle all preparation steps to guarantee flawless results. What Makes Quality Interior Painting of House Projects Stand Out Quality interior painting of house work shows in the details. Professional results come from proper surface preparation, using the right tools, and applying paint with correct techniques. The difference between acceptable and exceptional work lies in attention to small details that many homeowners overlook. Wall preparation accounts for most of the quality difference. Professionals spend more time preparing surfaces than actually painting. They fill every small hole, sand rough spots smooth, and ensure walls are clean and dry before opening paint cans. This preparation creates a smooth canvas for paint application. Edge work and cutting in separates amateur from professional results. Clean, straight lines where walls meet ceilings, around trim, and along baseboards require steady hands and proper technique. Quality painter’s tape helps, but skilled application matters more. The best painters can cut in freehand with brushes, creating crisp lines without tape. Paint Quality and Application Techniques Premium paints cost more but provide better coverage, richer colors, and longer-lasting finishes. They contain higher pigment concentrations and better binders, which means fewer coats and more durability. Cheap paint requires multiple coats and fades faster, ultimately costing more in time and repeat work. Application technique affects the final appearance significantly. Roll paint in a W pattern for walls, spreading it evenly without leaving roller marks. Work in sections, maintaining a wet edge to avoid lap marks. Apply even pressure and avoid pressing too hard, which squeezes paint out and creates thin spots. Two thin coats always beat one thick coat. Thick paint drips, sags, and takes forever to dry properly. Thin coats dry faster, level better, and create a more uniform finish. Wait the recommended time between coats as listed on the paint can. Common Mistakes to Avoid Skipping primer on new drywall or drastic color changes leads to uneven coverage and visible patches. Primer seals surfaces and provides a uniform base for paint. It costs less than paint, so using it actually saves money by reducing the number of paint coats needed. Removing painter’s tape too early or too late causes problems. Pull tape while the final coat is still slightly wet but not dripping. This prevents peeling dried paint along tape edges. Wait too long and tape pulls off dried paint, requiring touch-ups. Poor lighting during application hides imperfections that become obvious later. Use bright work lights to spot missed areas, thin spots, or drips while you can still fix them easily. Natural daylight reveals the most, so check your work during daytime when possible. Choosing Colors for Interior Painting of House Spaces Color selection transforms the entire feel of your home. The interior painting of house projects succeeds or fails largely based on color choices. Understanding color psychology, room function, and lighting conditions helps you make confident decisions that you will love for years. Start with the room’s purpose and mood you want to create. Bedrooms benefit from calming colors like soft blues, gentle greens, or warm neutrals that promote relaxation. Living areas can handle bolder choices since people spend time there in varied activities. Kitchens and dining rooms often feature warmer tones that stimulate appetite and conversation. Consider your
How Do You Find the Best Commercial Painters Near Me in Winnipeg?
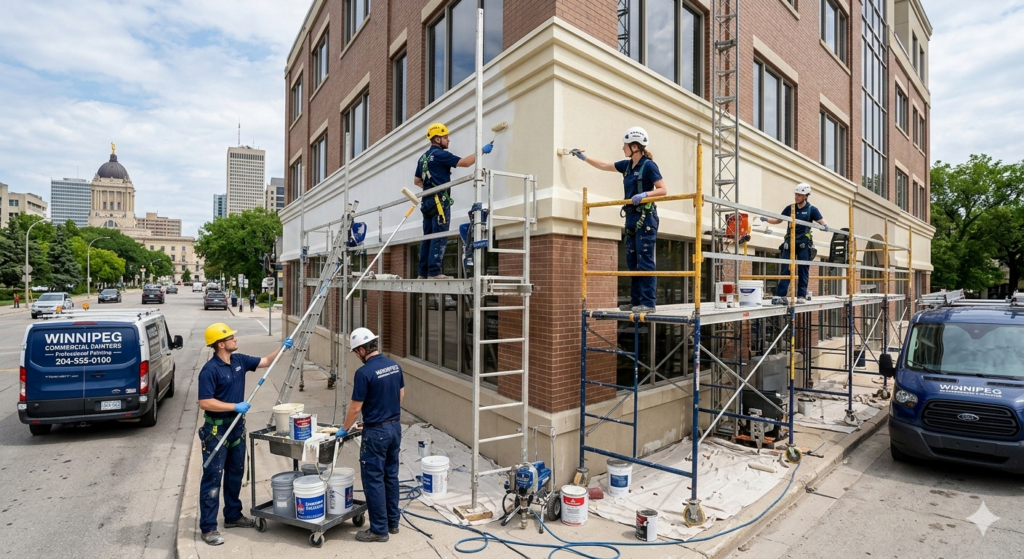
Finding reliable commercial painters near me starts with understanding your business needs and knowing what qualifies a painting contractor as truly professional. Commercial painters near me in Winnipeg offer specialized services including surface preparation, minimal business disruption, and long-lasting finishes designed for high-traffic environments. Whether you need office painting, retail space updates, or warehouse coating, choosing experienced commercial painters near me ensures your project stays on schedule and within budget while delivering results that enhance your business image and protect your investment. Searching for commercial painters near me can feel overwhelming with dozens of online options. You need a team that understands commercial timelines, works efficiently around your business hours, and delivers professional results. The right painters bring expertise in commercial-grade materials, safety protocols, and project management skills that keep everything running smoothly. Keep reading to learn what separates exceptional commercial painters from average contractors, how to evaluate local options, and what questions to ask before signing any contract. What Makes Commercial Painters Near Me Different From Residential Painters? Commercial painting requires a completely different approach than residential work. When you search for commercial painters near me, you’re looking for contractors who understand business environments and commercial building codes. Specialized Skills and Equipment Commercial painters near me use industrial-grade equipment that handles large-scale projects efficiently. They work with high-capacity sprayers, extended scaffolding systems, and specialized tools designed for commercial applications. These professionals handle various commercial surfaces from standard drywall to metal structures, concrete floors, and specialized wall coverings. Commercial painters also follow strict OSHA safety regulations, work at heights safely, and protect building occupants during projects. Project Management and Scheduling Time management sets commercial painters near me apart from residential contractors. They plan projects around your business hours to minimize disruption, often working evenings, weekends, or in phases to keep operations running. Professional commercial painters near me manage complexities smoothly, communicating clearly about timelines and coordinating with facility managers. Experienced painters provide accurate timelines and stick to them, allowing you to plan business activities accordingly. Why Location Matters When Choosing Commercial Painters Near Me Choosing local commercial painters near me in Winnipeg offers advantages that out-of-town contractors can’t match. Local painters respond quickly, understand Winnipeg’s climate challenges, and know which paints withstand harsh winters. Working with commercial painting services in your area supports the local economy. Local painters build their reputation in the community, allowing you to verify work quality. Established companies understand Winnipeg building codes and have relationships with suppliers for better pricing. What Services Do Commercial Painters Near Me Provide? Commercial painters near me offer comprehensive services beyond basic painting. Interior commercial painting transforms office spaces, retail stores, and restaurants using commercial-grade paints designed for durability, with many commercial painters near me providing interior painting services that include color consultation. Exterior painting protects your building from weather damage while creating a professional first impression. Commercial painters near me handle everything from small storefronts to large industrial buildings, using weather-resistant paints and proper preparation including power washing, repairs, and priming. Working with experienced exterior painting contractors ensures quality results. Beyond standard painting, commercial painters near me apply specialized coatings like epoxy floor coatings for warehouses, anti-slip coatings for safety, fire-retardant paints for code compliance, and sound-dampening coatings for offices. Many also offer wallpaper installation and skim coating to create smooth surfaces. How Do You Evaluate Commercial Painters Near Me? Always verify that commercial painters near me carry proper licensing, general liability insurance, and workers’ compensation coverage. Check that policies are current and verify business credentials including years of operation and physical business location. Ask about commercial painting experience and request references from recent clients. Discuss their approach to minimizing business disruption and get details about surface preparation, paint brands, number of coats, and warranty offerings. The best painting companies provide detailed written estimates outlining all costs, materials, timelines, and scope of work. Collect at least three estimates for realistic price comparisons. Don’t automatically choose the lowest bid, as extremely low prices often mean cut corners. Compare what each estimate includes, looking for itemized costs covering labor, materials, and preparation work. What to Expect During a Commercial Painting Project Professional commercial painters near me conduct thorough site assessments before starting, measuring spaces, identifying surface issues, and planning project timelines. Commercial painters near me start with comprehensive surface preparation including cleaning, filling holes, sanding, and priming. Quality commercial painting involves multiple coats with proper drying time. Professional teams maintain clean work areas, cleaning daily and containing dust. After finishing, painters conduct thorough cleanup, remove protective coverings, and complete a final walk-through. At True Coat, we provide a 3-year craftsmanship warranty on completed work. How Much Do Commercial Painters Near Me Charge? Commercial painting costs vary based on project size, surface condition, and paint quality. When evaluating commercial painters near me, square footage is the primary cost driver, with walls needing extensive repairs requiring more labor and materials. Commercial-grade paints cost more but offer superior durability, proving more economical long-term. Cost Factor Impact on Price Square Footage Direct relationship, larger projects may have discounts Surface Preparation Can add 20-40% to base cost Paint Quality Higher grade adds 15-30%, lasts 2-3x longer Timeline Constraints Rush jobs cost 10-25% more For specific pricing tailored to your project, contact True Coat for a free, no-obligation estimate. Beware of estimates that seem too good to be true, as suspiciously low bids often result in poor workmanship or cheap materials. Things To Know Before Hiring Commercial Painters Near Me Plan commercial painting during slower business periods like holidays or weekends to minimize disruption. In Winnipeg, optimal exterior painting occurs between late spring and early fall, while interior projects can happen year-round. Establish clear communication by designating a point person to coordinate with the painting team. Put everything in writing with detailed contracts specifying scope, materials, timeline, payment, and warranty terms. Proper maintenance extends paint job life through regular cleaning with appropriate products. Most commercial interiors need repainting every 3-5 years, while exteriors last 5-10 years. Top
What Are the Essential Steps and Benefits of Exterior Painting for Your Winnipeg Home?
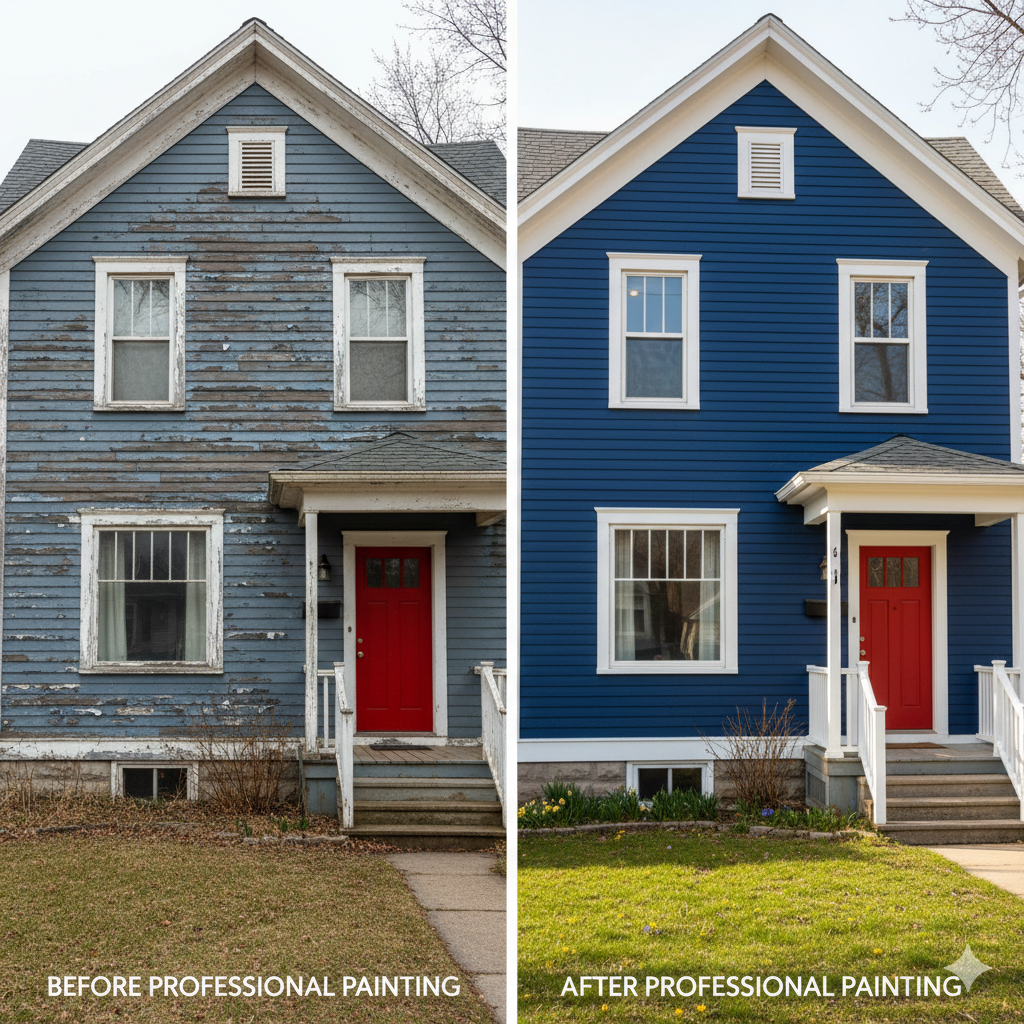
Exterior painting protects your Winnipeg home from extreme weather while enhancing curb appeal and property value. The process involves surface preparation, selecting weather-resistant paint finishes for Canadian climates, and applying protective coats that withstand temperature swings from -40°C to +30°C. Understanding the five paint finish types—flat, eggshell, satin, semi-gloss, and high-gloss—helps balance aesthetics with protection. Professional exterior painting follows systematic steps including inspection, power washing, scraping, priming, and multi-coat application ensuring lasting results. While costs vary by home size and condition, quality exterior painting delivers excellent returns through increased value and protection against moisture damage and UV degradation common in Winnipeg’s challenging climate. What Is Exterior Painting and Why Does It Matter? Exterior painting applies protective coatings to building surfaces, creating barriers against moisture, UV radiation, and temperature extremes. In Winnipeg, where temperatures swing dramatically, exterior painting serves as your home’s primary defense against weather damage, preventing water infiltration that causes wood rot and structural deterioration while blocking UV rays that fade materials. Beyond protection, exterior painting transforms property appearance, updates color schemes, and highlights architectural features. For Winnipeg homes, proper exterior painting addresses unique climate challenges—extreme temperature variations crack inferior paint, summer humidity promotes mildew, and harsh winters test durability. Professional application with weather-resistant products formulated for Canadian conditions delivers protection that lasts. What Are the 5 Types of Paint Finishes for Exterior? Selecting the right finish is crucial for exterior painting success. Each offers different sheen levels and durability for Winnipeg’s climate. Flat or Matte Finish Flat finishes create non-glossy appearances hiding surface imperfections, ideal for older homes with textured siding. They minimize flaws and provide excellent color depth but are harder to clean. For Winnipeg homes, flat finishes work well on body walls not receiving heavy wear. Satin and Eggshell Finishes These mid-range finishes balance subtle sheen with washability. Satin offers better moisture resistance than eggshell. Both provide good color retention on various siding materials, handling moisture better than flat paints. These finishes are ideal for areas needing occasional washing. Semi-Gloss Finish Semi-gloss creates noticeable sheen and superior durability, resisting moisture penetration. It’s ideal for trim, doors, and shutters. In exterior painting, semi-gloss typically accents rather than covers large surfaces, creating visual contrast highlighting architectural details. High-Gloss Finish High-gloss delivers maximum shine and highest durability, extremely resisting moisture and damage. It excels for front doors, shutters, railings, and architectural details, adding visual interest while providing superior rust protection for metal surfaces. Choosing the Right Combination Most successful exterior painting uses multiple finishes strategically, combining satin or eggshell for main walls with semi-gloss for trim. Surface Area Recommended Finish Primary Benefit Main walls, siding Satin or Eggshell Balance of durability and appearance Window and door trim Semi-Gloss Enhanced moisture resistance Front doors, shutters Semi-Gloss or High-Gloss Visual impact and protection Foundations Flat or Satin Hides surface irregularities Professional painting companies guide finish selection based on your home’s characteristics and Winnipeg’s climate demands. What Are the Steps for Professional Exterior Painting? Quality exterior painting follows systematic processes ensuring lasting results. Professional painters in Winnipeg use comprehensive approaches addressing climate-specific challenges. Surface Inspection and Planning Projects begin with thorough inspection examining conditions—loose siding, wood rot, mildew, or failing paint. This determines preparation requirements and ensures accurate estimates. Painters assess existing paint and test for lead paint on pre-1978 homes. Planning considers weather—exterior painting requires temperatures above 10°C and dry conditions. Cleaning and Power Washing Power washing removes dirt, mildew, and chalky residue at appropriate pressure (1500-2500 PSI). For mildew, specialized solutions are applied before washing. After washing, surfaces must dry completely—typically 24-48 hours before painting. Preparation and Repairs Scraping and sanding remove all loose or damaged paint, creating solid foundations. Removed areas are feathered smooth. Damaged wood requires repair or replacement. Fresh caulk is applied around windows, doors, and joints using paintable, flexible exterior caulk. Priming and Painting Primer creates bonding layers while sealing and blocking stains. Bare wood must always be primed. Professional exterior painting typically involves two finish coats for optimal coverage and durability. Professionals maintain “wet edges” ensuring seamless blending. Final Inspection Final steps involve thorough inspection and touch-ups. Professionals check for missed spots, thin coverage, and finish defects, ensuring crisp trim lines and proper window and door function. Proper cleanup includes removing masking materials and restoring landscaping. Experienced house painters in Winnipeg stand behind their work. Understanding Exterior Painting Costs Exterior painting represents a significant property investment. Home size is the primary cost factor—larger square footage requires more materials and labor. Surface condition dramatically impacts costs—homes requiring extensive preparation, repairs, or paint removal cost more than those needing simple cleaning. Design complexity affects pricing. Single-color exterior painting costs less than projects involving multiple accents and detailed trim work. Material quality influences both initial costs and long-term value—premium paints cost more but provide better coverage and last longer. For accurate pricing specific to your Winnipeg home, contact True Coat for detailed estimates reflecting quality workmanship and materials. Value and Return on Investment Quality exterior painting delivers substantial returns, potentially returning 50-100% of costs in increased home value. Beyond resale, it protects structures from weather damage and prevents costly repairs. Fresh paint on wood siding prevents moisture intrusion leading to rot—problems costing thousands to repair. Energy efficiency can improve with proper exterior painting. Light-colored paints reduce cooling costs by reflecting solar heat. Quality paint seals gaps, reducing heating costs during Winnipeg’s cold winters. Can You Paint Over Old Exterior Paint? Whether you can apply new paint over existing coatings depends on several factors. When Painting Over Works You can successfully paint over old exterior painting when existing coatings properly adhere, showing no peeling, with only minor fading. Old paint must be clean and free from dirt, mildew, and chalk preventing new paint bonding. Coatings should be intact without significant cracking or blistering. Minor imperfections can be addressed through spot repairs, but extensive damage indicates failed coatings. Modern acrylic latex paints adhere well to old latex coatings. When existing paint chemistry is unknown, bonding primers ensure proper adhesion.
How Do You Fix Damaged Drywall & Plaster Walls in Your Home?
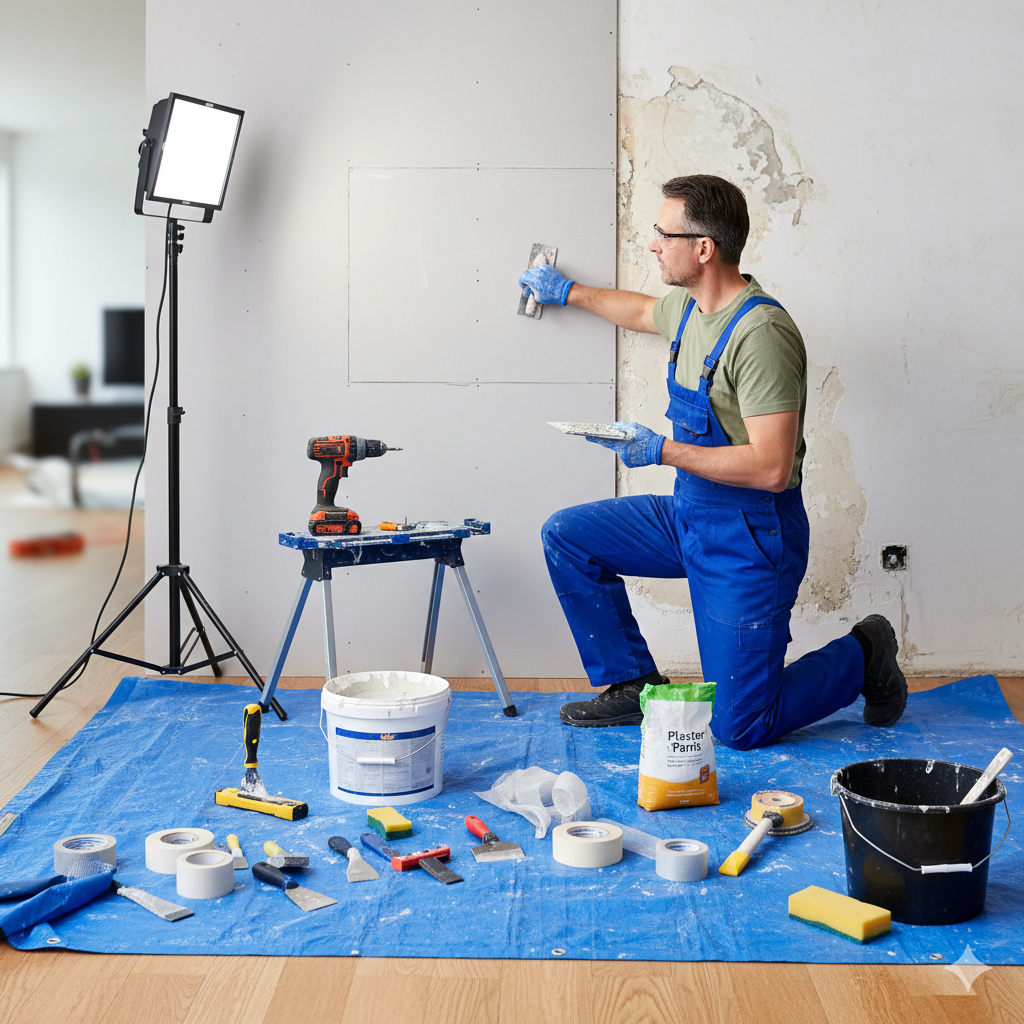
Drywall & plaster repair is a necessary service that fixes cracks, holes, and surface damage on interior walls to restore them to a smooth, paintable condition. Whether you’re dealing with small nail holes or large damaged sections, proper repair techniques can make your walls look brand new again. Most homeowners in Winnipeg face wall damage at some point, from settling cracks to accidental impacts, and knowing how to address these issues saves time and money. Professional repair work ensures durable results that blend seamlessly with existing surfaces, while DIY attempts often lead to visible patches and recurring problems. The process involves assessing the damage, choosing the right materials, applying proper techniques, and finishing with a smooth surface ready for painting. What Is Drywall & Plaster Repair? Drywall & plaster repair involves fixing damaged sections of interior walls to restore their original appearance and structural integrity. This service addresses everything from minor cosmetic issues to significant structural damage that affects your home’s value and appearance. The repair process differs depending on whether you’re working with modern drywall or traditional plaster walls. Drywall, also called gypsum board, consists of a gypsum core sandwiched between paper layers. Plaster walls, common in older Winnipeg homes, feature multiple layers of plaster applied over wood lath or metal mesh. Common Types of Wall Damage Wall damage comes in many forms, each requiring specific repair approaches. Small nail holes and picture hook marks are the most common, usually appearing when you remove wall hangings or rearrange your space. Cracks develop from house settling, temperature changes, or structural movement. Hairline cracks are mostly cosmetic, while wider cracks may signal foundation issues that need professional assessment. Impact damage creates dents or holes from doorknobs, furniture, or accidental collisions. Water damage shows up as staining, bubbling, or crumbling sections where moisture has compromised the wall material. Corner bead damage occurs at wall corners where metal or plastic edges get dented or separated. Texture damage happens when wall surfaces get scraped, gouged, or worn down over time. Why Professional Repair Matters Professional drywall & plaster repair delivers results that last. Experienced technicians understand how different materials behave, which products work best, and how to match existing textures perfectly. Improper repairs often crack again within months, requiring costly rework. Professionals use the right joint compounds, proper drying times, and skilled finishing techniques that prevent future problems. True Coat’s team brings years of experience to every drywall & plaster repair project, ensuring your walls look flawless and remain durable for years to come. How Does Drywall & Plaster Repair Work? The repair process follows specific steps that ensure strong, invisible fixes. Understanding these steps helps you appreciate the skill involved and why professional service delivers superior results. Assessment and Preparation Every successful repair starts with thorough assessment. Professionals examine the damage extent, identify the wall type, and check for underlying issues like moisture or structural problems. Preparation involves protecting your floors and furniture with drop cloths. The damaged area gets cleaned of loose material, dust, and debris. For holes, technicians cut away damaged sections to create clean, stable edges. Water-damaged areas must dry completely before repair begins. Any mold growth requires treatment before patching. Structural issues get addressed first to prevent repair failure. Repair Techniques for Different Damage Small Holes and Nail Pops Tiny holes get filled with spackling compound or lightweight joint compound. The filler goes in flush with the wall surface, then gets sanded smooth after drying. Multiple thin coats work better than one thick application. Medium Holes (1-6 Inches) These require backing support. Professionals install mesh tape, metal patches, or cut drywall pieces that fit behind the hole. Joint compound builds up in layers, with each coat extending slightly beyond the previous one to blend the patch. Large Holes (Over 6 Inches) Major damage needs full section replacement. Technicians cut a rectangular opening, install new drywall secured to studs, tape the seams, and apply multiple compound coats. This approach provides the strongest, most durable repair. Crack Repair Cracks get opened slightly with a utility knife to create a V-groove that holds compound better. Mesh tape reinforces the crack before compound application. Flexible compounds prevent re-cracking in areas with movement. Plaster Wall Repair Plaster repair requires different materials and techniques. Loose plaster gets removed back to solid material. For shallow repairs, bonding agents help new plaster adhere to old. Deep repairs may need multiple plaster layers that match the original wall thickness. Traditional skim coating techniques create smooth surfaces on damaged plaster walls, giving them a fresh, uniform appearance. Finishing and Texturing After repairs dry completely, technicians sand the surface smooth, feathering edges so patches blend invisibly. Matching existing wall texture is crucial for professional results. Common textures include orange peel, knockdown, and smooth finishes. Professionals replicate these textures using specialized tools and techniques. For interior painting projects, properly finished repairs ensure paint applies evenly without visible patches. Table 1: Drywall vs. Plaster Repair Comparison Feature Drywall Repair Plaster Repair Material Gypsum board, joint compound Lime or gypsum plaster, bonding agents Typical Damage Holes, dents, tape separation Cracks, crumbling, loose sections Repair Time 1-3 days (drying time) 3-7 days (multiple plaster layers) Difficulty Level Moderate Advanced Best For Modern homes (post-1950s) Historic homes (pre-1950s) Common Issues Paper damage, corner bead dents Lath separation, plaster delamination What Makes Drywall & Plaster Repair Challenging? Several factors make wall repair more difficult than it appears. These challenges explain why professional services often deliver better results than DIY attempts. Matching Existing Textures Wall textures vary significantly between homes and even between rooms. Orange peel texture, popular in many Winnipeg homes, requires specific spray equipment and technique to replicate accurately. Knockdown texture involves applying compound, then partially flattening it with a trowel. The timing and pressure must match the original application exactly. Smooth walls seem simple but show every imperfection, requiring expert finishing skills. Older homes may have custom textures or multiple texture layers that are extremely difficult to match. Professional contractors maintain texture samples
How to Properly Do Deck Staining: A Winnipeg Homeowner’s Guide
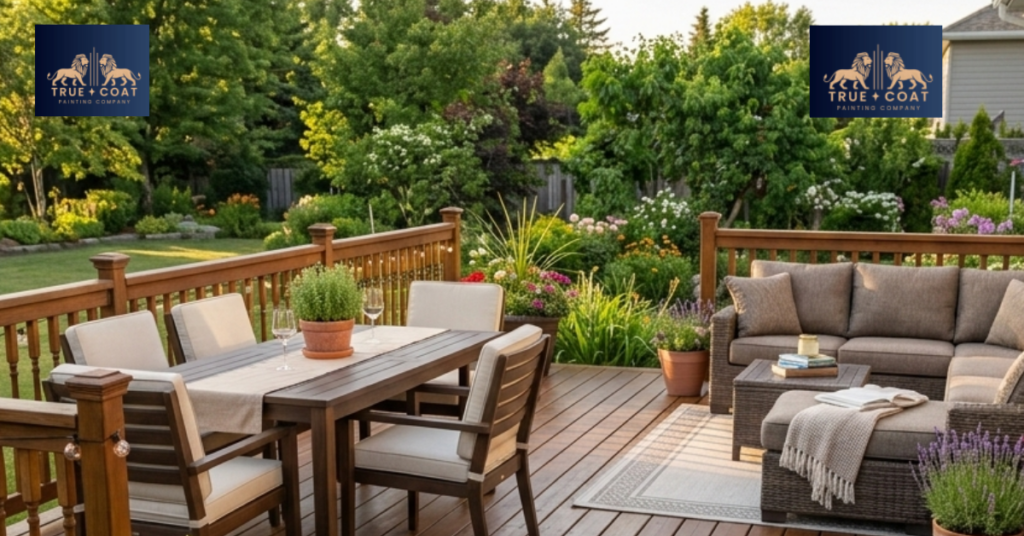
Deck staining protects your outdoor investment from harsh Canadian weather while enhancing your home’s curb appeal. The best approach combines proper surface preparation, choosing quality products suited to Winnipeg’s climate, and applying stain during dry conditions between 10°C and 27°C. Most homeowners achieve professional results by cleaning the deck thoroughly, sanding rough spots, and using a combination of brushing and rolling techniques for even coverage. Whether you’re tackling deck staining for the first time or looking to improve your technique, understanding the right methods and timing makes all the difference. A properly stained deck can last 2-4 years before needing maintenance, saving you money and protecting your wood investment. Ready to transform your outdoor space? Why Deck Staining Matters for Winnipeg Homes Your deck faces extreme temperature swings, intense UV exposure during summer months, and moisture from rain and snow throughout the year. Without proper protection, wood deteriorates quickly, leading to costly repairs or complete replacement. Deck staining creates a barrier against moisture penetration. When water seeps into wood fibers, it causes swelling, cracking, and eventual rot. Manitoba’s freeze-thaw cycles accelerate this damage, making regular deck staining essential for longevity. UV rays break down wood lignin, turning your deck gray and brittle. Quality stain contains UV blockers that slow this degradation process significantly. Interior painting services protect your home’s inside, but deck staining does the same job for your outdoor living space. Beyond protection, deck staining enhances natural wood grain and adds rich color that complements your home’s exterior. A well-maintained deck increases property value and creates an inviting space for summer gatherings. Many Winnipeg homeowners find that residential painting and deck staining projects together dramatically improve their home’s overall appearance. What’s the Best Way to Do Deck Staining? The most effective deck staining method combines multiple application techniques for thorough, even coverage. Start with a clean, dry surface, then use a combination of brushing, rolling, and back-brushing to work stain into wood grain. Surface Preparation Steps Proper preparation determines how well your deck staining project turns out and how long it lasts. Skip these steps, and you’ll see peeling and uneven color within months. First, sweep away all debris, leaves, and dirt. Use a stiff broom to get between deck boards where grime accumulates. Next, wash the entire surface with a deck cleaner designed to remove mildew, dirt, and old stain residue. Power washing works well but requires caution. Hold the nozzle 12 inches from the surface and use a fan tip, not a concentrated stream. Too much pressure damages wood fibers, creating a fuzzy surface that absorbs stain unevenly. Many homeowners working with best house painters in Winnipeg learn this technique prevents damage. After washing, let your deck dry completely for 48-72 hours depending on weather conditions. Test moisture levels by sprinkling water on the surface. If it beads up, the wood isn’t ready. If it soaks in, you’re good to proceed. Sand any rough spots, splinters, or raised grain using 80-grit sandpaper. This creates a smooth surface that accepts stain evenly. Pay special attention to railings and high-traffic areas that see more wear. Application Techniques That Work for Deck Staining The brush and roll method delivers the best results for deck staining. Pour stain into a paint tray, then load a roller with a thick nap cover (3/4 inch works well for textured wood). Roll stain onto 3-4 deck boards at a time, working in manageable sections. Immediately follow with a brush to work stain into cracks, grooves, and grain patterns. This back-brushing technique ensures complete penetration and even color. For railings and balusters, brush application works better than rolling. Load your brush moderately to avoid drips and runs. Work from top to bottom, and wipe away excess immediately with a clean rag. Apply stain in the direction of the wood grain, never against it. This follows natural wood patterns and creates a professional finish. Overlap each section slightly to avoid visible lines where new stain meets dried areas. Common Application Mistakes: How Many Coats Do You Need? Most deck staining projects require two coats for optimal protection and color depth. The first coat seals and primes the wood, while the second coat provides rich color and additional weather resistance. Wait for the first coat to dry according to manufacturer instructions, typically 4-24 hours depending on temperature and humidity. Test dryness by touching an inconspicuous spot. If it feels tacky, wait longer. Some heavily weathered decks or new wood may need three coats for complete coverage. However, more isn’t always better. Thick buildup can peel and flake, creating more problems than it solves. Deck Condition Recommended Coats Notes New wood 2 coats Absorbs stain quickly, needs sealing Previously stained (1-2 years) 1-2 coats Depends on existing condition Heavily weathered 2-3 coats May need primer for severe damage High-traffic areas 2-3 coats Extra protection for stairs, walkways Best Time to Stain a Deck for Long-Lasting Deck Staining Results The optimal time for deck staining in Winnipeg falls between late May and early September, when temperatures consistently stay between 10°C and 27°C. You need at least 48 hours of dry weather before application and 24-48 hours after to allow proper drying and curing. Seasonal Considerations for Winnipeg Climate Late spring offers excellent conditions as wood has dried from winter moisture and temperatures stabilize. However, watch for late frosts that can affect curing. June through August provides the most reliable weather windows, though intense heat requires adjusting your schedule. Early morning and late afternoon work best during summer months. Avoid deck staining in direct midday sun, as stain dries too quickly and doesn’t penetrate properly. Just like exterior painting projects, timing makes all the difference in results. Early fall can work if you complete the project before nighttime temperatures drop below 10°C. Cold temperatures slow drying and curing, potentially leaving your deck vulnerable to early winter weather. Daily Weather Factors That Impact Deck Staining Check the forecast for a 5-day window of dry conditions. Rain within 48 hours of
What Should You Expect From a Professional Interior Painting Service?
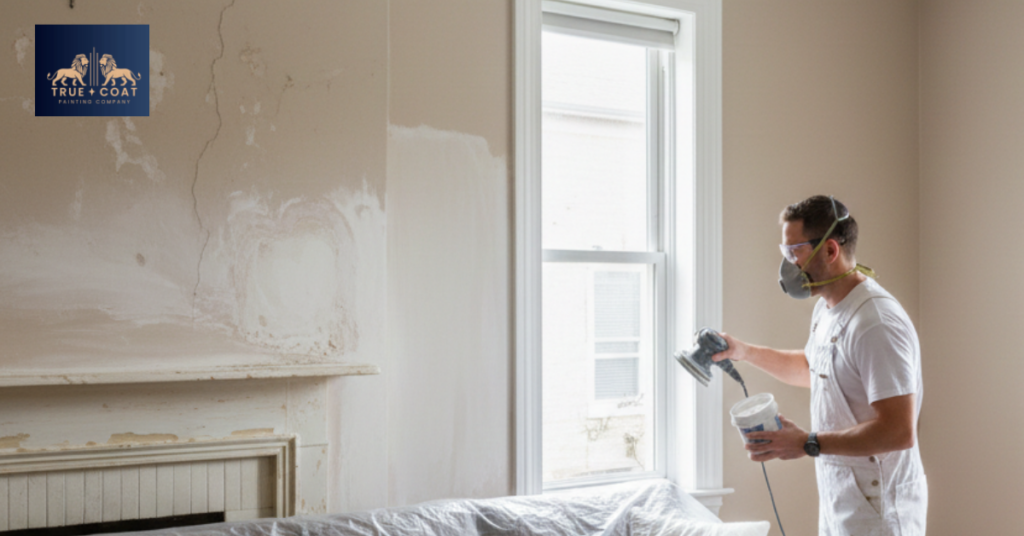
Professional interior painting service delivers more than just a fresh coat of paint on your walls. When you hire experienced painters in Winnipeg, you receive comprehensive surface preparation, expert color consultation, meticulous application techniques, and thorough cleanup that protects your furniture and floors. Quality interior painting service transforms your living spaces while ensuring durability through proper prep work, premium materials, and skilled craftsmanship. From initial consultation to final walkthrough, professional painters handle every detail including wall repairs, priming, multiple coats, and trim work. What Is Interior Painting Service? Interior painting service encompasses the complete process of refreshing or transforming the painted surfaces inside your home or business. This professional service goes far beyond simply rolling paint onto walls. A comprehensive interior painting service starts with a detailed consultation where painters assess your space, discuss your vision, and recommend color schemes that complement your style and lighting. Professional painters evaluate wall conditions, identify necessary repairs, and create a project timeline that minimizes disruption to your daily routine. The service includes protecting your belongings with drop cloths and plastic sheeting, repairing wall imperfections like cracks or holes, sanding rough surfaces, applying primer when needed, and executing multiple paint coats for even coverage. True Coat’s interior painting professionals handle every step with precision and care. What makes professional interior painting service different: Why Choose Professional Interior Painting Service? Hiring professional interior painting service saves you time, prevents costly mistakes, and delivers results that last significantly longer than amateur work. Many homeowners underestimate the skill required for flawless paint application. Professional painters bring years of experience identifying potential problems before they become expensive issues. They know which primers work best on different surfaces, how to prevent paint from peeling or bubbling, and techniques for achieving perfectly straight lines without tape marks. Expertise and Quality Professional interior painting service providers understand paint chemistry and how environmental factors affect application. Winnipeg’s climate requires specific approaches to ensure paint cures properly and maintains its appearance through temperature fluctuations. Experienced painters apply consistent pressure and use proper rolling techniques that eliminate visible roller marks and streaks. They cut in edges cleanly without getting paint on trim or ceilings, creating crisp lines that define professional work. Time and Efficiency A professional team completes interior painting service projects in a fraction of the time a homeowner would need. What might take you several weekends of hard work, professionals finish in days while maintaining superior quality. Professional painters work systematically, completing preparation on all surfaces before starting to paint. This workflow prevents the start-stop pattern that creates inconsistent results in DIY projects. Safety and Proper Equipment Professional interior painting service includes proper safety equipment for working on ladders, scaffolding, and high ceilings. Painters carry insurance protecting you from liability if accidents occur during the project. Professionals use commercial-grade equipment that produces better results than consumer tools. High-quality sprayers, extension poles, and specialized brushes make difficult areas easier to reach and paint more evenly. How to Prepare for Interior Painting Service Proper preparation before your interior painting service arrives helps the project run smoothly and prevents delays. Taking a few simple steps protects your belongings and creates an efficient work environment. Clearing the Space Remove small furniture, decorations, and wall hangings from rooms being painted. While professional painters will move larger pieces and cover them with protective materials, clearing smaller items prevents accidental damage and speeds up the process. Take down curtains, blinds, and window treatments before the painting crew arrives. Remove outlet covers, light switch plates, and door hardware if you feel comfortable doing so, though most professional interior painting service teams handle this as part of their preparation. Communicating Your Expectations Discuss your color preferences, finish options, and any specific concerns with your painting team during the initial consultation. Clear communication about your vision ensures the final result matches your expectations. Point out any areas requiring special attention, such as stains you want covered, damaged sections needing repair, or architectural features you want highlighted with accent colors. Professional painters appreciate detailed information that helps them deliver exactly what you envision. Planning for Pets and Children Interior painting service works best when painters can focus without interruptions. Consider arranging for children and pets to stay elsewhere during painting days, or confine them to areas not being worked on. Paint fumes, even from low-VOC products, can irritate sensitive individuals. Proper ventilation helps, but removing vulnerable family members from the immediate area provides extra protection and allows painters to work more efficiently. What Does the Interior Painting Service Process Include? Understanding each step of professional interior painting service helps you know what to expect and recognize quality work when you see it. The process follows a systematic approach ensuring consistent, long-lasting results. Initial Assessment and Consultation Your interior painting service begins with a thorough evaluation of your space. Professional painters examine wall conditions, note areas requiring repair, and discuss your color preferences and timeline requirements. During this consultation, painters provide recommendations based on room function, lighting conditions, and your personal style. They explain different paint finishes and which works best for each space in your home. Surface Preparation Professional painters spend significant time on preparation because this step determines how well paint adheres and how long it lasts. They fill nail holes, cracks, and dents with spackling compound, then sand surfaces smooth once repairs dry. Painters clean walls to remove dust, grease, and residues that prevent proper paint adhesion. In kitchens and bathrooms, thorough cleaning removes cooking oils and moisture deposits that can cause paint failure. When needed, professionals apply skim coating to create perfectly smooth surfaces, especially on damaged or textured walls you want transformed. This technique requires skill and patience but produces flawless results. Preparation Step Purpose Impact on Final Result Wall cleaning Removes contaminants Ensures proper paint adhesion Crack and hole filling Creates smooth surface Eliminates visible imperfections Sanding Levels repairs and roughens surface Provides uniform texture for painting Priming Seals surface and blocks stains Improves coverage and color