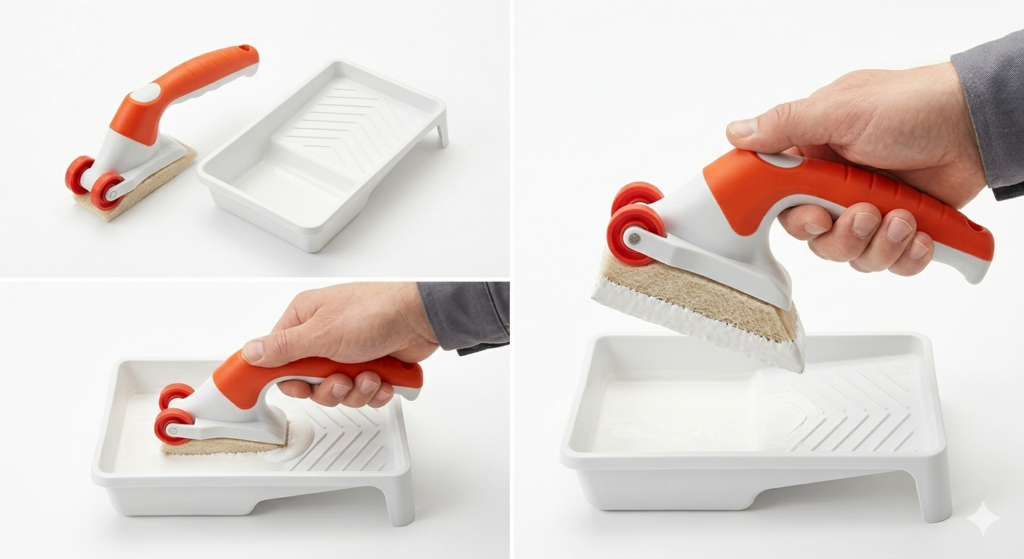
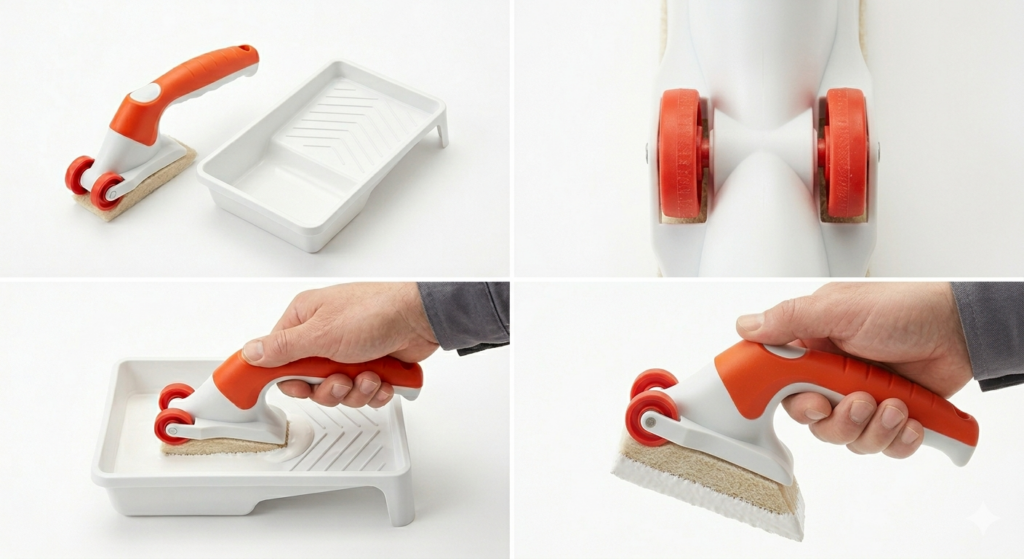
A painting edger is a handheld tool designed to apply paint along edges, corners, baseboards, and ceiling lines without needing painter’s tape. It gives you straight, clean paint lines by guiding the paint applicator right up to a boundary surface without bleeding over.
Whether you are touching up a single wall or repainting an entire room, a painting edger saves time, reduces mess, and helps anyone achieve a professional-looking finish. It works for both beginners doing DIY projects and experienced painters who want faster, cleaner results. Choosing the right type, loading it correctly, and keeping it clean are what separate a sharp result from a frustrating one.
What Is a Painting Edger?
A painting edger is a specialized paint applicator that lets you cut in cleanly along edges without freehand skill or masking tape. Most models feature a flat paint pad or small roller attached to a frame with guide wheels or a plastic shield on the sides. The wheels ride along the adjacent surface, such as a ceiling or baseboard, keeping the pad at a consistent distance so the paint line stays straight.
This tool is especially useful in spaces where two different colours meet, such as where the wall meets the ceiling, around door frames, along window trim, or above baseboards. Without a painting edger, those areas typically require steady brush control or careful taping, both of which demand either experience or a lot of prep time.
The painting edger was created to make edging accessible for everyone. Even someone with no painting experience can produce a tidy line using one, as long as the tool is loaded properly and moved at a steady pace. It eliminates most of the common causes of uneven lines, including hand shake, over-brushing, and inconsistent pressure, making it one of the most practical additions to any paint kit.
How Does a Painting Edger Work?
Using a painting edger is straightforward once you understand the mechanics behind it. The guide wheels do the positioning work for you, so your job is simply to keep a smooth pace and manage your paint load.
Here is the general process:
- Load the pad or roller by dipping it into a tray or rolling it lightly over a paint tray. Avoid overloading, as excess paint causes drips and uneven lines.
- Position the guide wheels against the trim, ceiling, or adjacent surface. The wheels act as a buffer so the pad stays aligned.
- Press gently and glide the painting edger along the surface in one smooth motion. Apply light, even pressure throughout.
- Overlap each pass slightly to avoid missed spots or streaks.
- Reload paint frequently because the pad dries out quickly and thin layers give better control than heavy ones.
One practical tip: wipe the guide wheels with a damp cloth after every few passes. Paint can build up on the wheels and transfer to the adjacent surface, leaving marks where you do not want them. For best results, always test the painting edger on a spare piece of cardboard or an inconspicuous area before committing to your wall. This lets you check the paint load and pressure before it matters.
Types of Painting Edger Tools
Not all painting edger options are built the same. Choosing the right type depends on your project, your surface type, and your comfort level with painting tools.
Pad Painting Edgers
These use a foam or fabric pad to apply paint. They hold a good amount of paint and glide smoothly along flat surfaces. Best for large wall areas near baseboards or along ceilings where you need consistent coverage over a long run. A pad painting edger is usually the easiest type to learn on and works well for standard interior rooms with smooth walls.
Roller Painting Edgers
A mini roller version of the standard tool, it lays paint on quickly and works well on textured walls. Some include an angled roller to reach corners more easily. The roller painting edger leaves a slightly more textured finish than a pad edger, which can actually blend better if your main walls are rolled rather than brushed.
Brush-Style Edging Tools
These look like a traditional paintbrush but have a built-in guide or shield on one side. They give more control on curved or irregular trim, such as ornate door frames or window moulding where other edger types cannot follow the shape accurately. If your home has detailed architectural trim, a brush-style painting edger gives you flexibility that a pad or roller cannot match.
Electric or Battery-Powered Painting Edgers
Battery-operated models spin a small pad or roller automatically. They are faster than manual tools and reduce hand fatigue on large projects. These suit intermediate or experienced users who want a consistent finish on big rooms without spending extra time on each pass.
| Type | Best For | Skill Level |
|---|---|---|
| Pad Edger | Flat surfaces, ceilings, baseboards | Beginner |
| Roller Edger | Textured walls, quick coverage | Beginner to Intermediate |
| Brush-Style Edger | Curved or detailed trim | Intermediate |
| Electric Edger | Large rooms, high volume work | Intermediate to Advanced |
Painting Edger vs. Painter’s Tape: Which Is Better?
Both tools help you get clean paint lines, but they work differently and suit different situations. Understanding where each one shines helps you avoid wasted time and uneven results.
Painter’s tape requires you to apply strips carefully along every edge before painting, let the paint dry, and then peel back the tape. If the tape is not pressed down firmly at every point, paint bleeds underneath and ruins the line. It also takes considerably more time to set up and remove, especially in a large room with lots of trim or multiple colour changes.
A painting edger skips the tape entirely. You load it with paint, position the guide wheels, and start painting right away. For most straightforward edging jobs, such as painting a wall next to white trim or running a line along a ceiling, it is noticeably faster and just as clean when used correctly.
However, tape still has real advantages. On highly textured surfaces, a painting edger’s wheels can sit unevenly and leave a crooked line. Tape conforms better in those cases. Tape is also the safer choice when you need to fully protect a surface, such as wallpaper or a stained wood panel, where even a small amount of bleed would cause damage.
For smooth walls in standard rooms, a painting edger wins on speed. For complex surfaces or delicate boundaries, tape remains the more reliable option. Many painters actually use both on the same job: the edger for the main runs and tape on tricky corners or textured spots where the wheels cannot sit flat.
Things To Know Before Using a Painting Edger
Before picking up a painting edger for your next project, a few important points will help you avoid the most common frustrations people run into when using one for the first time.
- Prime the surface first. A painting edger works best on primed, clean walls. Bare or uneven surfaces cause the pad to skip or absorb paint unevenly, leaving a patchy line.
- Use the right paint consistency. Very thick paint clogs the pad; very thin paint drips. Standard latex wall paint at room temperature works well with most painting edger models.
- Keep your pace consistent. Moving too slowly deposits too much paint and creates ridges. Moving too fast misses spots. A steady, moderate pace gives the best result.
- Clean the tool often. Paint dries quickly on the pad and wheels. Rinsing the painting edger between sessions extends its lifespan significantly.
- Do edges first, then roll the walls. Always complete edging before filling in the main wall area. The roller then covers any slight variations naturally.
- Lighting matters. Work in good lighting so you can see where the paint line sits and catch any gaps before they dry.
Painting Edger vs. Brush for Cutting In
Many homeowners wonder whether a painting edger fully replaces a brush for cutting in. The honest answer is that it depends on the specific job and the painter’s experience.
A paintbrush gives you more tactile control. Experienced painters rely on a brush when cutting in because they can feel exactly where the paint is going and adjust in real time. A brush also works well on surfaces that are not perfectly flat, such as walls with slight texture or trim with small imperfections.
A painting edger is more consistent for beginners and for long straight runs. The guide wheels remove the guesswork, so you do not need a perfectly steady hand. It also holds more paint than a standard angled brush, meaning you cover more distance per reload.
For professional results, many painters combine both tools. A brush handles tight corners and intricate spots, and a painting edger takes over for the longer straight runs near ceilings or baseboards.
| Tool | Advantage | Limitation |
|---|---|---|
| Painting Edger | Fast, consistent lines, beginner-friendly | Struggles on uneven or textured surfaces |
| Paintbrush | Full control, works on any surface | Requires practice for clean lines |
Common Mistakes to Avoid With a Painting Edger
Even with a reliable painting edger in hand, a few easy-to-make mistakes can lead to results that look rushed or uneven. Knowing what to watch for saves a lot of cleanup.
Overloading the pad is the number one issue. When too much paint is on the pad, it squeezes out the moment you press the tool to the wall. Start with less paint than you think you need and build up from there. A lightly loaded painting edger gives you far more control.
Skipping surface prep is another common problem. If the wall has dust or grease, the edger pad will not sit flush and the line will look uneven. A quick wipe-down before you start makes a noticeable difference.
Pressing too hard defeats the purpose of the guide wheels. The wheels do the alignment work, so gentle, even pressure is all it takes. Pressing hard causes the pad to spread paint beyond the guided line.
Finally, many people forget to re-wet the pad between walls or after breaks. A dried-out pad pulls instead of glides, leaving drag marks and thin spots in the paint line.
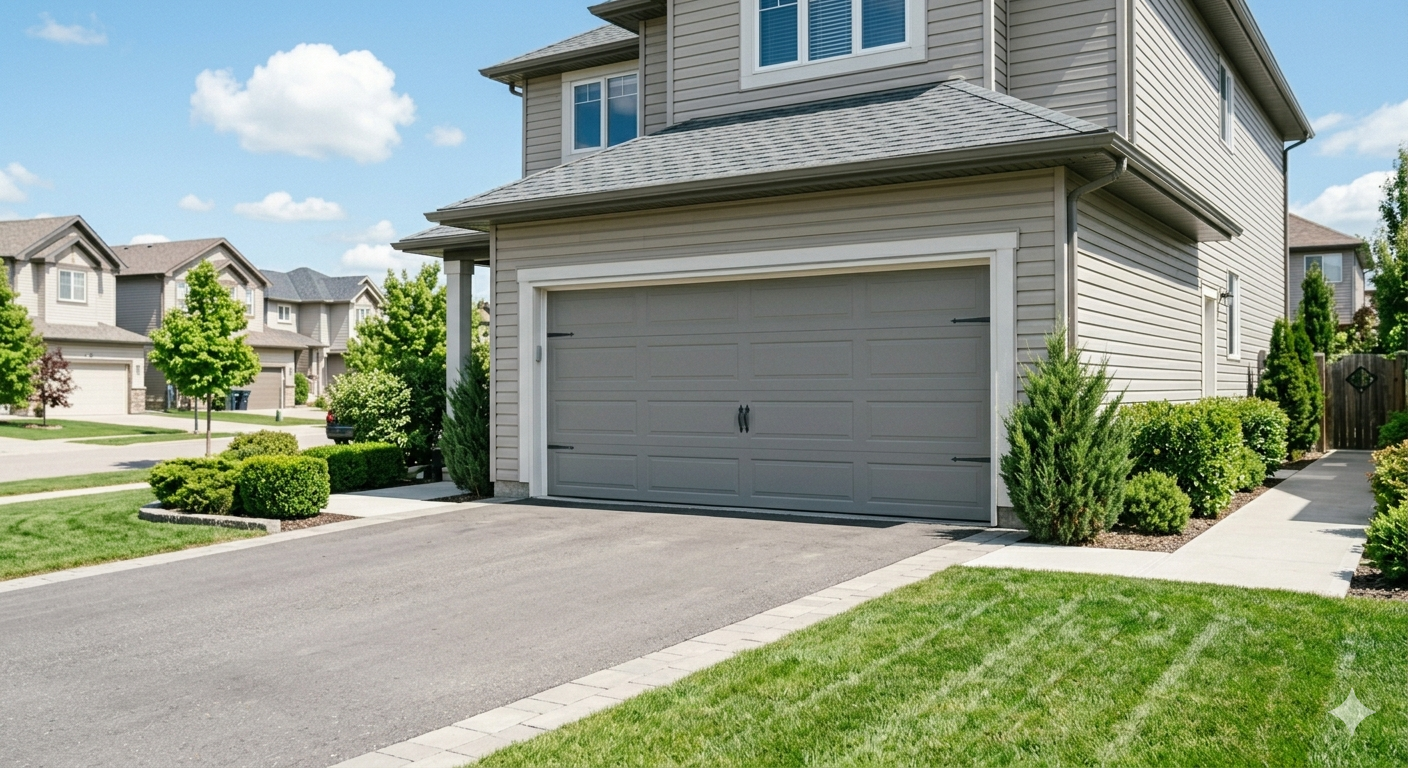
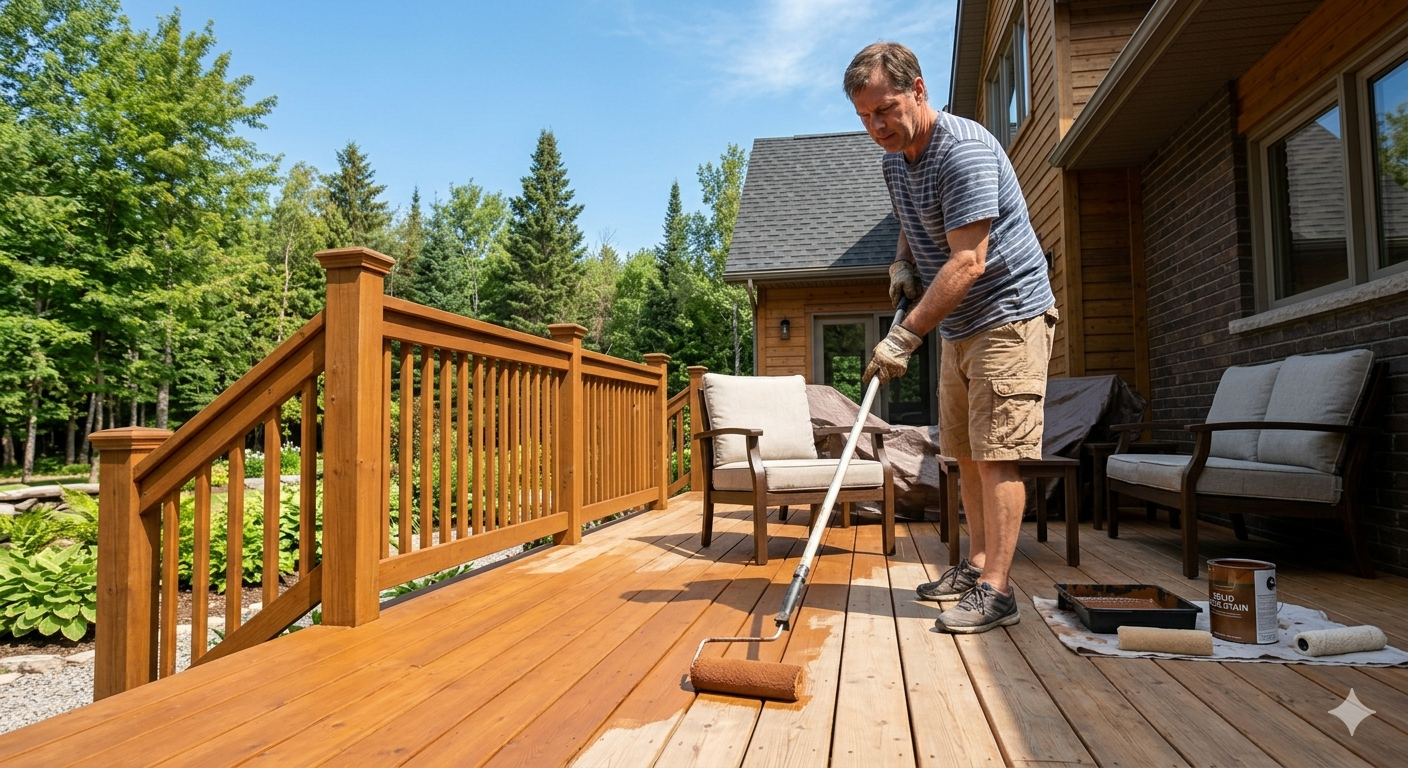
How True Coat Can Help With Your Painting Project
If your edging project feels bigger than a weekend DIY job, True Coat is Winnipeg’s trusted, licensed, and fully insured painting team. From careful prep work to flawless final coats, they handle everything so you get results that last. You can explore their full range of residential and commercial painting services to see what fits your home or business needs.
Their blog on exterior painting for house projects covers how to plan a thorough paint job from start to finish. And if you are working through a bigger renovation, reading about the best interior painting companies can help you make a confident, well-informed choice.
True Coat offers flexible financing options for larger projects, backed by a 3-year craftsmanship warranty. If your walls need more than a fresh coat, their drywall and plaster repair services in Winnipeg will get every surface perfectly smooth before any paint is applied.
Making the Most of Your Painting Edger
A painting edger is one of the most practical tools you can add to any interior paint project. It cuts in cleanly, saves setup time, and makes professional-looking lines achievable for anyone willing to use it correctly. Choosing the right painting edger type for your surface, loading it with the right amount of paint, and keeping the guide wheels clean are the three habits that make the biggest difference between a good result and a great one.
Whether you choose a basic pad edger for a quick bedroom refresh or a powered model for a full-house repaint, using a painting edger consistently will speed up your work and raise the quality of your finish every single time.
Frequently Asked Questions
Are paint edgers any good?
Yes, paint edgers are genuinely useful, especially for beginners. They remove the need for painter’s tape on most straight edges and help anyone achieve a clean, consistent line along ceilings, baseboards, and trim. The key is loading the pad lightly and keeping the guide wheels clean. For flat, smooth surfaces, a quality painting edger delivers results that match freehand brushwork in less time.
What is a paint edger for?
A paint edger is designed to apply paint right up to a boundary without crossing over onto the adjacent surface. It is most commonly used where walls meet ceilings, around door and window trim, and above baseboards. The guide wheels keep the pad aligned, so you get a straight paint line without needing tape or a steady hand.
What is the best tool for painting edges?
The best tool depends on your surface and skill level. A painting edger with guide wheels is the top choice for smooth, flat surfaces and beginners. A quality angled brush is better for textured walls or detailed trim. Many experienced painters combine both, using the painting edger on long straight runs and a brush for corners and tight spots.
What is painting the edges called?
The process is called “cutting in.” Cutting in means painting a precise line along edges, corners, and trim before filling in the main wall area with a roller. A painting edger is one of the primary tools used for cutting in, and getting it right is one of the most important steps in any interior paint project.
Do professional painters use edgers?
Some professional painters do use painting edgers, though many rely on a brush for cutting in. Professionals with years of experience often prefer a brush for the control it offers. However, painting edgers are common on larger jobs where speed matters, and battery-powered models are increasingly popular on big residential projects.