Skim coat concrete is a technique that applies a thin layer of specialized material over existing concrete surfaces to create a smooth, level finish. This process fixes minor imperfections like cracks, pits, and rough textures without the expense of replacing the entire surface.
The method involves proper surface preparation, mixing polymer-modified materials, and applying thin coats evenly. You can achieve professional results in one to two days with the right tools, making it practical for basements, garages, patios, and commercial spaces.
Skim coating costs less than replacement, works on structurally sound concrete, and creates ideal surfaces for painting, staining, or installing new flooring.
What Is Skim Coat Concrete?
Skim coat concrete involves spreading a thin layer of cement-based compound over existing concrete surfaces. This layer typically measures between 1/8 inch to 1/4 inch thick, just enough to cover surface defects without adding significant weight or height.
The process uses special polymer-modified materials designed to bond strongly with old concrete. Unlike regular concrete, skim coat products contain additives that improve adhesion and flexibility, preventing cracks and separation over time.
You’ll find skim coat concrete useful for leveling uneven surfaces, filling small holes and cracks, smoothing rough textures, and preparing floors for tile, vinyl, or epoxy coatings. Many property owners choose this method to refresh worn concrete without tearing it out and starting over.
Common Uses for Skim Coat Concrete
Basement floors benefit from skim coating when water damage or settling creates uneven spots. Garage floors with oil stains, pitting, or minor cracks become perfectly smooth, preparing them for durable finishes and protective coatings.
Benefits of Skim Coating
Skim coat concrete creates smooth surfaces ready for painting, staining, or new flooring installation. The thin application adds minimal height while fixing imperfections that make floors look old and worn.
Where to Use Skim Coat Concrete
Patios and walkways develop a fresh appearance when you apply skim coat concrete over weathered surfaces.
Commercial spaces like retail stores, warehouses, and office buildings use skim coating to maintain professional appearances without expensive replacements.
Why Choose Skim Coat Concrete Over Replacement?
Replacing damaged concrete costs significantly more than skim coating. Complete removal requires heavy equipment, disposal fees, and new concrete installation. Time savings matter too, as concrete replacement takes several days while skim coating typically finishes in one or two days.
Skim coat concrete works well when the existing slab remains structurally sound. If your concrete has minor surface issues but no major structural problems, skim coating provides an excellent solution at a fraction of replacement costs.
Cost Savings with Skim Coating
Skim coat concrete eliminates the need for expensive demolition and disposal. You save money on labor, equipment rental, and new concrete materials while achieving professional results that improve your property’s appearance.
Time Efficiency
Projects with tight deadlines benefit from faster completion compared to full concrete replacement. You can return to normal activities within days rather than weeks, minimizing disruption to your home or business operations.
When Skim Coating Makes Sense
Surface-level damage like small cracks, minor pitting, light scaling, and rough textures all disappear under a properly applied coat. Height restrictions sometimes prevent full replacement, making the thin layer of skim coat concrete ideal for maintaining specific floor heights.
Materials and Tools Needed for Skim Coat Concrete
Proper materials ensure your skim coat concrete project succeeds. Self-leveling concrete resurfacer works best for most applications, while polymer-modified cement provides enhanced bonding strength.
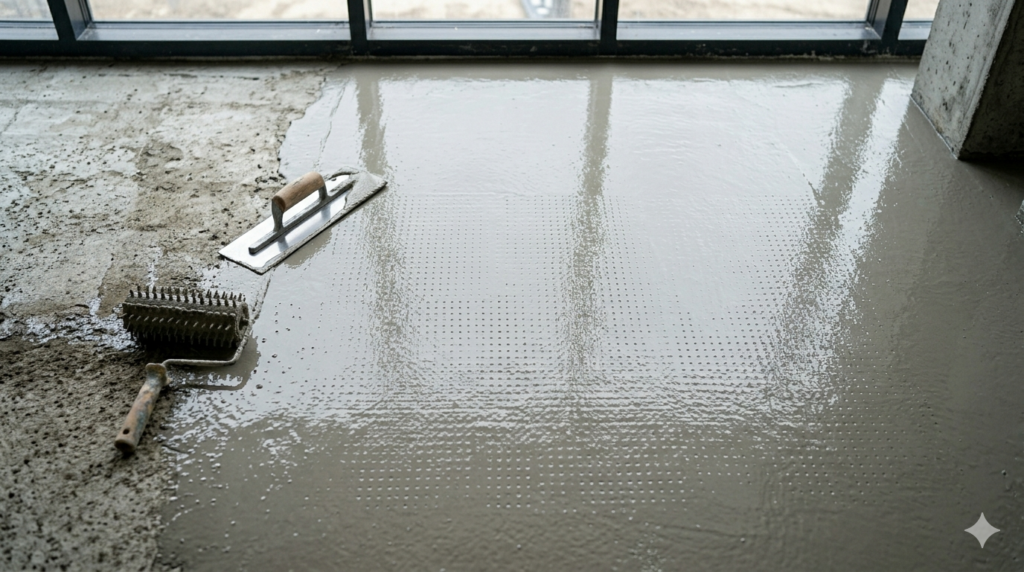
Concrete bonding agent prepares the surface for the new layer, creating a strong connection between old and new concrete. Basic tools include a mixing drill with paddle attachment, large buckets, steel trowels, gauge rake, and spiked roller to remove air bubbles.
| Material/Tool | Purpose | Approximate Cost Range |
| Self-leveling resurfacer | Main coating material | Contact True Coat for pricing |
| Bonding agent | Surface preparation | Contact True Coat for pricing |
| Steel trowels | Application and smoothing | Contact True Coat for pricing |
| Spiked roller | Air bubble removal | Contact True Coat for pricing |
Safety equipment includes rubber gloves, safety glasses, knee pads, and a dust mask when mixing and spreading skim coat concrete.
Choosing the Right Skim Coat Product
Self-leveling compounds work great for large flat areas, spreading easily and settling into smooth surfaces. Trowel-grade products suit smaller areas or vertical surfaces, staying where you place them without running.
Indoor vs. Outdoor Formulas
Outdoor formulas withstand weather exposure and resist freeze-thaw cycles. Indoor products offer smoother finishes, working perfectly for basements, garages, and commercial spaces protected from weather.
Essential Safety Equipment
Proper safety gear protects you during application. Rubber gloves prevent skin irritation from cement products. Safety glasses shield your eyes from splashes, while knee pads make floor work more comfortable during long application sessions.
How to Prepare Concrete for Skim Coating
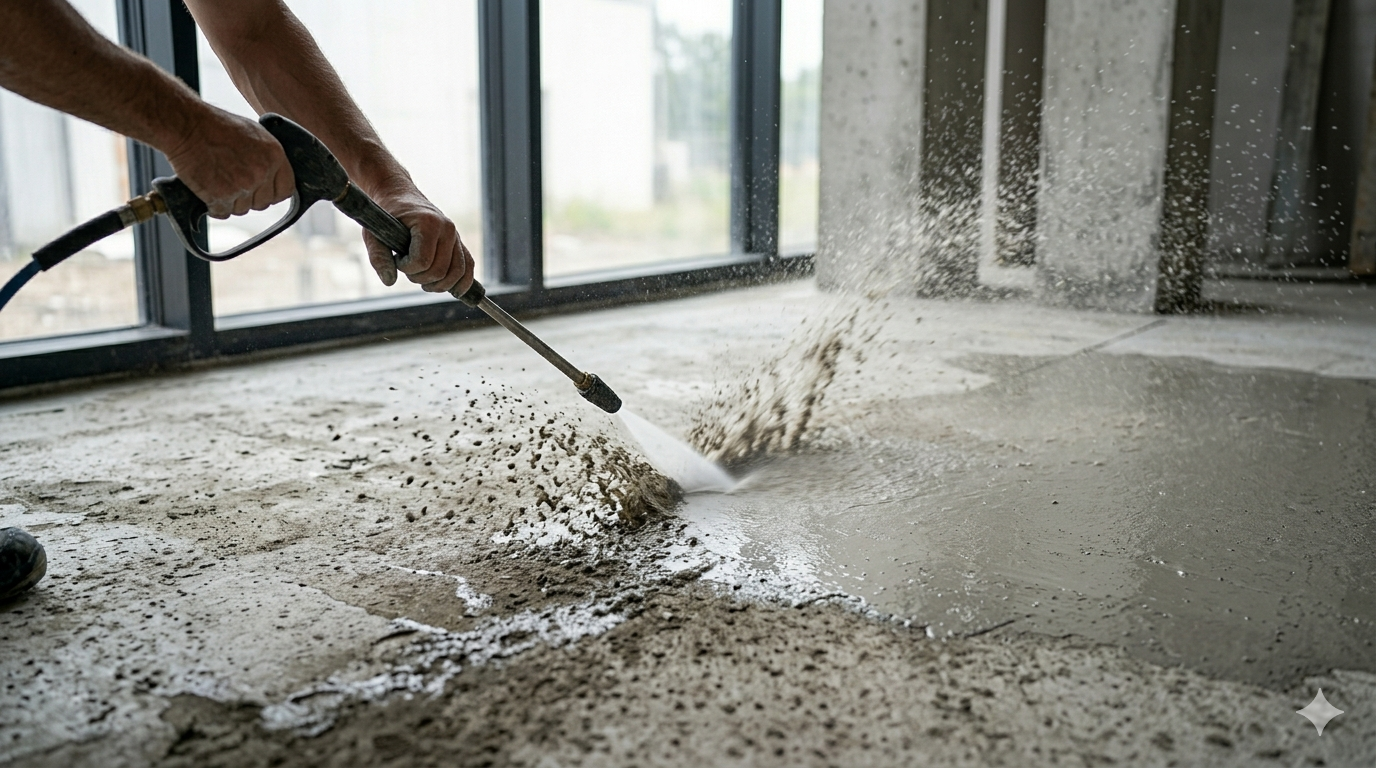
Surface preparation determines whether your skim coat concrete bonds properly and lasts for years. Clean the existing concrete thoroughly to remove all dirt, oil, grease, and loose material using a pressure washer or stiff brush with degreaser.
Check for loose or flaking concrete and scrape away any material that doesn’t bond tightly. Fill large cracks and holes wider than 1/4 inch with concrete filler before skim coating, letting repairs cure completely.
Cleaning the Surface
Remove all contaminants including oil stains, grease, dust, and debris. Use a degreaser for stubborn stains and ensure the concrete is completely clean before moving to the next preparation step.
Surface Testing and Repairs
Test the concrete’s condition by pouring water on the surface. If water soaks in quickly, the concrete is ready for coating. If water beads up, you may have sealers needing removal through grinding or etching.
Repair structural cracks properly before skim coating. Deep cracks indicate foundation problems that skim coat concrete can’t fix, requiring professional evaluation. Check for moisture problems in basement floors, addressing water issues before coating to ensure long-lasting results.
Applying Bonding Agent
Apply bonding agent with a roller or brush, covering the entire surface evenly without leaving dry spots. Work in sections small enough to coat before the bonding agent dries, usually 30 minutes to an hour.
Let the bonding agent become tacky before applying skim coat concrete. The surface should feel sticky but not wet, typically taking 15 to 30 minutes after application.
Step-by-Step Process to Skim Coat Concrete
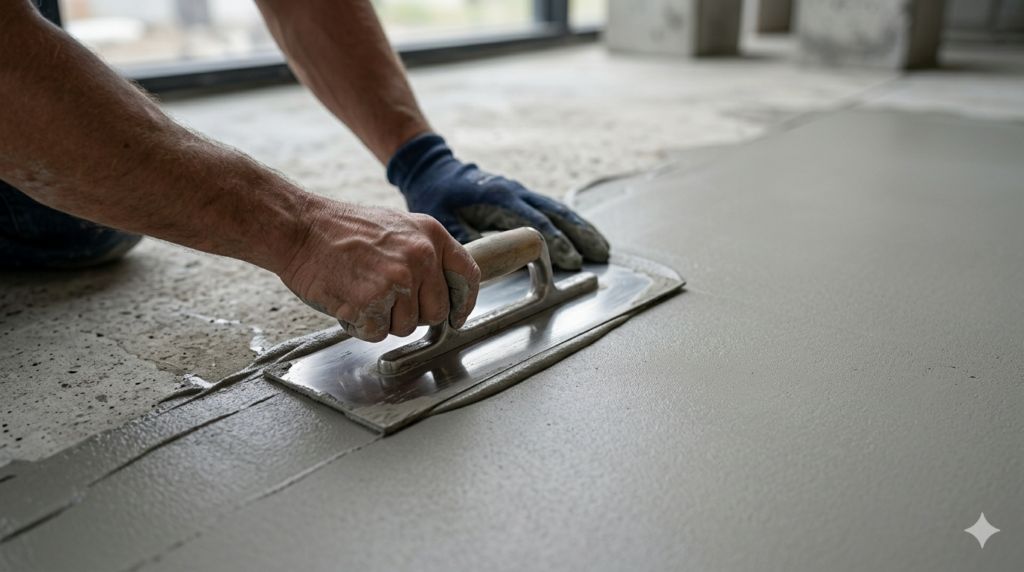
Mix your skim coat concrete following package directions carefully. The consistency should flow easily but not be too watery. Pour mixed material onto the prepared surface starting in the far corner, working backwards toward your exit.
Spread skim coat concrete with a steel trowel or gauge rake, maintaining even thickness of 1/8 to 1/4 inch. Use a spiked roller immediately after spreading to remove trapped air bubbles, rolling in different directions for complete coverage.
Mixing and Pouring Techniques
Follow manufacturer instructions exactly when mixing skim coat concrete. The proper water-to-material ratio ensures strong bonding and smooth application. Mix thoroughly to eliminate lumps that could create weak spots in the finished surface.
Application Techniques for Best Results
Work quickly because skim coat concrete begins setting within 20 to 30 minutes. Mix only the amount you can apply in that timeframe to prevent waste. Apply multiple thin coats rather than one thick layer, as two coats of 1/8 inch work better than one coat of 1/4 inch.
Maintain consistent temperature during application between 50°F and 80°F. Extreme temperatures cause problems with curing and bonding.
| Application Step | Time Required | Important Notes |
| Surface cleaning | 2-4 hours | Remove all contaminants completely |
| Bonding agent application | 30 minutes | Work in manageable sections |
| Spreading material | 20-30 minutes per batch | Work quickly before setting begins |
| Initial cure time | 2-4 hours | Avoid foot traffic completely |
Curing and Finishing
Keep the surface moist during curing to prevent cracking through light misting with water. Avoid walking on fresh skim coat concrete for at least four hours. Light foot traffic becomes safe after 24 hours, but wait three to seven days before placing heavy furniture.
Apply sealers after complete curing. Most skim coat concrete needs 28 days to fully cure before sealing, though some products allow earlier sealing.
Common Mistakes to Avoid When Skim Coating Concrete
Skipping surface preparation causes the most failures. Skim coat concrete won’t bond to dirty, oily, or sealed surfaces regardless of application care. Using too much water weakens the mixture, reducing strength and durability significantly.
Applying material too thick leads to cracking and poor curing. Ignoring temperature and humidity affects results, as working in very hot, cold, or humid conditions changes how skim coat concrete sets.
Troubleshooting Common Problems
Bubbles and pinholes appear when air gets trapped during application. Using a spiked roller properly prevents most issues. Cracking happens when skim coat concrete dries too quickly or gets applied too thick.
Poor adhesion results from inadequate surface preparation or skipping bonding agent. Uneven texture occurs when spreading too slowly or inconsistently. Work at a steady pace with uniform trowel pressure for smooth results.
How Much Does Skim Coat Concrete Cost?
Several factors influence the total expense including surface condition, area size, product choice, and labor requirements. DIY projects cost less than professional installation but require more time and effort.
For accurate pricing specific to your project, contact True Coat for free estimates based on your concrete’s condition and specific needs. Professional installation includes surface preparation, materials, application, and cleanup with guaranteed results.
Factors Affecting Project Cost
Large areas cost less per square foot than small spaces. Severely damaged concrete needs more preparation work, increasing labor time and material usage. Outdoor applications may cost more than indoor work due to weather considerations and specialized products.
Skim Coat Concrete Maintenance and Longevity
Properly applied skim coat concrete lasts many years with minimal maintenance. Indoor surfaces often remain in good condition for 10 to 20 years or more. Regular cleaning extends surface life through frequent sweeping and mopping with mild detergent.
Seal the surface every few years to maintain protection. Sealers prevent moisture penetration and make cleaning easier. Address minor damage quickly to prevent larger problems from developing.
When to Recoat or Repair
Heavy traffic areas may need recoating sooner than low-use spaces. Visible wear patterns, dull spots, or surface roughness suggest the skim coat needs attention. Water absorption problems require resealing.
Structural cracks need professional evaluation. While minor surface cracks may only need patching, deeper cracks might indicate foundation issues requiring expert assessment and repair.
Skim Coat Concrete vs. Other Concrete Finishing Options
Epoxy coatings create thicker, more durable surfaces than skim coat concrete. Epoxy works well for garages and workshops but costs more and requires extensive preparation. Polished concrete grinding removes surface material rather than adding it, working only on thick, sound concrete.
Concrete staining adds color without changing texture but won’t fix surface imperfections like skim coat concrete does. Tile or vinyl installation covers damaged concrete but adds height without addressing underlying surface problems.
Combining Skim Coat with Other Finishes
Apply decorative coatings over cured skim coat concrete. Stains, dyes, and paints adhere well to the smooth surface. Install flooring materials after skim coating for perfect results, as the level surface prevents problems with tile, vinyl, or wood installations.
Integrate with painting projects for complete room transformations. Skim coating floors while refreshing walls creates cohesive renovations.
Things to Know Before Starting Your Skim Coat Concrete Project
Temperature control matters throughout the process. Cold concrete won’t cure properly, while hot surfaces cause too-fast drying and potential cracking. Ventilation helps during indoor applications through open windows and fans.
Practice technique on a small area first. Testing your mixing and application methods in an inconspicuous spot helps avoid mistakes on visible surfaces.
Professional Help vs. DIY
Simple projects suit DIY approaches if you have basic skills and tools. Complex situations with large areas, severe damage, or tight deadlines benefit from professional experience.
True Coat brings specialized knowledge to every skim coat concrete project. Our team handles preparation, application, and finishing with precision from years of experience. We use professional-grade materials and equipment that deliver superior results.
Contact True Coat for a free consultation about your concrete resurfacing needs. We’ll assess your surface, discuss options, and provide honest recommendations based on your specific situation.
Wrapping Up Your Skim Coat Concrete Project
Skim coat concrete offers an affordable, effective way to transform damaged or ugly concrete into smooth, attractive surfaces. The process requires attention to detail during preparation and application, delivering professional results that last for years.
Whether you choose DIY installation or professional service, understanding the process helps you make informed decisions. Don’t let rough, damaged concrete limit your space’s potential. With skim coat concrete, you can create beautiful floors and surfaces that enhance your property’s value and appearance.
For expert assistance with skim coating or any other painting and finishing services, reach out to True Coat for professional guidance and quality workmanship.
Frequently Asked Questions
Can you skim coat over concrete?
Yes, you can skim coat over existing concrete surfaces. The concrete must be clean, structurally sound, and properly prepared with a bonding agent. Skim coat concrete works well on indoor and outdoor surfaces, provided you use the appropriate products for each location. The existing concrete should be free from oil, grease, sealers, and loose material for proper adhesion.
How thick can you skim coat concrete?
Typical skim coat concrete applications range from 1/8 inch to 1/4 inch thick. Some specialized products allow slightly thicker applications up to 1/2 inch, but thinner coats generally cure better and resist cracking. Multiple thin coats work better than one thick layer if you need more coverage. Always follow manufacturer recommendations for thickness to ensure proper curing and durability.
What is the best material to skim coat concrete?
Self-leveling concrete resurfacer works best for most skim coat concrete projects. Polymer-modified cement products offer superior bonding and flexibility compared to regular cement. For vertical surfaces, trowel-grade products provide better control. Choose outdoor-rated formulas for patios and walkways, and indoor-specific products for basements and garages. Quality bonding agents are essential regardless of which skim coat material you select.
How long does skim coat concrete take to dry?
Skim coat concrete typically dries enough for light foot traffic within 24 hours. Complete curing takes 28 days, though many products allow sealing after seven days. Drying time varies based on temperature, humidity, thickness, and product type. Warmer temperatures and lower humidity speed drying, while cool, damp conditions extend cure times. Avoid placing heavy objects or applying floor coverings until the surface has fully cured.
Can you paint over skim coat concrete?
Yes, you can paint over fully cured skim coat concrete. Wait at least seven days before painting, though 28 days ensures complete curing for best results. Clean the surface thoroughly and apply a concrete primer designed for the paint type you’ve chosen. Both latex and epoxy paints work well over skim coated surfaces. Proper surface preparation and primer application ensure paint adheres correctly and lasts for years.