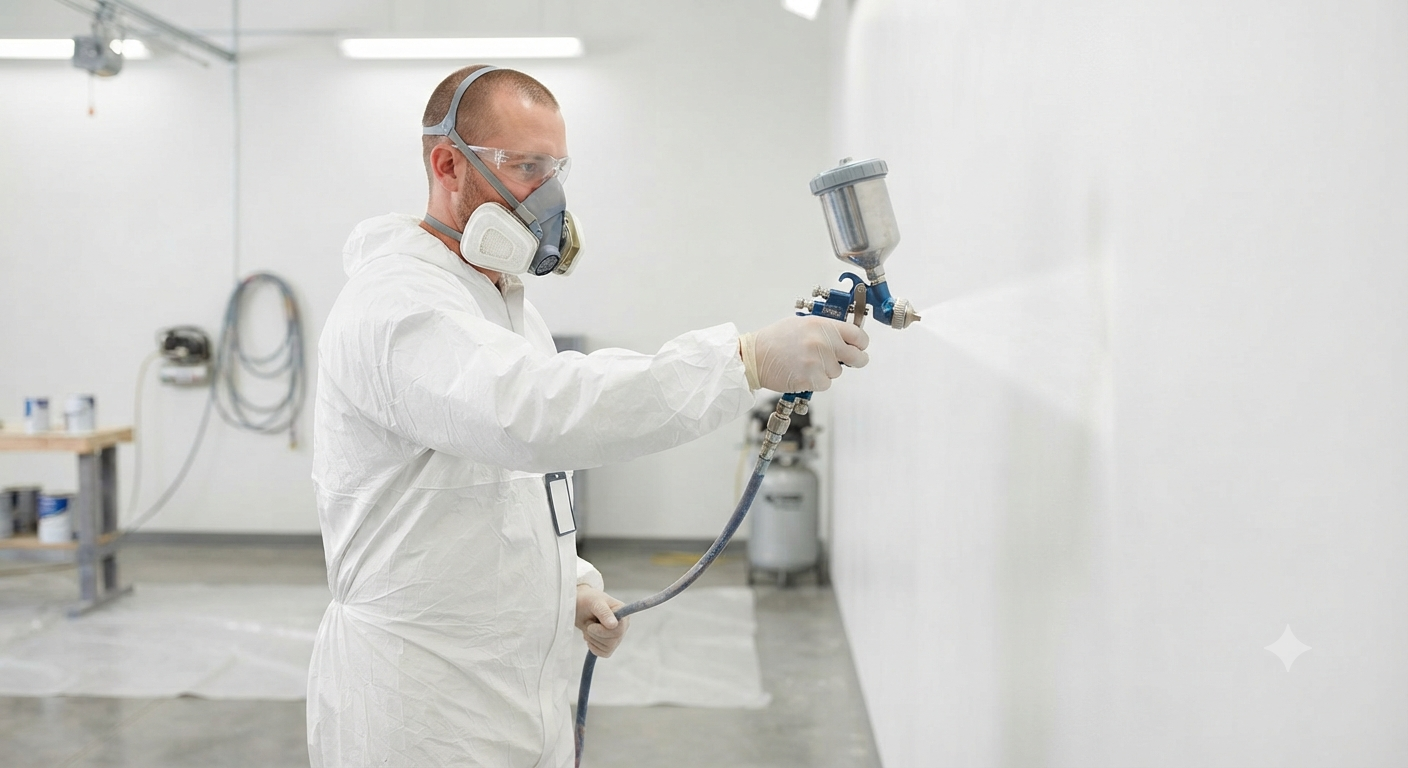
Skim coating a wall means applying thin layers of joint compound across an entire wall surface to create a smooth, even, paint-ready finish. It’s used to fix damaged drywall, remove old texture, repair surfaces after wallpaper removal, and prep walls for specialty finishes like limewash.
The process involves cleaning and priming the surface, applying two to three thin coats of compound, sanding between each coat, and finishing with a drywall primer before paint. It works on both drywall and older plaster walls. One coat is rarely enough, and skipping the final primer causes uneven paint absorption.
Skim coating a wall sits between spot patching and full drywall replacement on the repair scale. It costs less than replacement and delivers far better results than patching alone when a wall has widespread surface damage. For Winnipeg homeowners dealing with aging walls, post-wallpaper surfaces, or outdated textures, it’s often the most practical and cost-effective solution before repainting.
What Is Skim Coating a Wall?
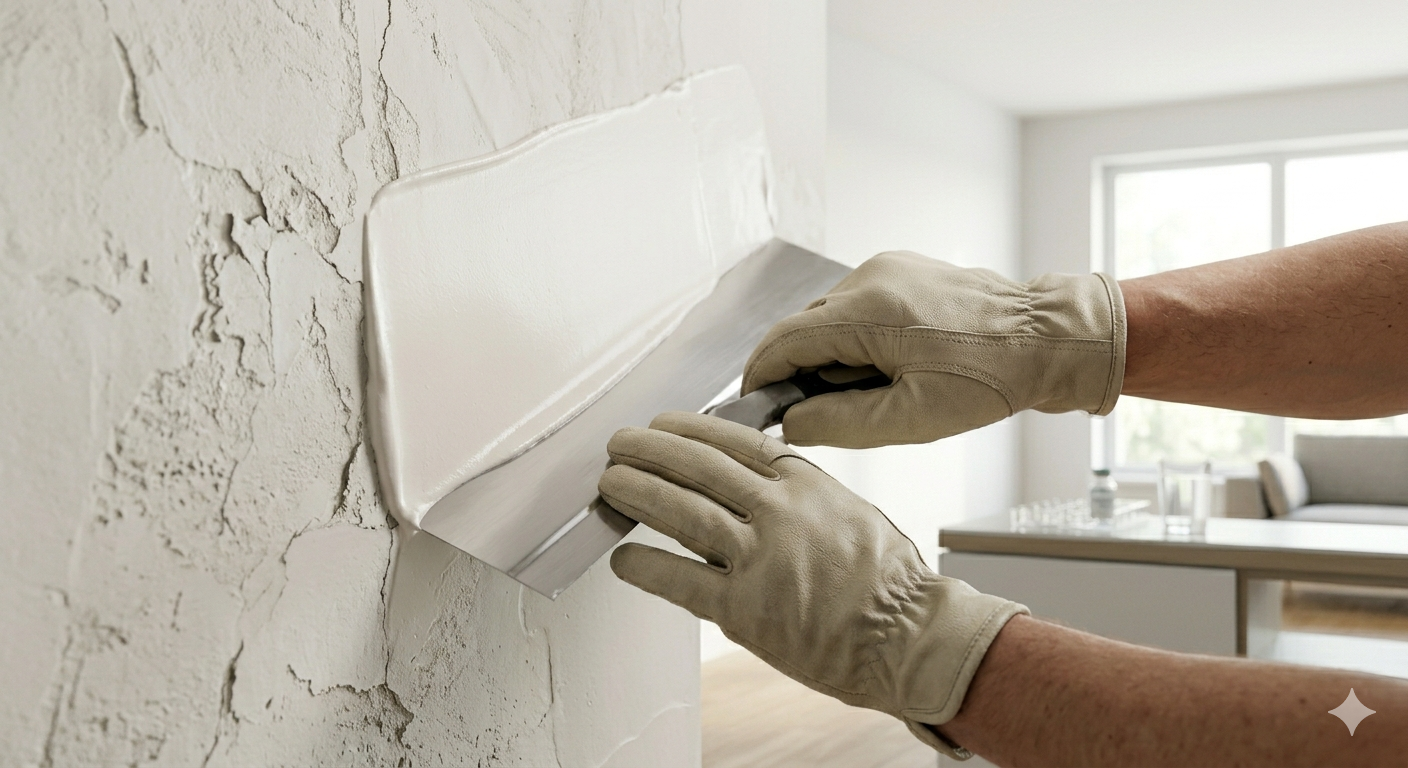
Skim coating a wall is the process of applying one or more thin, even layers of joint compound across the full surface of a wall to create a perfectly smooth finish. It is not the same as patching an individual crack or hole. Instead, skim coating a wall treats the entire surface so that every square inch ends up level, uniform, and ready for paint.
The compound used in skim coating a wall is typically a lightweight joint compound or finishing plaster. It gets spread across the wall in thin coats using a wide trowel or drywall knife. Once dry, each coat is lightly sanded before the next one goes on. The final result is a surface so smooth that paint sits on it evenly rather than sinking into ridges or bumps.
Think of it as resurfacing your walls the same way you’d resurface a floor before laying tile. The prep work sets the entire outcome.
Why Would You Need to Skim Coat a Wall?
Not every wall needs this treatment, but there are several clear situations where skim coating a wall is the right move. Knowing when it applies saves you from painting over a problem that will just look worse once paint goes on.
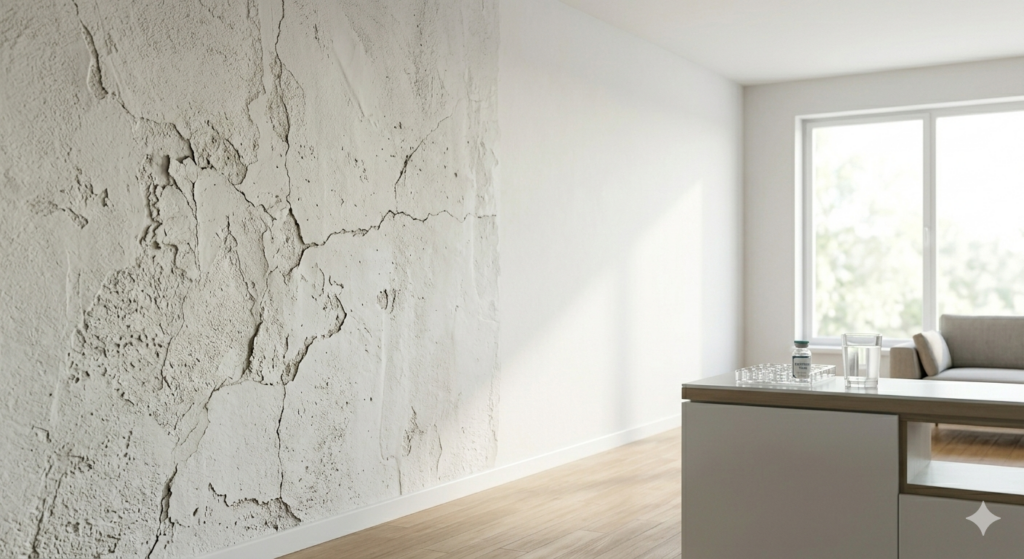
Old or damaged drywall. Walls that have been patched multiple times, scuffed, or damaged from water tend to be uneven all over. Skim coating a wall smooths everything out so patches don’t ghost through the paint.
Removing wallpaper. When wallpaper is stripped, the paper face of the drywall often tears and lifts, leaving behind a rough, inconsistent surface. Painting directly over it creates a blotchy, textured result. Skim coating a wall after wallpaper removal fixes this completely.
Eliminating old wall texture. Popcorn, orange peel, and knockdown textures were popular decades ago but look dated today. Skim coating a wall over the existing texture levels it out so you can achieve a clean, modern flat finish.
Preparing for limewash or specialty finishes. Limewash paint and other decorative finishes require a smooth, consistent base to look their best. Without skim coating a wall first, uneven surfaces can cause the finish to appear blotchy or inconsistent. If you’re curious about specialty finishes, our team covers limewash paint in Canada and why you should consider it in more detail.
Older homes with aging plaster. Many Winnipeg homes have plaster walls that have developed fine cracks, bubbling, and soft spots over the years. Skim coating a wall stabilizes and smooths the surface without requiring a full tear-out.
How Does Skim Coating a Wall Work? A Step-by-Step Look
Understanding the actual process helps you appreciate why results vary so much between DIY attempts and professional work. Here is how skim coating a wall is done properly.
Step 1: Surface Assessment and Prep Before any compound touches the wall, the surface has to be cleaned and stabilized. Loose paint gets scraped away, grease is cleaned off, and any large holes or deep cracks get filled first. If wallpaper residue is present, torn drywall paper gets stabilized with a primer. Skipping this step is the most common reason skim coat jobs fail.
Step 2: Priming A bonding primer or drywall primer is applied to the wall before the first coat of compound. This step ensures the joint compound adheres properly and doesn’t crack or peel as it dries.
Step 3: First Coat A thin, even layer of joint compound gets spread across the entire wall using a wide trowel. The goal at this stage is full coverage, not perfection. The compound gets feathered out at the edges to avoid hard ridges.
Step 4: Drying and Light Sanding The first coat takes roughly 24 hours to dry depending on humidity and temperature. Once fully dry, it gets lightly sanded to knock down any ridges or trowel marks. Winnipeg winters can slow drying considerably, so ventilation matters.
Step 5: Second and Third Coats Most walls need at least two coats for a truly smooth result. Each coat is thinner than the one before it. By the final coat, the compound layer should be almost paper thin and completely flat.
Step 6: Final Sanding and Priming After the last coat cures, the surface is finish-sanded and wiped clean of dust. A final coat of drywall primer seals everything before paint goes on. Without this primer, paint absorbs unevenly into the compound and the finished wall looks dull and patchy.
Skim Coating a Wall vs. Other Options: Which One Is Right for You?
There are a few different approaches to fixing wall surfaces, and choosing the right one depends on the condition of your walls and the result you want.
| Option | Best For | Finish Result |
| Skim Coating a Wall | Uneven surfaces, texture removal, full-room prep | Completely smooth, professional-grade finish |
| Spot Patching | Small isolated holes or nail pops | Targeted repair only, not full coverage |
| Full Drywall Replacement | Severe structural damage or water damage | New panel, maximum durability |
| Plaster Repair | Older homes with historic plaster walls | Restores original surface character |
For most Winnipeg homeowners dealing with cosmetically tired walls, skim coating a wall hits the sweet spot. It’s more thorough than patching but far less invasive and costly than replacing entire panels. It’s also the only method that truly fixes an uneven or textured surface across the full wall.
If your walls have significant structural damage or persistent moisture issues, replacement may be the better call. Our team handles drywall and plaster repair in Winnipeg for those situations as well.
Things To Know About Skim Coating a Wall
- Skim coating a wall uses joint compound, not traditional plaster
- Paint applied directly to fresh skim coat without primer will look uneven and absorb differently across the surface
- Cold Winnipeg winters extend drying time between coats, so budget extra time for winter projects
- Raking light (a work light held at a low angle across the wall) is the best way to spot remaining imperfections before priming
- One coat is almost never enough for a truly flat finish on a damaged wall
- Skim coating a wall over glossy paint requires sanding or bonding primer first so the compound sticks
- Thin coats dry faster and crack less than thick ones
- The final sand is just as important as the application itself
How True Coat Handles Skim Coating a Wall in Winnipeg

True Coat is a fully licensed and insured painting and decorating company in Winnipeg, and skim coating a wall is one of our most requested interior prep services. Here is what separates our approach from a general contractor or DIY result.
We start with a proper wall inspection before a single tool comes out. If there are moisture problems, soft spots, or structural cracks hiding underneath the surface, we identify them before skim coating a wall makes them harder to address later. That saves you money and prevents the coat from failing down the line.
We use professional-grade joint compound that bonds properly, dries consistently, and holds up over time. Inexpensive compound shrinks and cracks. Ours doesn’t.
Our painters have real, hands-on experience with skim coating a wall across dozens of residential and commercial projects in Winnipeg. Controlling compound consistency, reading how a wall responds, and sanding to a true flat finish requires practice that most homeowners simply haven’t had the chance to build.
We protect your floors, furniture, and trim throughout the process. When we finish, your space is spotless.
Every skim coating job we complete is backed by our 3-Year Craftsmanship Warranty. You won’t find that with a weekend DIY attempt. Want to see the full picture of what we offer? Browse our complete painting and decorating services or take a look at the interior painting results we’ve delivered for Winnipeg homeowners.
Ready to get started? Contact True Coat today for a free, no-obligation estimate on skim coating a wall in your home.
Final Words on Skim Coating a Wall
Skim coating a wall is one of those investments that you truly feel every time you walk into a freshly painted room. Smooth walls make paint colours richer, lighting more even, and the whole space look intentional rather than patched together. Whether you’re renovating an older Winnipeg home, finally tackling that room that never looked right, or prepping for a full interior repaint, skim coating a wall is the step that makes everything else look better.
The process takes skill, patience, and the right materials. Done right, it lasts for decades. Done wrong, it cracks, peels, and creates more work down the road. That’s why working with an experienced, local team makes the difference between a result you love and one you have to fix again in two years.
Also worth reading: Why Should You Hire Interior House Painters for Your Winnipeg Home?
Frequently Asked Questions About Skim Coating a Wall
Is it worth it to skim coat walls?
Yes. Skim coating a wall is worth every dollar when your goal is a smooth, polished final result. Painting over rough, damaged, or textured walls only makes imperfections more visible under light. Skim coating a wall gives you a clean, flat surface that makes paint look professional and intentional. For anyone planning a full interior repaint, it’s one of the highest-value prep steps you can take.
Can I skim coat a wall myself?
You can attempt skim coating a wall on a small patch or low-visibility area as a DIY project. For full rooms or main living spaces, it’s genuinely difficult without experience. Common issues include lap marks, shrinkage cracks from applying compound too thick, and over-sanding that damages the drywall face. For results that hold up and look truly flat, a professional application is the better investment.
What is skim coating a wall?
Skim coating a wall is the process of applying thin, even coats of joint compound across an entire wall surface to create a smooth, uniform finish. It removes texture, levels out imperfections, fills inconsistencies, and prepares the wall for paint or specialty finishes. It’s a full-surface treatment rather than a spot repair.
Can I skim coat over paint?
Yes, skim coating a wall over existing paint is possible with the right prep. Glossy or slick surfaces need to be scuff-sanded or coated with a bonding primer first so the compound has something to grip. Flaking or peeling paint should always be removed before skim coating a wall, since compound applied over loose paint will peel along with it.
How long will a skim coat last?
A properly applied skim coat on a well-prepped wall can last for decades without any issues. The key factors are proper priming before application, quality compound, and no underlying moisture problems. True Coat’s 3-Year Craftsmanship Warranty covers our skim coating work so you have full peace of mind after the job is done.