Interior painting of house projects starts with proper planning, surface preparation, and choosing the right colors and finishes for each room. Whether you refresh one room or transform your entire home, understanding the process helps you achieve professional results.
The right approach involves selecting quality paints, preparing walls correctly, using proper techniques, and knowing when to hire professionals versus handling the work yourself. From color selection and paint types to preparation steps and application methods, every decision impacts your final results.
Budget considerations, timing, and understanding different paint finishes all play crucial roles in creating beautiful, long-lasting interior spaces.
How to Plan the Interior Painting of House Projects Successfully
Planning the interior painting of house projects requires a systematic approach that covers preparation, execution, and finishing touches. Start by assessing every room you plan to paint and creating a detailed list of materials needed. Walk through your home and note wall conditions, ceiling heights, and any repairs needed before painting begins.
Create a realistic timeline based on room sizes and complexity. A single bedroom might take a weekend, while an entire house could require several weeks. Consider your schedule and whether you will work on weekends only or take time off for larger projects.
Budget planning helps avoid surprises. Calculate paint quantities by measuring wall square footage and checking coverage rates on paint cans. Most quality paints cover 350-400 square feet per gallon. Add 10-20% extra for touch-ups and second coats. Include costs for brushes, rollers, painter’s tape, drop cloths, and any repair materials.
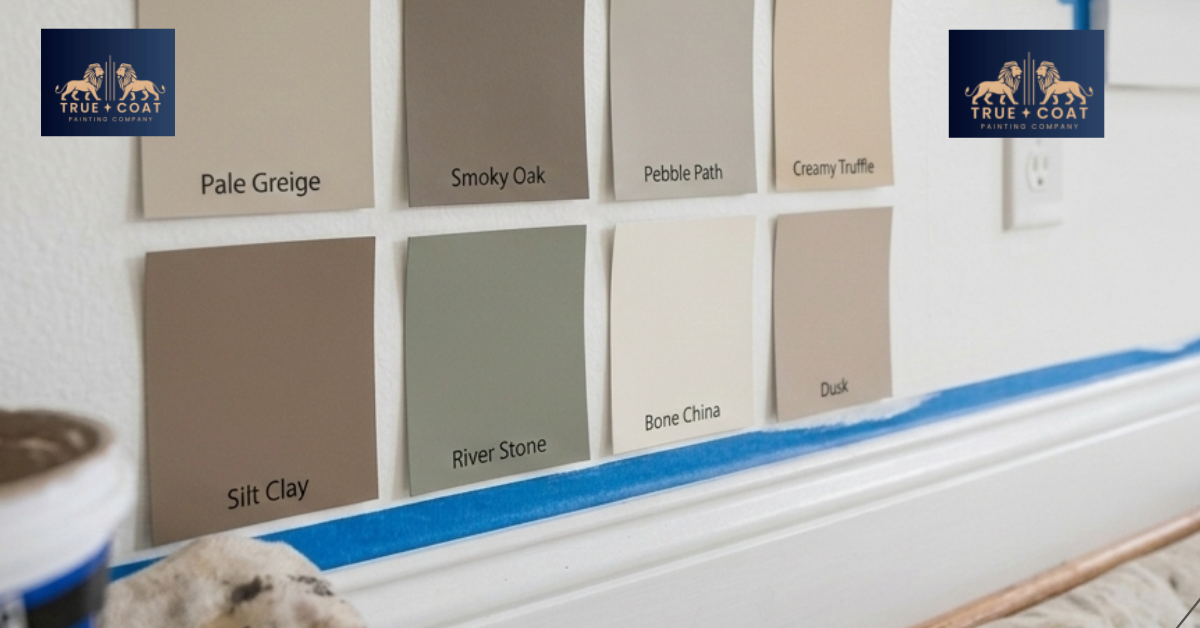
Choose your color scheme early in the planning process. Gather paint samples and test them on walls in different lighting conditions. Natural light in the morning looks different from artificial light in the evening. Live with test patches for a few days before committing to full room colors.
Prepare a detailed supply checklist. Beyond paint and basic tools, you might need spackling compound, sandpaper, primer, extension poles, and cleaning supplies. Having everything ready before starting prevents frustrating mid-project trips to the hardware store.
Consider the order of rooms. Paint from top to bottom of your house and from back to front. This approach prevents tracking paint through finished areas. If you are painting multiple rooms, complete one fully before moving to the next to maintain momentum and see progress.
Essential Steps Before Starting
Clear rooms completely or move furniture to the center and cover it with drop cloths. Remove outlet covers, light switch plates, and hanging decorations. Patch holes and cracks with spackling compound and let dry completely. Sand patched areas smooth and wipe walls clean of dust.
Apply primer to new drywall, patched areas, or when making dramatic color changes. Primer ensures even coverage and helps paint adhere properly. For professional interior painting services, experts handle all preparation steps to guarantee flawless results.
What Makes Quality Interior Painting of House Projects Stand Out
Quality interior painting of house work shows in the details. Professional results come from proper surface preparation, using the right tools, and applying paint with correct techniques. The difference between acceptable and exceptional work lies in attention to small details that many homeowners overlook.
Wall preparation accounts for most of the quality difference. Professionals spend more time preparing surfaces than actually painting. They fill every small hole, sand rough spots smooth, and ensure walls are clean and dry before opening paint cans. This preparation creates a smooth canvas for paint application.
Edge work and cutting in separates amateur from professional results. Clean, straight lines where walls meet ceilings, around trim, and along baseboards require steady hands and proper technique. Quality painter’s tape helps, but skilled application matters more. The best painters can cut in freehand with brushes, creating crisp lines without tape.
Paint Quality and Application Techniques
Premium paints cost more but provide better coverage, richer colors, and longer-lasting finishes. They contain higher pigment concentrations and better binders, which means fewer coats and more durability. Cheap paint requires multiple coats and fades faster, ultimately costing more in time and repeat work.
Application technique affects the final appearance significantly. Roll paint in a W pattern for walls, spreading it evenly without leaving roller marks. Work in sections, maintaining a wet edge to avoid lap marks. Apply even pressure and avoid pressing too hard, which squeezes paint out and creates thin spots.
Two thin coats always beat one thick coat. Thick paint drips, sags, and takes forever to dry properly. Thin coats dry faster, level better, and create a more uniform finish. Wait the recommended time between coats as listed on the paint can.
Common Mistakes to Avoid
Skipping primer on new drywall or drastic color changes leads to uneven coverage and visible patches. Primer seals surfaces and provides a uniform base for paint. It costs less than paint, so using it actually saves money by reducing the number of paint coats needed.
Removing painter’s tape too early or too late causes problems. Pull tape while the final coat is still slightly wet but not dripping. This prevents peeling dried paint along tape edges. Wait too long and tape pulls off dried paint, requiring touch-ups.
Poor lighting during application hides imperfections that become obvious later. Use bright work lights to spot missed areas, thin spots, or drips while you can still fix them easily. Natural daylight reveals the most, so check your work during daytime when possible.
Choosing Colors for Interior Painting of House Spaces
Color selection transforms the entire feel of your home. The interior painting of house projects succeeds or fails largely based on color choices. Understanding color psychology, room function, and lighting conditions helps you make confident decisions that you will love for years.
Start with the room’s purpose and mood you want to create. Bedrooms benefit from calming colors like soft blues, gentle greens, or warm neutrals that promote relaxation. Living areas can handle bolder choices since people spend time there in varied activities. Kitchens and dining rooms often feature warmer tones that stimulate appetite and conversation.
Consider your existing furniture, flooring, and fixed elements. Paint should complement these items rather than clash with them. Bring fabric samples, photos, or small items from the room when selecting paint colors. Many paint stores offer color matching services if you have a specific item you want to coordinate with.
Natural and artificial lighting dramatically affect how colors appear. North-facing rooms receive cooler, indirect light that makes colors appear slightly grayer and muted. South-facing rooms get warm, bright light that intensifies colors. East-facing rooms enjoy bright morning light but cooler afternoon light, while west-facing rooms reverse this pattern.
Test paint samples on all walls of a room, not just one. Colors look different on each wall due to varying light exposure. Paint at least 2-foot by 2-foot test squares and observe them at different times of day. Morning, afternoon, and evening light all reveal different aspects of the color.
Current trends favor warm neutrals, soft earth tones, and colors inspired by nature. However, trends change while you live with your paint choices for years. Choose colors you genuinely love rather than following trends blindly. Your home painting project should reflect your personal style and comfort preferences.
Understanding Paint Types for Interior Painting of House Projects
Different paint types serve different purposes in interior painting of house applications. Knowing which paint works best for each situation ensures lasting results and easier maintenance. Paint breaks down into two main categories based on the liquid that carries the pigment: water-based (latex) and oil-based.
Latex paint dominates interior applications for good reasons. It dries quickly, cleans up with water, has low odor, and releases fewer harmful fumes. Modern latex formulations provide excellent durability and coverage. Most homeowners and professionals choose latex for walls and ceilings throughout the house.
Oil-based paint offers superior adhesion and smoother finish but requires mineral spirits for cleanup and takes longer to dry. It works well for trim, doors, and cabinets where extra durability matters. However, stronger odors and cleanup hassles lead many people toward water-based alternatives even for these applications.
Paint Finishes and Their Best Uses
Flat or matte finish provides a smooth, non-reflective appearance that hides wall imperfections well. It works beautifully for ceilings and low-traffic areas but shows marks easily and proves difficult to clean. Use flat finish in adult bedrooms, formal living rooms, and ceilings where you rarely need to wipe walls.
Eggshell finish offers a slight sheen with better cleanability than flat paint. It strikes a good balance between appearance and practicality, making it popular for living rooms, dining rooms, and bedrooms. Eggshell hides minor imperfections while allowing gentle cleaning when needed.
Satin finish adds more sheen and significantly improved durability. It handles frequent cleaning well, making it ideal for kitchens, bathrooms, hallways, and children’s rooms. The subtle shine adds a polished look without being too glossy. Satin finish works well for trim and doors too.
Semi-gloss and gloss finishes provide maximum durability and moisture resistance. Use these in bathrooms, kitchens, and on trim, doors, and cabinets. High-gloss finishes highlight every imperfection, so surface preparation must be meticulous. The shiny surface cleans easily but shows brush and roller marks more readily.
Paint Finish Comparison
| Finish Type | Best For | Durability |
| Flat/Matte | Ceilings, low-traffic rooms | Low |
| Eggshell | Living rooms, bedrooms | Medium |
| Satin | Kitchens, bathrooms, hallways | Medium-High |
| Semi-Gloss | Trim, doors, cabinets | High |
| Gloss | High-moisture areas, accents | Very High |
Professional vs DIY Interior Painting of House Work
Deciding between professional painting services and DIY work depends on several factors including budget, time, skill level, and project scope. Many homeowners successfully paint rooms themselves, while others prefer hiring professionals for quality and convenience.
DIY interior painting of house projects saves money on labor costs but requires significant time investment. You need to learn proper techniques, purchase or rent equipment, and dedicate consecutive days or weekends to complete the work. Physical demands include climbing ladders, reaching high areas, and repetitive motions that can tire you quickly.
Consider your skill level honestly. Painting a simple bedroom with one color and minimal trim requires basic competence anyone can develop. Complex projects involving multiple colors, detailed trim work, high ceilings, or challenging architectural features benefit from professional expertise. Interior house painters bring efficiency and expertise that can save time and ensure quality results.
Professional painters complete work faster due to experience and specialized equipment. A project that takes you three weekends might be done in two days by a professional crew. They know how to avoid common mistakes, achieve clean lines, and create uniform finishes. Professional work typically includes warranties covering defects or issues that appear after completion.
The cost difference varies by location and project complexity. Professional painting typically costs $2-6 per square foot for basic work, with prices increasing for detailed jobs. For specific pricing on your interior painting of house project, contact True Coat for a free estimate tailored to your needs and specifications.
Time value matters significantly. If taking time off work costs more than hiring painters, professional service makes financial sense. Additionally, painting requires physical stamina and comfort working on ladders. Safety concerns and physical limitations make professional help a smart choice for many homeowners.
Preparing Rooms for Interior Painting of House Projects
Proper preparation makes the difference between mediocre and outstanding results in interior painting of house work. Rushing preparation or skipping steps leads to problems that show in the finished work. Taking time to prepare correctly saves frustration and ensures your paint looks great for years.
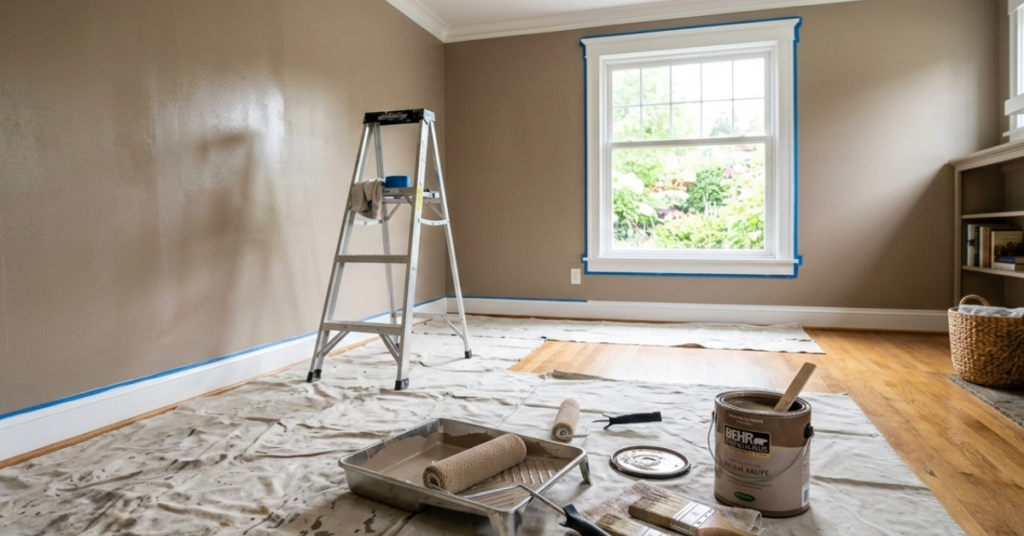
Remove all furniture from the room when possible. This gives complete freedom to work efficiently without worrying about protecting items or working around obstacles. If removing everything proves impractical, move furniture to the room center and cover it completely with drop cloths or plastic sheeting.
Take down curtains, blinds, wall decorations, and switch plates. Remove outlet covers and light fixtures when possible. If fixtures cannot be removed, carefully tape around them. Protect floors with canvas drop cloths, which absorb paint drips better than plastic and do not slip as easily.
Clean walls thoroughly to remove dust, grease, and dirt that prevent paint adhesion. Wipe kitchen walls with a degreasing cleaner since cooking residue accumulates over time. In bathrooms, remove soap scum and mildew. Let walls dry completely before proceeding to repairs.
Inspect walls for damage needing repair. Fill small holes and dents with spackling compound using a putty knife. For larger holes, use drywall repair patches. Smooth repairs flush with the wall surface and let dry according to product instructions. Sand dried repairs smooth and wipe away dust before painting.
Apply primer to repaired areas, stains, or dramatic color changes. Primer costs less than paint and prevents problems like stains bleeding through, uneven color absorption, and excessive paint consumption. Properly primed surfaces require fewer paint coats and produce better-looking results. Professionals doing residential painting in Winnipeg never skip proper preparation steps that ensure quality finishes.
Timeline and Process for Interior Painting of House Success
Understanding the timeline helps you plan interior painting of house projects realistically. Most homeowners underestimate how long painting actually takes, especially when including all preparation and cleanup steps. Setting realistic expectations prevents frustration and allows proper planning.
A typical bedroom requires 1-2 days for a DIY painter, including preparation, two coats of paint, and cleanup. Living rooms take 2-3 days depending on size and detail. Whole house projects spread over several weekends or take professional crews one to two weeks for completion.
Break down the timeline by phase. Preparation including repairs, cleaning, and priming often takes as long as the actual painting. Rushing preparation to start painting sooner leads to poor results. Plan for each paint coat to dry 2-4 hours in good conditions, with final cure time taking several days.
Step-by-Step Painting Process
Start by cutting in all edges with a brush. Paint a 2-3 inch border around ceilings, corners, baseboards, and trim. This creates a buffer zone making rolling easier and reducing the chance of getting paint where it does not belong. Cut in one entire room before rolling to maintain a wet edge.
Roll walls using a W pattern to spread paint evenly. Work in 4-foot by 4-foot sections, starting at the top and working down. Overlap slightly into previously painted sections while the paint remains wet to avoid visible lines. Apply steady, even pressure and avoid pressing too hard.
Allow proper drying time between coats as specified on the paint can. Humidity and temperature affect drying times significantly. Cool or humid conditions require longer drying periods. Rushing second coats leads to pulling or peeling of the first coat and uneven appearance.
Apply a second coat to all surfaces. Even quality paint rarely provides perfect coverage in one coat. The second coat evens out the color, covers any thin spots, and creates a uniform finish. Some dark colors or dramatic changes may require a third coat for optimal results.
Typical Room Painting Timeline
| Room Type | DIY Time | Professional Time |
| Bedroom (12×12) | 1-2 days | 4-6 hours |
| Living Room (15×20) | 2-3 days | 6-8 hours |
| Kitchen | 2-3 days | 6-10 hours |
| Bathroom | 1-2 days | 3-5 hours |
| Whole House (2000 sq ft) | 3-4 weeks | 5-7 days |
Maintaining Your Interior Painting of House Results
Protecting your investment in interior painting of house work extends its life and keeps rooms looking fresh longer. Proper maintenance prevents premature wear and reduces the frequency of repainting. Simple habits make a significant difference in how long paint retains its beauty.
Clean painted surfaces regularly using gentle methods. Dust walls with a soft cloth or duster to prevent buildup. When washing becomes necessary, use a soft sponge with mild soap and water. Avoid abrasive cleaners or scrubbing pads that scratch paint surfaces. Test cleaning methods in inconspicuous areas first to ensure they do not damage the finish.
Address marks and scuffs promptly. Touch up small areas using paint saved from the original job. Keep leftover paint in sealed containers in a cool, dry location. Write the room name and date on containers for easy identification. Properly stored latex paint lasts 2-3 years, while oil-based paint keeps longer.
Prevent damage through strategic choices. Use higher-sheen paints in high-traffic areas where walls need frequent cleaning. Install door stops to prevent knobs from banging into walls. Place furniture pads under items that touch walls to prevent scuffs. These simple preventive measures protect your paint and reduce maintenance needs.
Control humidity levels to prevent paint problems. Excessive moisture causes paint to bubble, peel, or support mildew growth. Use bathroom and kitchen exhaust fans when showering or cooking. In humid climates, consider a dehumidifier to maintain indoor humidity around 30-50%.
Expect to repaint high-traffic areas like hallways and children’s rooms every 3-5 years. Low-traffic spaces like formal living rooms or master bedrooms can last 5-7 years or longer between paint jobs. Quality paint and proper application extend these timeframes significantly. When you notice significant fading, numerous marks that cannot be touched up, or simply want a fresh look, it is time to plan your next interior painting of house project.
Things To Know About Interior Painting of House Projects
Several important considerations impact your interior painting of house results. Temperature and humidity affect paint application and drying. Paint works best in temperatures between 50-85°F with moderate humidity. Extreme cold or heat causes application problems and improper drying.
Ventilation matters for health and drying. Open windows when weather permits to improve air circulation and speed drying. Use fans to move air but avoid directing them at wet paint, which can cause uneven drying and texture problems. Low-VOC or zero-VOC paints reduce fumes, making them better choices for occupied homes.
Paint calculations often surprise first-time painters. Measure room dimensions carefully and calculate square footage accurately. Subtract for windows and doors, then divide by the coverage rate on your paint can. Always purchase extra paint for touch-ups and future repairs. Running out mid-project wastes time and matching paint later proves difficult.
Sample testing prevents expensive mistakes. Never commit to full room colors based solely on small paint chips. Purchase sample sizes and paint test areas on your actual walls. View samples in different lighting conditions throughout the day before making final color decisions. This small investment prevents regret over permanent color choices.
Insurance and warranties matter when hiring professionals. Verify that painting companies carry liability insurance and workers compensation. Ask about workmanship warranties covering defects or problems that appear after completion. Quality painting companies stand behind their work with clear warranty terms.
Lead paint concerns affect homes built before 1978. If your home predates this year, consider testing paint before sanding or extensive preparation. Lead-safe work practices protect your family’s health during renovation projects. Professionals trained in lead-safe practices know how to handle these situations properly.
Seasonal considerations influence project timing. Many people paint during spring and summer for better ventilation and faster drying. However, winter offers advantages like lower humidity in some regions and greater availability of professional painters during their slower season. Plan around your schedule and climate conditions.
Color psychology influences mood and perception. Warm colors like reds, oranges, and yellows energize spaces and make rooms feel cozy but smaller. Cool colors including blues, greens, and purples create calming environments and make spaces feel larger. Neutrals provide versatile backgrounds that work with changing decor and resist trend cycles. Learn more about choosing exterior paint colors for coordinating inside and outside aesthetics.
Final Thoughts on Interior Painting of House Projects
Successfully completing interior painting of house projects requires planning, preparation, and patience. Whether you tackle the work yourself or hire professionals, understanding the process helps you make informed decisions and achieve results you will love. Quality materials, proper techniques, and attention to detail separate acceptable work from exceptional transformations.
Remember that painting changes more than just wall colors. It refreshes your entire living environment, protects surfaces, and adds value to your property. Taking time to plan properly, choose colors carefully, and execute work correctly creates beautiful spaces that bring joy for years.
If your project feels overwhelming or you want guaranteed professional results, contact True Coat for expert guidance and free estimates. Their experienced team handles projects of any size with meticulous attention to detail and commitment to customer satisfaction. Transform your home with confidence knowing professional support is available whenever you need it.
Frequently Asked Questions
Which is the best color for interior house painting?
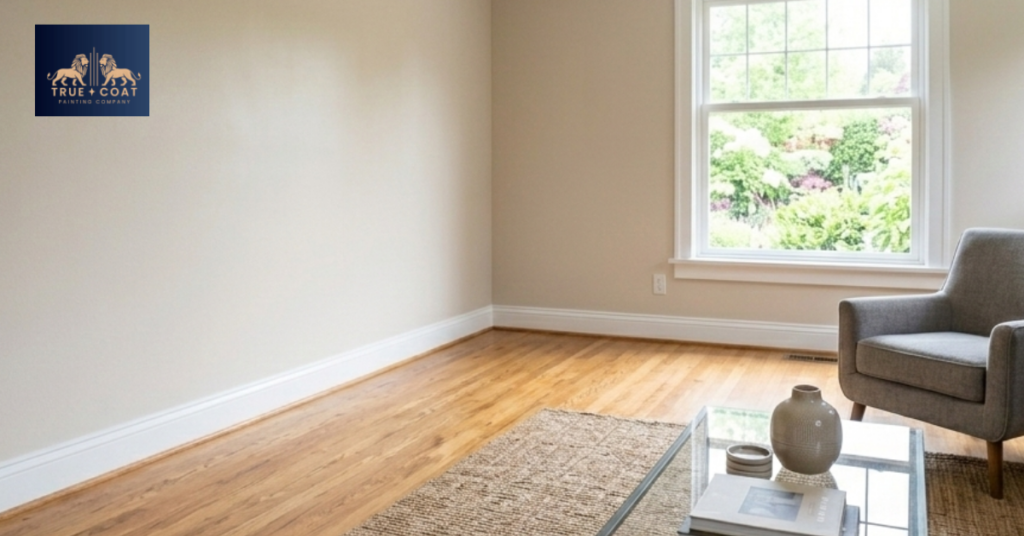
The best color depends on your room function and personal preference. Neutral colors like warm grays, soft whites, and beige work well throughout most homes because they provide versatile backgrounds that complement various decor styles. Living rooms benefit from welcoming earth tones, while bedrooms feel more restful with soft blues or greens. Consider lighting conditions, existing furniture, and the mood you want to create when selecting colors for interior painting of house spaces.
What is the best paint for the inside of a house?
Water-based latex paint in satin or eggshell finish offers the best overall performance. Premium latex paints from reputable manufacturers provide excellent coverage, durability, and easy cleanup. Choose satin finish for kitchens, bathrooms, and high-traffic areas due to better cleanability. Eggshell works beautifully in living rooms and bedrooms, offering subtle sheen with good stain resistance. Always select low-VOC or zero-VOC formulas for healthier indoor air quality during and after your interior painting of house project.
How do you paint the interior of a house?
Start with thorough preparation including cleaning, repairing, and priming walls. Remove furniture and protect floors with drop cloths. Cut in edges with a brush around ceilings, corners, and trim. Roll walls using a W pattern in sections, maintaining a wet edge. Apply two thin coats rather than one thick coat, allowing proper drying time between applications. Work from top to bottom and complete one room before moving to the next for best results in your interior painting of house work.
What color makes a house look expensive?
Rich, sophisticated neutrals create an expensive, high-end appearance. Warm grays, soft taupes, and creamy off-whites provide elegant backgrounds that feel luxurious and timeless. Deep accent colors like navy, charcoal, or forest green add drama and sophistication when used strategically on feature walls or in smaller spaces. Quality paint with excellent coverage and smooth finish contributes more to an expensive look than color choice alone in interior painting of house applications.
What is the most popular color of interior paint?
Warm, neutral grays currently dominate as the most popular interior paint choice. These versatile shades work with various design styles from modern to traditional and complement most furniture and decor. Greige, a blend of gray and beige, also ranks highly for its warmth and adaptability. Soft white and cream remain perennial favorites for their bright, clean appearance. Popularity shifts with trends, but choosing colors you personally love ensures satisfaction with your interior painting of house results regardless of current fashions.