Boost Your Brand with Expert Commercial Painting in Winnipeg
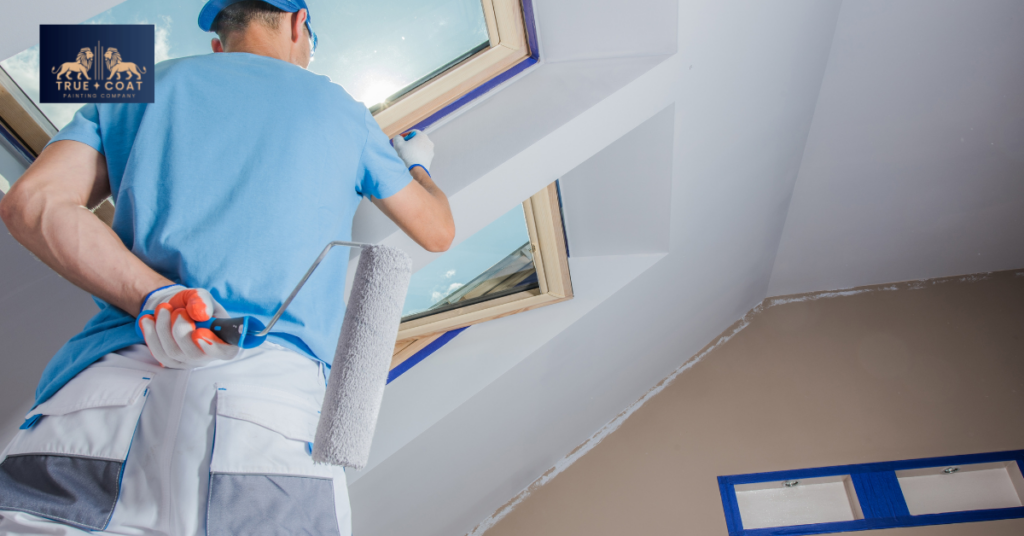
Commercial painting requires specialized knowledge and equipment to handle large-scale projects efficiently. Business owners need reliable contractors who understand tight timelines and can work around operational schedules. Professional application protects your investment while creating an inviting atmosphere for employees and customers. Quality finishes extend the life of your building’s surfaces, reducing maintenance costs over time. True Coat Paint brings years of experience to every commercial painting project, ensuring results that meet your business needs. Licensed professionals use premium materials and proven techniques to deliver lasting value. Your workspace deserves attention to detail that reflects your brand and values. Professional contractors complete projects on schedule while maintaining safety standards and cleanliness throughout the process. What Commercial Painting Includes Interior Office Spaces Office environments benefit from fresh coats that boost employee morale and productivity. Conference rooms, cubicles, and common areas receive proper surface preparation before application. Color selection affects mood and energy levels throughout the workday. Professional painters protect furniture, equipment, and flooring during the process. Quick-dry formulas minimize downtime and allow for evening or weekend scheduling. Retail Store Finishes Retail locations need appealing surfaces that attract customers and showcase products effectively. Brand colors and design elements get applied with precision and consistency. High-traffic areas receive durable finishes that withstand constant use and cleaning. Proper preparation ensures smooth application on various materials including drywall, concrete, and metal. Fast turnaround times keep stores operational and profitable. Industrial Facility Coatings Warehouses and manufacturing spaces require specialized products that resist chemicals, moisture, and wear. Protective coatings extend equipment life and maintain safe working conditions. Floor markings and safety zones get applied according to regulations and standards. Large-scale projects demand efficient crews and professional-grade equipment. Scheduled maintenance programs keep facilities looking clean and well-maintained. How Commercial Painting Works Professional contractors begin with thorough assessments of your property’s condition and requirements. Site visits identify problem areas, surface types, and access challenges. Detailed estimates outline materials, labor, and timelines for budgeting purposes. Scheduling accommodates your business hours to minimize operational disruptions. Preparation constitutes the foundation of quality results. Surfaces receive cleaning, repairs, and priming as needed. Furniture and equipment get covered or relocated for protection. Drop cloths and plastic sheeting prevent overspray and spills. Proper ventilation ensures safe application and faster drying times. Application follows manufacturer specifications for optimal performance and longevity. Multiple thin coats provide better coverage than single thick layers. Professional painters maintain consistent techniques for uniform appearance. Quality control checks occur throughout the project to address any concerns immediately. Final inspections verify complete coverage and clean edges. Touch-ups address any missed spots or imperfections. Thorough cleanup removes all materials and returns spaces to working condition. Warranty information and maintenance recommendations get provided for ongoing care. Why Businesses Choose Commercial Painting Services Professional Appearance First impressions matter when clients and partners visit your location. Fresh surfaces communicate attention to detail and business success. Clean, well-maintained spaces build confidence in your services and products. Regular updates keep your facility looking current and competitive. Property Protection Quality application protects walls, ceilings, and trim from damage and deterioration. Moisture barriers prevent mold growth and structural issues. Proper products resist fading, chipping, and wear from daily use. Regular maintenance extends the life of your building’s surfaces significantly. Employee Satisfaction Pleasant work environments improve morale and reduce turnover rates. Natural light reflection from proper finishes reduces eye strain and fatigue. Color psychology influences productivity, creativity, and collaboration among teams. Well-maintained facilities show employees that management values their comfort and wellbeing. Types of Commercial Properties We Serve Property Type Common Areas Special Considerations Office Buildings Lobbies, conference rooms, hallways Low-odor products, after-hours work Retail Stores Sales floors, fitting rooms, storefronts Quick turnaround, brand color matching Restaurants Dining areas, kitchens, bathrooms Food-safe products, sanitation requirements Medical Facilities Waiting rooms, exam rooms, hallways Antimicrobial options, infection control Warehouses Production floors, storage areas, offices Durable coatings, safety markings Preparing Your Business for Commercial Painting Clear communication with your contractor ensures smooth project execution. Notify employees about schedules, access restrictions, and temporary changes. Remove valuable items, documents, and electronics from work areas. Coordinate with building management regarding parking, elevator use, and entry access. Budget considerations include not just the initial cost but long-term value. Quality materials and application cost more upfront but last significantly longer. Energy-efficient products can reduce heating and cooling expenses over time. Preventive maintenance schedules spread costs predictably across years. Timeline planning accounts for business cycles and seasonal factors. Slow periods allow for more extensive work with less disruption. Multi-phase approaches keep portions of your facility operational during projects. Flexibility in scheduling helps contractors work efficiently while respecting your needs. Benefits of Hiring Licensed Professionals on Commercial Painting Licensed contractors carry insurance that protects your property from accidents and damages. Trained crews understand proper safety protocols and equipment operation. Experience with commercial projects means realistic timelines and accurate estimates. Professional relationships with suppliers ensure access to quality products at competitive prices. Technical expertise addresses challenges that inexperienced painters might overlook. Surface compatibility, product selection, and application methods all require specialized knowledge. Problem-solving skills help contractors adapt to unexpected conditions during projects. Quality assurance processes verify that work meets industry standards and your expectations. True Coat Paint brings full licensing and insurance coverage to every commercial painting project in Winnipeg. Our experienced team understands the unique demands of business environments. We work efficiently to minimize disruptions while delivering exceptional results. Visit True Coat Paint to learn more about our commercial services. Selecting Colors for Commercial Spaces Color psychology plays a significant role in workplace atmosphere and customer perception. Blue tones promote calmness and focus in office settings. Warm colors like yellow and orange encourage energy and social interaction. Neutral palettes provide versatile backgrounds for merchandise and branding elements. Brand consistency maintains recognition across multiple locations and touchpoints. Custom color matching ensures accurate reproduction of your corporate colors. Accent walls and feature areas draw attention to key spaces or products. Lighting conditions affect how colors appear and should influence selection decisions. Our team provides
How Does Residential Painting Boost Your Property Value
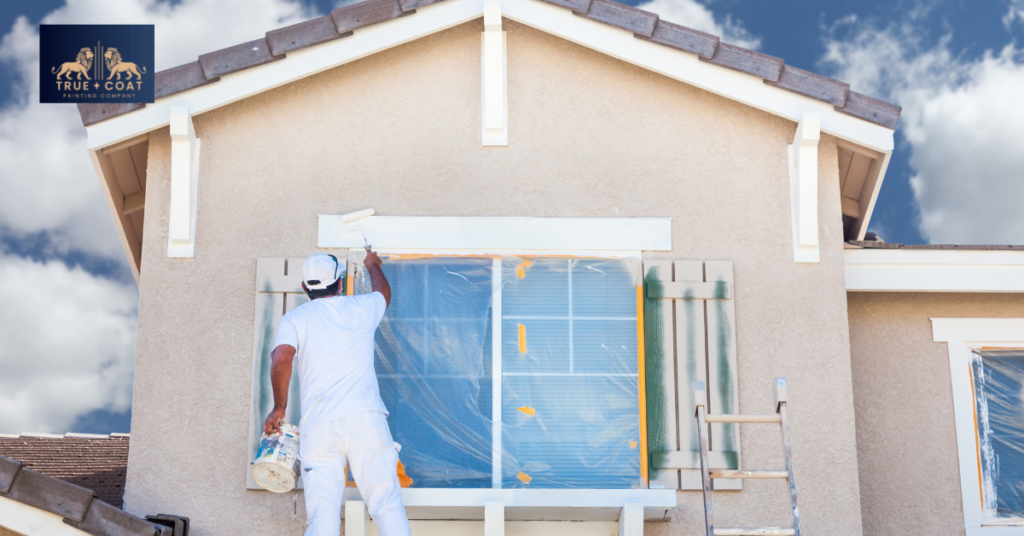
Residential painting remains one of the smartest investments homeowners can make to boost property value and create a welcoming atmosphere. A fresh coat of paint protects walls from moisture, wear, and environmental damage while completely transforming the look and feel of any room. Professional residential painting services ensure proper surface preparation, premium paint selection, and flawless application that lasts for years. Homeowners across Winnipeg trust experienced painters to handle interior and exterior projects with care and precision. From choosing the right colors to completing the final brushstroke, quality residential painting delivers results that exceed expectations. Whether you want to update a single bedroom or repaint your entire home, professional services make the process simple and stress-free. What Is Residential Painting and Why Does It Matter Residential painting refers to professional paint application services for homes, apartments, condos, and other living spaces. This includes both interior and exterior surfaces such as walls, ceilings, trim, doors, and siding. Quality residential painting goes beyond simply applying color to surfaces. Professional painters assess wall conditions, repair damage, prime surfaces properly, and use high-grade paints formulated for specific environments. The benefits of residential painting extend far beyond appearance. Fresh paint acts as a protective barrier against moisture, mold, and everyday wear. Interior house painting improves air quality when using low-VOC or zero-VOC products. Exterior painting shields your home from harsh Canadian weather, including snow, ice, rain, and UV exposure. A well-executed painting project can increase your home’s market value by thousands of dollars. Real estate professionals consistently recommend fresh paint as one of the highest-return improvements before selling. Even if you plan to stay in your home for years, residential painting creates a space you genuinely enjoy living in every day. How to Choose the Right Residential Painting Service Check Credentials and Insurance Licensed and insured painting companies protect both your property and your investment. Always verify that your residential painting contractor carries proper liability insurance and workers’ compensation coverage. This protects you from responsibility if accidents occur during the project. Review Past Work and References Reputable home painting companies gladly share portfolios of completed projects. Ask for references from recent customers and take time to read online reviews. Look for consistent praise regarding professionalism, cleanliness, and attention to detail. Get Detailed Written Estimates Professional residential painting services provide comprehensive quotes that outline all costs upfront. The estimate should include surface preparation, primer, paint brand and type, number of coats, and timeline. Avoid contractors who give vague verbal estimates or pressure you into quick decisions. Why Professional Residential Painting Beats DIY Many homeowners consider painting their own homes to save money. While DIY projects work for small touch-ups, professional painting delivers superior results for several reasons. Professional painters bring years of experience to every project. They know how different surfaces absorb paint, which products perform best in specific conditions, and how to achieve smooth, even coverage without drips or brush marks. Interior painting professionals also have access to commercial-grade equipment including sprayers, scaffolding, and specialized tools that homeowners rarely own. Time savings represent another major advantage. A professional residential painting crew can complete in days what might take homeowners weeks of weekend work. Professionals also handle all the tedious preparation work including moving furniture, covering floors, taping edges, and filling holes. Perhaps most importantly, professional painting comes with warranties and guarantees. Quality contractors stand behind their work and will address any issues that arise after project completion. Ready to transform your home with professional results? Contact True Coat today for your free estimate and discover why Winnipeg homeowners trust our experienced team. What to Expect During Your Residential Painting Project The residential painting process follows a clear sequence that ensures lasting, beautiful results. Your painter visits your home during the initial consultation to assess surfaces, discuss color preferences, and measure spaces. This visit allows for accurate estimating and project planning. Surface preparation determines how well paint adheres and how long it lasts. This includes cleaning walls, filling cracks and holes, sanding rough areas, and applying primer where needed. Professional residential painting typically involves multiple coats for complete coverage and depth of color. Painters work systematically through your home, completing one area before moving to the next. Quality house painting companies conduct thorough walk-throughs with homeowners during final inspection. This ensures every detail meets expectations before the project closes. Professional painters leave your home cleaner than they found it. All materials are removed, furniture is returned to position, and surfaces are left spotless. Residential Painting Cost Factors Factor Impact on Price Square footage Larger spaces require more paint and labor Surface condition Damaged walls need more preparation Paint quality Premium paints cost more but last longer Number of colors Multiple colors increase labor time Ceiling height Tall ceilings require specialized equipment Trim and detail work Intricate woodwork adds to project scope Interior vs exterior Exterior work often requires different prep Costs vary based on project scope and complexity. Most professional painters charge either by square footage or by room. Getting multiple quotes helps you identify fair market pricing in your area. Home painting services in Winnipeg offer competitive rates while maintaining high-quality standards. How Residential Painting Protects Your Home Beyond aesthetics, residential painting serves important protective functions for your property. Quality exterior paint creates a waterproof barrier that prevents moisture from penetrating siding and wood surfaces. This reduces the risk of rot, mold, and structural damage. Canadian summers bring intense sunlight that fades and degrades unprotected surfaces. Modern painting products include UV inhibitors that maintain color and integrity for years. Light-colored exterior paints reflect heat, helping keep homes cooler during summer months. This can reduce air conditioning costs and improve energy efficiency. Properly painted and sealed surfaces leave fewer entry points for insects and other pests. Residential painting that includes caulking and gap filling adds another layer of protection for your home. Why Winnipeg Homeowners Choose True Coat for Residential Painting True Coat has served the Winnipeg community for years, building a reputation for exceptional
Professional Plaster and Drywall Repair Services in Winnipeg
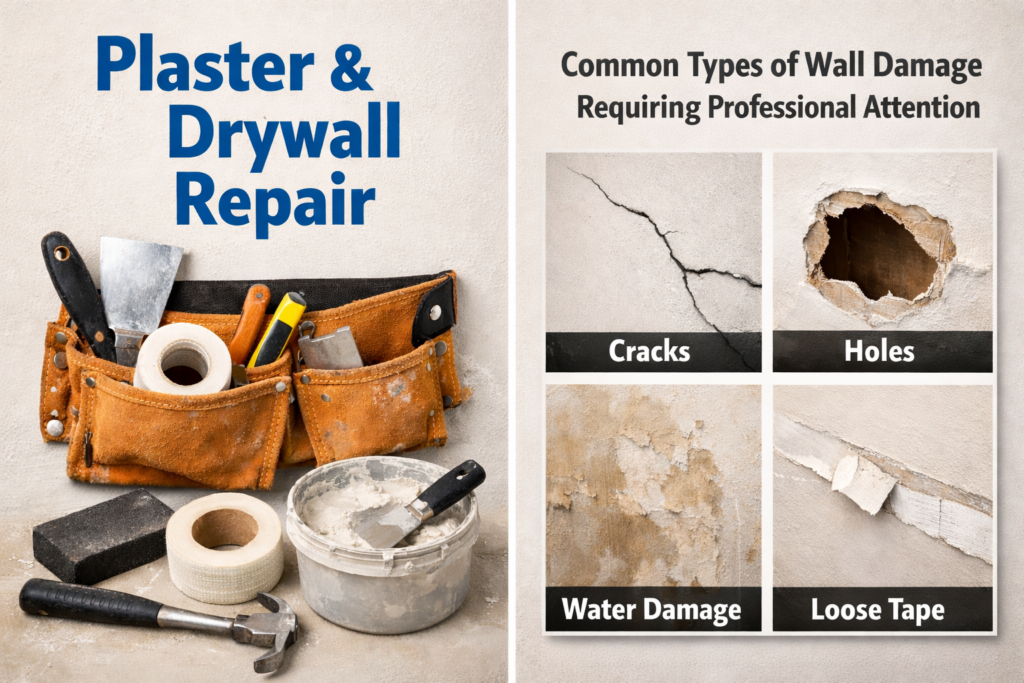
Plaster and drywall repair services restore damaged walls to their original condition, addressing cracks, holes, water damage, and surface imperfections that can diminish your property’s appearance and value. Walls endure daily wear from furniture, doorknobs, moisture, and structural settling, creating unsightly blemishes that require professional attention. Quality plaster and drywall repair services prevent further deterioration, prepare surfaces for painting, and maintain your home or business’s structural integrity. Professional technicians assess damage severity, select appropriate materials, and apply proven methods to achieve seamless results. Whether fixing small nail holes or extensive water damage, proper repair work creates smooth, uniform surfaces that blend invisibly with existing walls, ensuring your space looks pristine and well-maintained for years to come. What Plaster and Drywall Repair Services Include Professional wall restoration encompasses multiple services designed to address various types of damage and surface issues. Technicians providing plaster and drywall repair services begin by examining damaged areas to determine the best repair approach. They clean surfaces, remove loose material, and prepare the work area to ensure optimal adhesion. Protection of surrounding spaces prevents dust and debris from affecting your furniture and flooring. Small cracks receive a filling compound that flexes with minor wall movement. Larger holes require backing material installation before applying joint compound in multiple layers. Each layer dries completely before technicians apply the next, building up the surface gradually for strength and durability. Multiple sanding passes create perfectly smooth transitions between repaired and original surfaces. Moisture-damaged walls need special attention to prevent mold growth and structural issues. Professionals offering plaster and drywall repair services identify the water source, dry affected areas thoroughly, and replace compromised material. They treat surfaces with antimicrobial products when necessary before applying new drywall or plaster. Matching existing wall textures requires skill and experience, as technicians replicate patterns like knockdown, orange peel, or smooth finishes to ensure repaired areas blend seamlessly with surrounding surfaces. Why Professional Plaster and Drywall Repair Services Matter Quality wall repairs protect your investment and enhance your property’s appearance in several important ways. Unrepaired cracks and holes allow moisture penetration, leading to more extensive and expensive problems over time. Small issues quickly become major repairs if left unattended. Professional plaster and drywall repair services stop damage progression and preserve wall integrity throughout your home or commercial space. Well-maintained walls significantly impact property appraisal values and buyer impressions. Visible damage suggests neglect and prompts concerns about hidden issues. Properly repaired surfaces demonstrate pride of ownership and attention to maintenance requirements. Damaged walls detract from otherwise beautiful spaces and undermine decorating efforts, while professional repairs create clean canvases for fresh paint colors and new design elements. Different damage types require specific repair materials and techniques. Professionals providing plaster and drywall repair services understand which products work best for particular situations, considering factors like wall composition, moisture levels, and intended use. They select materials that provide long-lasting results rather than temporary fixes. DIY repairs often require multiple attempts and material purchases before achieving acceptable results, whereas professional technicians complete jobs efficiently with proper tools and materials, eliminating wasted time and repeated expenses. How to Identify When You Need Plaster and Drywall Repair Recognizing damage early allows prompt intervention before problems worsen and repair costs increase. Buildings settle over time, creating stress points that manifest as cracks. Foundation shifts, temperature changes, and soil conditions contribute to gradual movement. These natural processes affect all structures regardless of age or construction quality. Scheduling plaster and drywall repair services at the first sign of damage saves money long-term. Damage Type Visual Indicators Urgency Level Hairline Cracks Fine lines in paint or plaster Low to Medium Large Cracks Gaps wider than 1/8 inch High Holes Visible openings from impacts or hardware Medium Water Stains Discoloration, bubbling, or peeling High Sagging Areas Bulging or drooping sections Very High Texture Damage Scraped or gouged surface patterns Medium Furniture, equipment, and daily activities create holes and dents in walls. Doorknobs, chair backs, and moving accidents leave visible marks. High-traffic areas experience more frequent damage than seldom-used spaces. Leaky pipes, roof damage, and humidity issues cause water infiltration that softens and damages wall materials. Bathrooms and kitchens face higher moisture levels that can compromise surfaces over time. Older plaster develops cracks as materials lose flexibility and adhesion weakens. Paint failure exposes underlying surfaces to environmental factors that accelerate deterioration. Regular inspections help catch problems early when repairs remain simple and affordable. Common Types of Wall Damage Requiring Plaster and Drywall Repair Services Structural Cracks Structural cracks indicate serious foundation or framing issues that require immediate professional assessment. These cracks typically run vertically or diagonally and measure wider than a quarter inch. They may appear suddenly or widen gradually over months. Horizontal cracks along walls or ceilings signal potentially dangerous structural problems requiring engineering evaluation before cosmetic repairs begin. Quality plaster and drywall repair services address these issues after structural concerns are resolved. Nail Pops and Fastener Issues Nail pops occur when fasteners work loose from framing members, creating small bumps or cracks in wall surfaces. Temperature fluctuations and wood shrinkage cause these common problems. While not structurally serious, nail pops multiply over time and create unsightly patterns across walls and ceilings. Professional plaster and drywall repair services fix these efficiently. Corner Bead Damage Metal or plastic corner beads protect outside corners from impact damage but can bend, dent, or separate from walls. Damaged corner beads expose sharp edges and create irregular corner profiles. Replacement requires removing damaged sections, installing new beads, and applying fresh joint compound. Ceiling Water Damage Roof leaks, plumbing failures, and condensation create ceiling stains and material degradation. Water-damaged ceiling drywall sags, discolors, and eventually fails if not addressed promptly. Professionals identify leak sources, dry affected areas, and replace compromised materials to prevent collapse and mold growth. Settlement Cracks Settlement cracks develop as buildings adjust to soil conditions and weight distribution. These cracks usually appear near doors, windows, and corners where stress concentrates. Most settlement occurs during the first few years after construction, though
The Complete Wallpaper Installation Process in 2025
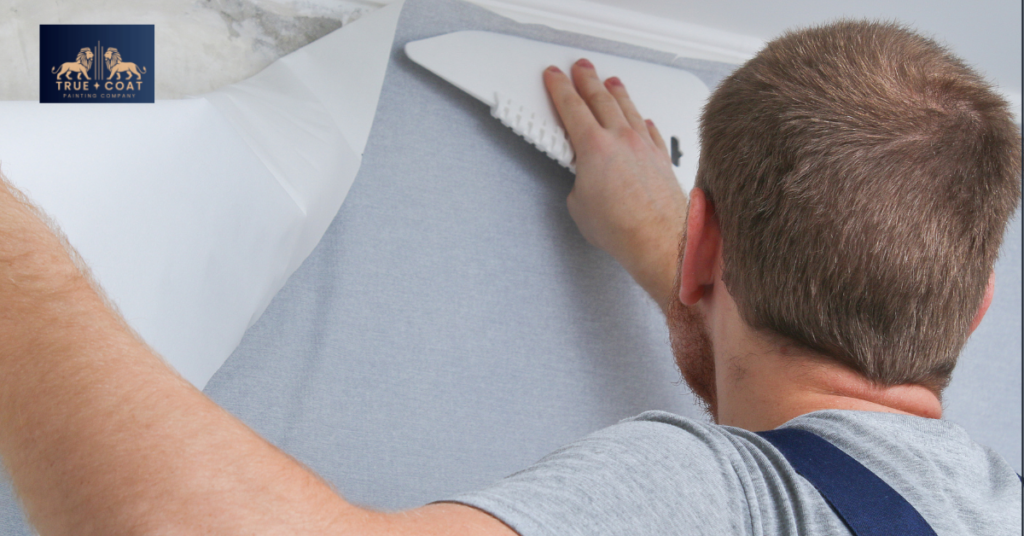
The wallpaper installation process transforms plain walls into stunning focal points that reflect your personal style. This method involves careful preparation, precise measurements, proper adhesive application, and skillful hanging techniques to achieve professional results. Whether you’re updating a single room or redecorating your entire home, understanding each step ensures a smooth application and long-lasting beauty. From selecting the right materials to applying the final seam, every detail matters in creating a flawless finish that will last for years. What Is the Wallpaper Installation Process? The wallpaper installation process consists of multiple stages that work together to create a flawless finish. Each phase builds upon the previous one, creating a foundation for success. Proper wall preparation forms the foundation of any successful installation. Walls must be clean, smooth, and completely dry before any wallpaper can be applied. Remove all existing wallpaper, loose paint, or debris from the surface. Fill any cracks, holes, or imperfections with appropriate filler material. Surface Preparation Sand rough areas until completely smooth to the touch. Wipe down walls with a damp cloth to remove dust particles. Allow walls to dry thoroughly before moving forward. This preparation stage determines how well your wallpaper adheres and how long it lasts. Taking time to properly prepare surfaces prevents future problems like peeling or bubbling. Material Selection Choosing the right wallpaper type affects both the installation method and final appearance. Vinyl wallpapers offer durability and easy cleaning, making them perfect for high-traffic areas. Traditional paper wallpapers provide classic beauty and come in countless patterns. Non-woven wallpapers resist tearing and remove easily during future updates. Pre-pasted options simplify application but may require additional adhesive in some cases. Consider room conditions like moisture levels when selecting materials. Tools and Supplies Gathering the correct tools before starting saves time and frustration. Essential items include a smoothing brush or plastic smoother, sharp utility knife, measuring tape, level, pencil, and cutting mat. You’ll also need a sponge, bucket of clean water, and appropriate adhesive if using unpasted wallpaper. A plumb line or laser level ensures perfectly straight installation. Quality tools produce cleaner cuts and smoother application. How the Wallpaper Installation Process Works Understanding the technical aspects of installation helps you appreciate the skill involved in professional work. Each step follows a specific sequence for optimal results. Accurate measurements prevent waste and ensure pattern alignment. Measure wall height from ceiling to baseboard, adding extra inches for trimming. Calculate the number of strips needed by dividing wall width by wallpaper width. Account for pattern repeats when cutting strips to length. Planning your starting point is essential, typically beginning at the least visible corner or beside a window. Mark vertical guidelines using a level to keep strips straight. This planning phase saves materials and prevents frustrating mistakes during application. Taking measurements twice ensures accuracy before cutting any wallpaper. Cut wallpaper strips slightly longer than needed to allow for adjustments. Match patterns carefully when cutting multiple strips from the same roll. For pre-pasted wallpaper, immerse each strip in water according to manufacturer directions. Non-pasted varieties require applying adhesive to either the wall or paper back. Let pasted strips “book” by folding ends together, allowing adhesive to activate properly. This resting period typically lasts five to ten minutes. Position the first strip along your marked guideline, leaving excess at top and bottom. Smooth from center outward using your brush or smoother tool, removing air bubbles as you work. Press firmly along edges to ensure complete adhesion. Trim excess paper at ceiling and baseboard using a sharp blade for clean edges. Wipe away excess adhesive immediately with a damp sponge. Each subsequent strip should butt seamlessly against the previous one without overlapping. Why Proper Wallpaper Installation Process Matters Following the correct wallpaper installation process determines whether your project succeeds or fails. Professional techniques produce results that last for years. The difference between amateur and professional installation becomes apparent over time as properly installed wallpaper maintains its beauty while poorly applied wallpaper develops problems. Improper installation leads to various issues that compromise appearance and longevity. Bubbles form when air gets trapped beneath the surface during application. Peeling edges occur when insufficient adhesive was used or walls weren’t properly prepared. Visible seams result from incorrect butting or stretched paper. Pattern misalignment happens without careful planning and measuring. Mold growth can develop behind wallpaper applied to damp walls. Professional installers know how to prevent these problems through experience and proper technique. Correctly installed wallpaper maintains its beauty for many years with minimal maintenance. Proper adhesion prevents premature peeling or lifting at seams and edges. Smooth application without wrinkles or bubbles preserves the pattern and texture. Professional finishing techniques protect vulnerable areas like corners and transitions. Quality installation also makes future removal easier when you’re ready for a change. The time invested in proper installation pays dividends through lasting performance. Hiring experienced installers ensures your wallpaper looks exactly as intended. Professionals understand how different materials behave during application and adjust techniques accordingly. They possess the tools and knowledge to handle challenging situations like high ceilings or difficult corners. Expert installers work efficiently, completing projects faster without sacrificing quality. Their trained eye catches potential issues before they become visible problems. Professional services deliver consistent, beautiful results that enhance your space. Tips for a Successful Wallpaper Installation Process Several practical considerations help ensure your installation goes smoothly from start to finish: Some situations benefit from professional expertise rather than attempting DIY installation. Complex patterns requiring precise alignment challenge even experienced homeowners. Large rooms or high ceilings demand specialized equipment and techniques. Delicate or expensive wallpaper deserves professional handling to avoid costly mistakes. Commercial spaces require efficient installation that minimizes disruption. Contact experienced professionals for projects beyond your comfort level or when guaranteed results matter most. Additional Considerations for Wallpaper Installation Understanding the complete picture helps you make informed decisions about your project. Several elements influence the total cost of wallpaper installation. Material prices vary widely based on quality, pattern complexity, and manufacturer. Professional labor costs reflect the
Transform Your Space with Professional Painting Services in Winnipeg

Painting services in Winnipeg can make all the difference in how your property looks and feels. Whether you’re refreshing a single room or completing a full property makeover, the right team brings your vision to life with precision and care. True Coat stands ready to help homeowners and business owners across Winnipeg create beautiful spaces that last. Our licensed and insured professionals combine years of experience with attention to detail, delivering results that meet your expectations while staying within budget. From color selection to final cleanup, we handle every step of the process with professionalism and dedication to your satisfaction. What Makes Quality Painting Services in Winnipeg Essential Protection for Your Investment Your property represents a significant investment that deserves proper care. Quality painting work protects surfaces from weather damage, moisture, and daily wear. Fresh paint creates a barrier against the elements while preserving the structural integrity of walls and exterior surfaces. Professional painters understand which products work best for different materials and conditions, ensuring long-lasting protection for your home or business. Visual Appeal and Property Value For Painting Services in Winnipeg A fresh coat of paint transforms any space instantly. Clean walls and vibrant colors create welcoming environments that make positive impressions on visitors, customers, and potential buyers. Well-maintained paint increases property value and helps spaces feel more modern and inviting. Whether preparing to sell or simply wanting to enjoy your space more, professional painting delivers noticeable improvements. Time and Cost Efficiency with Painting Services in Winnipeg Attempting painting projects without proper skills often leads to mistakes, wasted materials, and disappointing results. Painting services in Winnipeg save time and money by completing work efficiently with the right tools and techniques. Experienced painters finish projects faster while maintaining high standards, allowing you to enjoy your refreshed space sooner. How Professional Painters Transform Your Property Comprehensive Preparation Work Successful painting starts with thorough preparation. Professional painters inspect surfaces carefully, identifying issues that need attention before applying new paint. They fill cracks, sand rough spots, repair damaged areas, and clean surfaces to ensure proper paint adhesion. This preparation creates smooth, even surfaces that hold paint better and look better for years. Expert Application Techniques Skilled painters know how to apply paint correctly for optimal coverage and appearance. They use appropriate tools for different surfaces and paint types, applying the right number of coats for durability. Proper technique prevents drips, streaks, and uneven coverage that plague amateur projects. Professional painters also understand how environmental conditions affect painting, scheduling work during ideal weather for exterior projects. Attention to Detail with Painting Services in Winnipeg Quality painting services in Winnipeg include careful attention to trim work, edges, and transitions between colors. Professionals use painter’s tape and steady hands to create crisp, clean lines. They protect floors, furniture, and fixtures from paint splatters, maintaining cleanliness throughout the project. Small details like these separate professional results from DIY attempts. Why Winnipeg Property Owners Choose Painting Services in Winnipeg Climate Considerations Winnipeg’s weather presents unique challenges for painting projects. Cold winters, hot summers, and significant temperature fluctuations require specific paint formulations and application strategies. Professional painters understand these local conditions and select appropriate products for durability. They know the best times for exterior work and how to prepare surfaces for Winnipeg’s demanding climate. Commercial Project Requirements Business owners need painting services in Winnipeg that minimize disruption to operations. Professional commercial painters work efficiently around business schedules, often completing work during evenings or weekends. They understand commercial building codes and safety requirements, maintaining professional standards throughout the project. Quick turnarounds and reliable scheduling help businesses maintain productivity while improving their facilities. Residential Expertise Painting Services in Winnipeg Homeowners appreciate painters who respect their living spaces and work considerately. Professional residential painters communicate clearly about schedules, progress, and any issues that arise. They work cleanly, protecting belongings and cleaning up thoroughly each day. This respect for your home creates a positive experience from start to finish. Understanding Different Painting Services in Winnipeg Interior Painting Solutions Interior work refreshes living spaces, offices, and commercial areas with new colors and finishes. Professional painters handle walls, ceilings, trim, doors, and cabinets with equal skill. They help select appropriate finishes for different rooms, such as moisture-resistant paint for bathrooms or durable finishes for high-traffic areas. Interior painting services in Winnipeg include both small touch-up projects and complete property repainting. Exterior Painting Protection Exterior painting protects buildings from weather damage while improving curb appeal. Professional painters prepare exterior surfaces thoroughly, removing old paint, cleaning dirt and mildew, and repairing damaged areas. They apply primers and multiple coats of weather-resistant paint designed for outdoor use. Proper exterior painting extends the life of siding, trim, and other exterior materials. Deck staining represents another important exterior service. Professional staining protects wood from moisture and sun damage while highlighting natural grain patterns. Regular staining maintenance keeps decks looking beautiful and prevents costly repairs. Specialty Finishing Techniques Beyond standard painting, professional services include specialty finishes that create unique appearances. Limewash painting offers a distinctive, textured finish with historic charm. This breathable finish works particularly well on masonry surfaces and creates subtle variations in color and texture. Skim coating smooths damaged or textured walls, creating perfect surfaces for painting. This technique repairs imperfections and provides a fresh start for new paint applications. Drywall and plaster repair fixes holes, cracks, and water damage before painting begins. Finding the Right Painting Services in Winnipeg Licensing and Insurance Verification Always verify that painting contractors hold proper licenses and insurance coverage. Licensed painters meet professional standards and legal requirements for operating in Winnipeg. Insurance protects property owners from liability if accidents occur during projects. These credentials demonstrate commitment to professional standards and customer protection. Experience and References Experienced painters bring valuable knowledge to projects. Ask about similar projects they’ve completed and request references from past clients. Reading reviews and viewing completed work helps assess quality standards. Established companies with strong reputations typically deliver more reliable results when providing painting services in Winnipeg. Clear Communication
Painting Preparation: A Complete Guide from Winnipeg Professionals
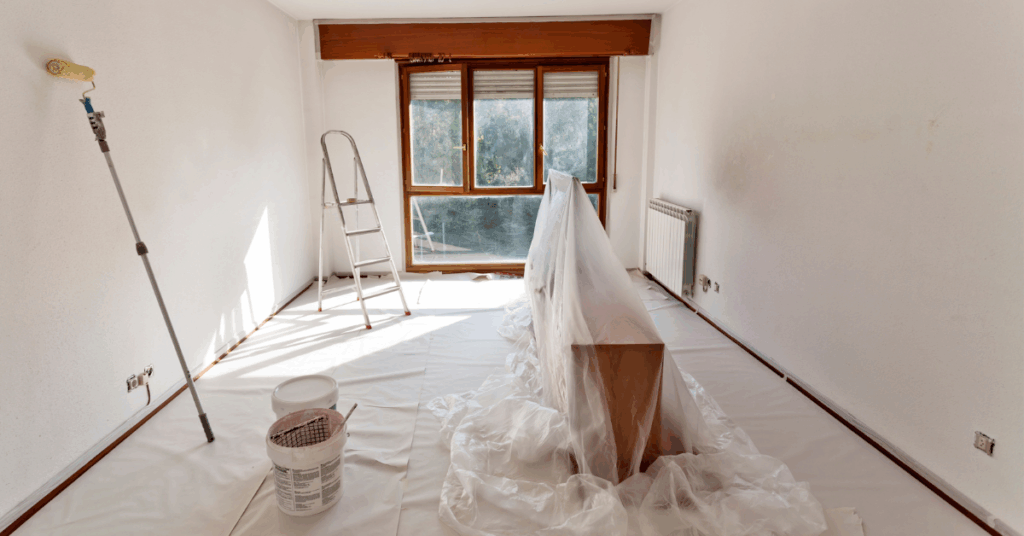
Knowing how to prep your home for painting can make the difference between a professional-looking finish and a disappointing result. Preparation accounts for approximately 70% of a successful paint job, affecting both appearance and longevity. Whether you’re refreshing a single room or planning a whole-house makeover, proper surface preparation, thorough cleaning, and careful protection of your belongings create the foundation for beautiful, long-lasting results. Understanding the Importance of Proper Surface Preparation for Painting Surface preparation directly impacts paint adhesion, finish quality, and durability. Skipping preparation steps often leads to peeling, bubbling, or uneven color coverage within months. Professional painters spend considerable time on prep work because it eliminates future problems and saves money on touch-ups or complete repaints. Clean surfaces allow paint to bond properly with walls and trim. Dust, grease, and old flaking paint create barriers that prevent new coatings from adhering correctly. Filling holes and cracks before painting prevents shadows and texture problems that become more visible once paint dries. Clearing and Protecting Your Space Remove as much furniture as possible from the room before starting any painting project. Items that cannot be moved should be clustered in the center and covered with canvas drop cloths or plastic sheeting. Canvas drop cloths are preferable because they absorb paint spills rather than creating slippery surfaces. Take down wall decorations, curtains, and curtain rods. Remove outlet covers, light switch plates, and any hardware attached to walls or trim. Store these small items in labeled bags so you can easily reinstall them after painting. Cover floors completely with drop cloths, securing edges with painter’s tape to prevent shifting during work. Cleaning Walls and Surfaces Thoroughly Begin wall preparation by dusting from ceiling to floor using a microfiber cloth or vacuum with a brush attachment. Cobwebs and dust particles interfere with paint adhesion and can get trapped in wet paint, creating bumpy textures. Wash walls with a solution of warm water and mild dish soap or trisodium phosphate (TSP) for heavily soiled areas. Use a sponge to clean in circular motions, working from bottom to top to prevent streaking. Rinse with clean water and allow walls to dry completely before proceeding—typically 24 hours depending on humidity levels. Kitchen and bathroom walls often have grease buildup or mildew that requires special attention. For mildew, use a mixture of water and bleach (one part bleach to three parts water) applied with a spray bottle, then scrub gently and rinse thoroughly. Repairing Damaged Areas in Painting Inspect walls carefully for holes, cracks, dents, and other imperfections. Small nail holes can be filled with spackling compound using a putty knife. For larger holes, you may need drywall patches or mesh tape before applying joint compound. Apply spackling or joint compound in thin layers, allowing each layer to dry before adding more. Overfilling creates extra sanding work. Once repairs are completely dry, usually within a few hours—sand them smooth with fine-grit sandpaper (150 to 220 grit). Cracks along ceiling lines or in corners often indicate settling and may reappear after painting. Use flexible caulk designed for paintable applications to fill these gaps. Smooth caulk with a wet finger or caulk tool immediately after application for a seamless appearance. How to Prep Your Home for Painting: Sanding Techniques Sanding creates a slightly rough surface that helps new paint grip effectively. Use medium-grit sandpaper (100 to 120 grit) for initial sanding on glossy surfaces or old paint, then finish with fine-grit (150 to 220 grit) for smoothness. Sand lightly in circular motions without applying excessive pressure. Over-sanding can damage drywall paper or create uneven surfaces. After sanding, wipe walls with a slightly damp cloth to remove all dust particles before painting. Previously painted trim and doors with glossy finishes require sanding to dull the sheen. This step is essential because new paint won’t adhere properly to slick, glossy surfaces. Use a sanding block for flat surfaces and folded sandpaper for detailed molding. Priming for Professional Results Primer seals porous surfaces, covers stains, and creates uniform color absorption. New drywall, patched areas, and dark wall colors all require priming before applying finish coats. Skipping primer often means needing three or four coats of expensive finish paint instead of one coat of affordable primer plus two finish coats. Stain-blocking primers prevent water stains, smoke damage, and marker drawings from bleeding through new paint. These specialized primers are particularly important in bathrooms, kitchens, and children’s rooms where staining is common. Apply primer using the same techniques you’ll use for finish paint, cutting in edges first with a brush, then rolling larger areas. Allow primer to dry according to manufacturer instructions, typically two to four hours, before applying paint. Taping and Masking Quality painter’s tape protects trim, windows, and adjacent surfaces from accidental paint marks. Apply tape carefully along edges, pressing firmly to seal and prevent paint seepage underneath. Remove tape while paint is still slightly damp for clean lines without pulling off dried paint. Use wider tape or masking paper for protecting baseboards and larger trim pieces. Plastic sheeting can protect windows, but be sure to tape all edges completely to prevent paint mist from reaching glass during rolling. Avoid leaving painter’s tape in place for extended periods. Most tapes are designed for removal within 7 to 14 days. Tape left longer may leave adhesive residue or become difficult to remove without damaging surfaces. Ventilation and Safety Considerations Proper ventilation during preparation and painting protects your health and speeds drying times. Open windows and use fans to maintain air circulation throughout the workspace. This is particularly important when using TSP, primers, or oil-based products that emit stronger fumes. Wear appropriate safety equipment including dust masks during sanding, gloves when handling cleaning solutions, and safety glasses when working overhead. Keep children and pets out of work areas until all preparation and painting is complete and fumes have dissipated. Professional Support for Preparation Projects While many homeowners can handle basic preparation work, some situations benefit from professional expertise. Extensive water damage, lead paint
Professional Painting Process: From Start to Finish
A professional painting process guide makes all the difference between a paint job that lasts three years and one that lasts fifteen. Most homeowners focus on choosing the perfect color, but the real secret to a flawless finish starts long before anyone opens a paint can. Professional painters know that proper prep work accounts for roughly 70% of a successful project, while the actual painting makes up the remaining 30%. True Coat stands ready to help homeowners and business owners across Winnipeg create elegant spaces and professional painting that last. Walking through a professional painting process reveals why some paint jobs look magazine-worthy while others start peeling within months. The steps might seem straightforward at first glance, but each phase requires specific techniques, timing, and attention to detail that separate amateur attempts from professional results. Understanding the Foundation of Quality Paint Work from Professional Painting The transformation of any space begins with a solid foundation. Paint only performs as well as the surface underneath it, which means skipping preparation steps creates problems that no amount of premium paint can fix. Surface preparation directly affects how paint bonds to walls, ceilings, and trim. Old paint that’s flaking, walls with grease buildup, or surfaces with dust and debris prevent new paint from forming a proper bond. Think of it like trying to stick a bandage to dirty skin. It might hold for a moment, but it won’t last long. Temperature and humidity play bigger roles than most people realize. Paint needs specific environmental conditions to cure properly. Too cold, and the paint won’t flow smoothly or dry correctly. Too humid, and moisture gets trapped under the paint film, leading to bubbling and peeling down the road. Professional painters check these conditions before starting any project. They understand that rushing through prep work to save a few hours costs much more time and money when repairs become necessary later. Before Starting Professional Painting Do Evaluating Space Before you touch a paint brush, you need to really look at your space. Every crack, stain, and imperfection tells you what work needs doing. Missing these signs means you’ll deal with bigger problems once the paint goes on. Professional Painting Identifying Surface Issues and Damage Walls rarely stay perfect over time. Small cracks appear around door frames. Nail holes dot the surfaces where pictures once hung. Water stains might peek through from old leaks. Each problem needs a different fix. Hairline cracks often signal normal settling, but wider cracks might mean structural issues that need addressing before any painting begins as Professional Painting. Water stains require investigation because painting over moisture problems just hides them temporarily. The stains will return, sometimes bringing mold along with them. Peeling or bubbling paint points to adhesion failures from the previous paint job. These areas need complete removal down to bare drywall or plaster. Leaving them and painting over creates a lumpy, unprofessional finish that highlights rather than hides the problem. Glossy surfaces present their own challenges. Paint struggles to stick to shiny finishes without proper preparation. Kitchens and bathrooms often have these surfaces because previous owners wanted easy-to-clean walls. Now those same walls need roughing up before new paint will stick. Professional Painting Assessing Paint Type and Compatibility Not all paints work well together. Latex paint over oil-based paint without proper prep leads to widespread peeling. Oil-based paint applied directly over latex can work, but it requires specific primers and techniques. Testing existing paint takes seconds. Rubbing a cotton ball soaked in rubbing alcohol on the wall reveals the paint type. If color transfers to the cotton, the paint is latex. No color transfer means oil-based paint underneath. Knowing the existing paint type guides every decision moving forward. It determines which primers to use, whether sanding becomes necessary, and how many coats the final job might require. Missing this step causes headaches that proper testing prevents. The Complete Painting Preparation Guide for Surface Prep Surface preparation separates professional results from disappointing amateur attempts. This phase takes longer than the actual painting, but cutting corners here guarantees problems later. Getting your surfaces ready means doing several tasks in the right order with the right techniques. Professional Painting Clearing and Protecting the Room Empty rooms paint faster and better than furnished ones. Moving everything out means you’re not constantly dancing around furniture and reduces the chance of paint splatters on belongings. When moving everything proves impossible, group furniture in the center of the room and cover it completely. Drop cloths matter more than people think. Plastic sheets seem cheaper, but canvas drop cloths actually protect better because they absorb spills instead of spreading them around with every footstep. Professional painters use canvas for floors and plastic only for large furniture pieces that need complete coverage. Remove switch plates, outlet covers, and light fixtures. Taping them off seems faster, but paint still seeps underneath, creating messy edges that look sloppy. Unscrewing a few plates takes minutes and produces much cleaner results. Door hardware gets the same treatment. Taking off knobs, hinges, and strike plates before painting means no careful brushwork around metal parts. The paint goes on faster, looks better, and hardware stays free of accidental splatters. Professional Painting Cleaning Walls and Surfaces Thoroughly Clean walls accept paint better than dirty ones. Grease, dust, cobwebs, and general grime create a barrier between paint and wall surface. That barrier prevents proper adhesion and leads to early paint failure. Kitchen walls need extra attention because cooking splatters leave oily residue that repels water-based paints. A mixture of warm water and trisodium phosphate (TSP) cuts through this grease effectively. Regular dish soap works for lighter cleaning jobs, but TSP handles heavy buildup better. Bathroom walls collect soap scum and moisture-related residue. These need thorough cleaning and complete drying before painting starts. Painting over damp walls traps moisture that eventually causes paint to peel and bubble. Ceilings collect dust and cobwebs that most people ignore until painting time. A quick pass with a vacuum extension
Paint Selection Guide: Colors, Types & Finishes

A good paint selection guide helps homeowners make smart choices about colours, types, and finishes for their painting projects. Picking the right paint is way more complicated than just choosing a nice colour from those sample cards. You need to think about what the room is used for, how much light it gets, what kind of surfaces you’re painting, and how long you want it to last. The paint you choose affects everything from how your home looks to how much maintenance you’ll need to do later. Different rooms need different kinds of paint. Bathrooms need paint that handles moisture, kitchens need something you can scrub clean, and bedrooms work best with colours that help you relax. Getting these details right saves you from expensive do-overs and disappointing results. Understanding Paint Types and Formulations Different paint types work better for different jobs and perform differently depending on where you use them. Modern paints have come a long way from just basic latex and oil-based options. Now you’ve got advanced formulas that last longer, cover better, and go on easier. Water-Based vs Oil-Based Paint Fundamentals Water-based paints, usually called latex paints, dominate the home painting market for good reasons. They dry fast, clean up with soap and water, and don’t release as many nasty fumes as oil-based paints. Latex paints keep their colour better over time and resist cracking and peeling on most surfaces. Oil-based paints still work better in certain situations even though they’re not as popular anymore. They stick better to previously painted surfaces, level out smoother, and last longer on high-traffic areas. But they need mineral spirits for cleanup, take forever to dry, and smell awful while you’re applying them. Hybrid paint formulas combine the best of both worlds. Alkyd-modified latex paints flow and level better while still cleaning up with water and having low odour. These work really well for trim work and cabinets where you want that smooth finish. Understanding these basic differences helps you make paint selection guide decisions based on what you actually need instead of just going by marketing hype or price. Specialty Paint Formulations Paint and primer combinations try to make things simpler but don’t always give you the best results. These products work okay over previously painted surfaces that are in good shape, but they might not cover stains, bold colours, or bare surfaces properly. Knowing when to use separate primer and paint versus combination products prevents disappointment. Low-VOC and zero-VOC paints address health and environmental concerns while still performing well. These formulations have gotten much better recently, offering durability and coverage that matches traditional paints. They’re especially important for bedrooms, nurseries, and homes with people who have sensitivities. Antimicrobial paints have additives that stop mould, mildew, and bacteria from growing. These specialty formulas work well in bathrooms, basements, and other damp areas. However, they cost more than regular paints and might not be necessary in well-ventilated spaces that don’t have moisture problems. Self-priming paints contain more solids and special bonding agents that eliminate the need for separate primer on many surfaces. They work best over sound existing paint or properly prepped surfaces but shouldn’t be used over stains, glossy surfaces, or big colour changes without separate primer. Performance Characteristics and Durability Paint quality directly affects how well it performs and how long it lasts. Better-quality paints have more pigment and resin, giving you better coverage, colour that lasts, and durability. While they cost more upfront, quality paints often save money through less maintenance and longer life. Coverage rates vary a lot between paint qualities and colours. Premium paints typically cover 350 to 400 square feet per gallon, while cheap ones might only cover 250 to 300 square feet. Dark colours usually need more coats than lighter ones, no matter what quality paint you use. Washability ratings tell you how well paint stands up to cleaning without getting damaged. Paints rated for heavy-duty cleaning work well in kitchens and kids’ rooms, while those suitable for light cleaning are fine in bedrooms and formal areas. Understanding these ratings helps you match paint performance to how the room gets used. Fade resistance becomes really important for colours that get hit with direct sunlight. Some colours, especially bright reds and blues, fade faster than others. Quality paints use lightfast pigments and UV-resistant formulas to keep colours looking good longer. Paint Selection Guide for Color Theory and Psychology Picking colours involves both how they look and how they make you feel, which affects how spaces work and feel to live in. Understanding how colours work together and their effects on mood helps create environments that support your lifestyle and preferences. Understanding Color Relationships Primary colours (red, blue, yellow) form the base for all other colours and make bold, energetic statements in rooms. Using primary colours effectively needs careful balance because they can quickly overwhelm smaller rooms or create visual fatigue in spaces where you want to relax. Secondary colours (orange, green, purple) come from mixing primary colours and work better in most home situations. Green works well in bedrooms and offices because it’s calming, while orange adds warmth to social spaces. Purple ranges from classy deep tones to fun lighter shades. Tertiary colours blend primary and secondary colours, creating subtle options like blue-green, red-orange, or yellow-green. These colours often feel more sophisticated and easier to live with than pure primary or secondary options. They provide subtle interest without overwhelming other design elements. Complementary colours sit opposite each other on the colour wheel and create strong contrast when used together. However, using them equally can create visual tension. Instead, use one as the main colour and the other as an accent for more pleasing results. Psychological Effects of Different Colors Warm colours (reds, oranges, yellows) come forward visually, making spaces feel cosier but smaller. They get people talking and make you hungry, so they’re great for dining rooms and kitchens. However, they can feel overwhelming in bedrooms or offices where you need calm focus. Cool
Commercial Painting Solutions for Canadian Businesses
Every Canadian business owner knows that first impressions count, and your building’s paint job says a lot about your company. This commercial painting guide covers everything you need to transform your business space with professional painting that works for Canada’s tough climate and business needs. Your paint job talks before customers even walk through your door. Running a retail store in Toronto? Managing offices in Vancouver? Operating a warehouse in Calgary? The right painting approach boosts property value and creates spaces that draw customers and great employees. Understanding Commercial Painting Basics Commercial painting is completely different from painting your house. The size alone creates challenges that need special equipment, skilled crews, and smart planning to keep your business running smoothly. Commercial painters use industrial materials built to handle heavy traffic, crazy weather, and the daily beating that comes with business life. These jobs often cover multiple floors, need special equipment to reach high places, and must follow safety rules and building codes. Project timelines change a lot based on square footage, how much prep work surfaces need, and your business schedule. Many contractors work nights or weekends so they don’t mess with your daily operations. This takes careful planning and coordination. Picking the Right Commercial Painting Contractor The wrong contractor can wreck your project. Start by checking that any contractor has proper licensing, insurance, and bonding for commercial work in your province. Experience with jobs like yours matters more than you think. A contractor who does retail spaces faces different problems than one who mainly works industrial sites. Ask for references from similar businesses and visit their completed projects when you can. Get detailed written quotes that break down labor, materials, prep work, and timeline. The cheapest bid usually isn’t the best deal when you think about delays, quality problems, and warranty coverage. Getting Surfaces Ready Good surface prep makes up about 80% of a painting job that lasts. This means power washing, scraping old paint, filling cracks, sanding rough spots, and priming when needed. Commercial buildings often have tricky prep needs. Older buildings might have lead paint that needs special removal. Industrial places could have grease, chemicals, or other mess that needs specific cleaning before paint goes on. Weather plays a big role in prep timing. Canadian winters make outside prep nearly impossible in many areas, while high humidity messes with drying times and how well paint sticks. Planning around weather prevents expensive delays and gets you better results. Exterior Commercial Painting That Works Canada’s tough climate needs specific outside painting that handles everything from prairie wind to ocean humidity. Your outside paint protects your building from weather while keeping it looking professional all year. Temperature swings, sun damage, rain, and freeze-thaw cycles all hit paint differently across Canada. Knowing these regional differences helps you pick the right materials and timing for where you are. Choosing Paint for Your Climate Here’s what works best in different parts of Canada: When to Paint Outside Most of Canada has short painting seasons, usually late spring through early fall. Planning your commercial painting guide timeline around good weather prevents delays and makes sure paint cures right. Spring jobs get mild temperatures and lower humidity but face unpredictable weather. Summer gives the most reliable conditions but you need to book early because contractors stay busy. Fall painting works well in many areas but watch for temperature drops that mess with curing. Some contractors offer better rates for fall work because demand drops. Picking Colors for Business Buildings Professional colors should match your brand while thinking about upkeep and local climate. Lighter colors reflect heat and hide dirt better. Darker colors might fade faster under strong sun. Think about your building style, surrounding area, and neighborhood when picking colors. Some cities have color rules or approval processes for commercial buildings that need advance planning. Test colors on different sides of your building to see how they look under various lighting throughout the day. What looks great in morning light might look totally different in afternoon sun or under artificial lighting. Interior Commercial Painting Approaches Inside commercial spaces create challenges that house painters rarely see. Heavy traffic, special equipment, air flow needs, and keeping business running all affect project planning. Different businesses need specific paint considerations. Medical places need germ-fighting coatings, restaurants need grease-resistant finishes, and manufacturing spaces might need chemical-resistant paints. Before diving into specific methods, you need to understand that interior commercial painting requires careful coordination between your business needs and the contractor’s work schedule. Working Around Your Business Schedule Businesses can’t always close for painting, so contractors must work around your hours. Many commercial painters specialize in doing work in sections while keeping your business running. Night and weekend schedules let painting happen without messing up normal business hours. This needs proper lighting, security coordination, and careful attention to air flow. Containment systems using plastic and negative air pressure protect work areas while stopping paint fumes and dust from getting into other spaces. These work really well in offices and medical facilities. Special Paint Applications Different business types need specific coatings: Handling Traffic and Wear High-traffic spots like lobbies, hallways, and stairs need paint that resists scuffing, scratching, and frequent cleaning. Semi-gloss and satin finishes usually work better than flat paints here. Wall protection like wainscoting, chair rails, and corner guards can make paint last longer in areas that get hit by equipment, carts, or heavy foot traffic. Planning these during design saves money compared to fixing damage later. Regular maintenance helps paint last longer and keeps your place looking professional. Touch-up programs cost less than complete repainting and keep your facility looking fresh between major jobs. Special Commercial Applications Different industries need unique painting solutions for specific operational needs and regulations. Knowing these special applications helps you pick the right materials and contractors for your business type. Healthcare places must meet strict infection control standards while staying welcoming. Schools need tough finishes that handle heavy use while creating good learning
Complete Home Painting Guide: Interior & Exterior 2025
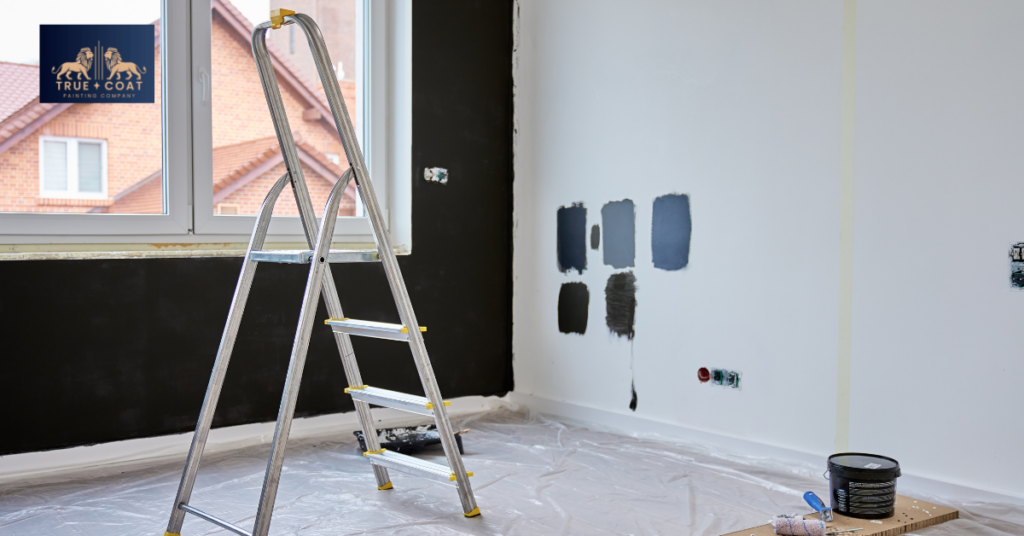
This comprehensive home painting guide covers everything you need to know about painting your house, from picking colors to applying the final coat. Whether you’re doing this for the first time or just want to brush up on your skills, we’ll walk you through the whole process step by step. Painting your home can feel overwhelming at first. There’s so much to think about – what colors to pick, which paint to buy, how to prep the walls. But here’s the thing: once you break it down into manageable pieces, it becomes much easier. You’ll save money doing it yourself, and there’s something really satisfying about stepping back and seeing a room you just transformed. Most people jump into painting without understanding the basics, which leads to frustration and poor results. This comprehensive home painting guide will teach you professional techniques, help you avoid costly mistakes, and show you how to achieve results that rival what you’d get from hiring contractors. Planning Your Home Painting Project You wouldn’t start cooking dinner without checking what’s in your fridge first, right? Same goes for painting. Planning ahead saves you from those annoying trips to the hardware store in the middle of your project. Most people think painting is just about slapping some color on the wall, but that’s where they go wrong. The planning phase is where successful projects are born. Skip this step, and you’ll likely end up with patchy coverage, weird color choices, or a project that drags on for months. Setting Your Timeline Here’s what most homeowners don’t realize – painting takes way longer than you think. A single room typically needs 2-3 days when you factor in all the prep work, applying multiple coats, and waiting for everything to dry. If you’re tackling the outside of your house, we’re talking weeks, not days. A realistic timeline for a typical 12×12 bedroom includes: This doesn’t include drying time between coats, which can extend the project by another day in humid conditions. Budget Planning Paint costs can shock you if you’re not prepared. Good quality paint might cost twice as much as the cheap stuff, but it usually covers better and lasts longer. Here’s a realistic breakdown for painting a 12×12 room with 9-foot ceilings: For exterior projects, multiply these costs by 3-4 times depending on your home’s size. If you’re feeling overwhelmed by all this planning, the team at TrueCoat Paint can handle the entire project from start to finish. Interior Home Painting Guide: Room by Room Tips Interior painting is probably the most dramatic way to change how your home looks and feels. Each room has its own personality and challenges, and understanding these differences is crucial for success. Every room in your house serves a different purpose and gets used differently, which means your paint choices need to reflect those differences. The paint that works perfectly in your bedroom might fail miserably in your bathroom. Living Areas and Bedrooms These rooms give you the most freedom to play with color. Bigger rooms can handle bold, rich colors that might make smaller spaces feel cramped. For bedrooms, consider the psychological impact of colors: Color temperature matters more than people realize. Test your paint samples under the actual lighting you’ll use in the room. Kitchens and Bathrooms These rooms present unique challenges because they deal with constant moisture, steam, and temperature changes. You can’t just use any paint here – you need formulations specifically designed to handle humidity and frequent cleaning. Go with semi-gloss or satin finishes in kitchens and bathrooms. They’re much easier to wipe down when they get splattered or steamy. Flat paint soaks up moisture and stains, which is the last thing you want near your stove or shower. Kitchen painting considerations: Bathroom painting essentials: Color Selection That Makes Sense Picking colors is where a lot of people freeze up. There are thousands of options, and somehow you’re supposed to know which one will look good on your walls? Let’s make this easier. Color selection combines both art and science. Understanding color theory helps, but you also need to consider practical factors like lighting, room size, and how colors make you feel. Understanding Undertones Every paint color has undertones, and these can totally change how the color looks once it’s on your wall. That beige you thought was neutral might have pink undertones that clash with your brown furniture. Always test paint samples on your actual walls. Those tiny paint chips at the store don’t tell you much. Paint a decent-sized square and look at it throughout the day. Colors change dramatically from morning to evening light. Creating Flow Between Rooms If you have an open floor plan, you can’t just pick random colors for each area. They need to work together or your house will feel choppy and weird. The 60-30-10 rule works really well: 2025 Color Trends This year, people are gravitating toward earthy, calming colors: With more people working from home, camera-friendly backgrounds are actually influencing color choices. Soft, muted tones look professional on video calls while still feeling cozy in person. Need help choosing colors that work together? The color experts at TrueCoat Paint can help you create a cohesive color scheme that flows beautifully throughout your home. Surface Preparation: Why This Step Matters Most Professional painters spend most of their time on prep work, and there’s a good reason for that. This step determines whether your paint job looks great for years or starts peeling within months. You can use the most expensive paint in the world, but if you don’t prep properly, it won’t stick. Surface preparation is the foundation of any successful paint job. It’s also the most commonly skipped step in DIY projects, which explains why so many home paint jobs fail prematurely. Cleaning Walls Properly Your walls are probably dirtier than you think. Years of cooking grease, smoke, and just everyday living create invisible films that prevent paint from sticking properly. Use TSP (trisodium phosphate) or