How Do You Paint a Cabin the Right Way?
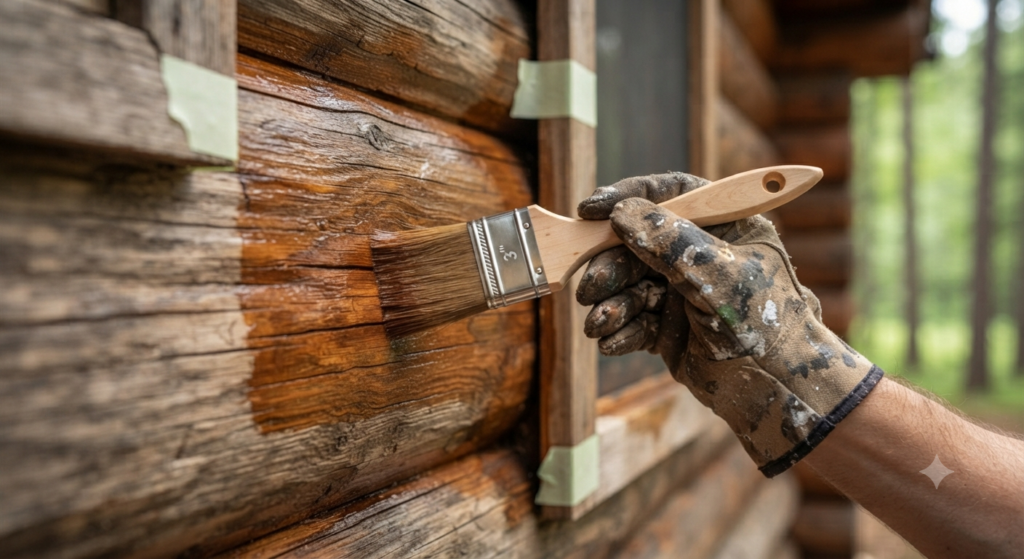
To paint cabin surfaces correctly, you need to clean and prepare the wood, choose the right paint type for the climate, and apply at least two coats with proper drying time in between. Whether you are working on the interior or exterior of a log cabin, the results depend on choosing the right products and following the right steps. This covers the best paints to use, how to prep surfaces, common mistakes to avoid, the difference between interior and exterior cabin painting, and when to call in a professional. What Does It Mean to Paint a Cabin? Painting a cabin is different from painting a typical house. Cabins are often built with exposed logs, rough-sawn wood, or natural timber, which require specific products and methods that differ from standard drywall or stucco surfaces. When you paint cabin walls, you are protecting the wood from moisture, UV rays, insects, and seasonal temperature changes. In a place like Winnipeg, where winters are harsh and summers can be humid, the right cabin paint does more than just add colour. It extends the life of the wood and keeps the structure sealed against the elements. Many homeowners also paint cabin interiors to add character, brighten dark wood tones, or match a modern design style. For interior work, the focus shifts to air quality and finish quality rather than weatherproofing. If you want to explore what professional residential painting in Winnipeg looks like for unique properties like cabins, it is worth understanding what goes into the process. How to Paint Cabin Exterior Surfaces Exterior cabin painting requires more preparation than interior work. Wood expands and contracts with the seasons, so the paint you use needs to be flexible and breathable enough to move with it. Step 1: Clean the Surface Wash the exterior thoroughly to remove dirt, mildew, and old peeling paint. A pressure washer works well for log cabins, but keep it on a lower setting to avoid damaging the wood grain. Let the surface dry completely before moving forward, which usually takes 24 to 48 hours depending on the weather. Step 2: Sand and Repair Sand down any rough patches or raised grain. Fill cracks and gaps with a flexible exterior wood filler or caulking that is rated for wood movement. This step is critical because skipping it leads to peeling paint within a season or two. Step 3: Apply Primer Use a penetrating oil-based primer on bare wood before you paint cabin exteriors. This seals the wood and helps the topcoat bond properly. Skip the primer and the paint will not last, especially in areas exposed to rain, snow, or direct sunlight. Step 4: Apply Paint in Thin Coats Use a brush or roller designed for rough surfaces. Apply the first coat in a thin, even layer and allow it to dry fully. Sand lightly between coats, then apply a second coat. For full log cabins, a brush gives better penetration into the wood than a roller or sprayer. How to Paint Cabin Interiors Interior cabin painting is less about weatherproofing and more about aesthetics and air quality. Many people choose to keep the natural wood look inside, but painting interior walls, ceilings, or trim can make a space feel brighter and more modern. Before you paint cabin interiors, clean the walls to remove grease, dust, or smoke residue, especially if the cabin has a wood-burning fireplace. Use a bonding primer if you are painting over bare wood, knotty pine, or cedar, since these woods contain tannins that bleed through regular primer. For colour selection, lighter shades open up the space, while warm neutrals enhance the natural cabin feel. Low-VOC paints are a good choice for enclosed spaces where ventilation may be limited. If you are unsure about finishes, best interior painting companies can guide you through the right options for wood surfaces. Use a satin or semi-gloss finish in high-traffic areas like kitchens and bathrooms, as these are easier to clean. Flat or eggshell finishes work well in bedrooms or living areas where you want a softer appearance. Best Paint Types for a Cabin Choosing the right paint is one of the most important decisions when you paint cabin surfaces. Not all paints perform the same way on wood, and using the wrong type leads to cracking, peeling, and early wear. Paint Type Best Used For Key Benefit Acrylic Latex Exterior walls, siding Flexible, water-resistant, easy cleanup Oil-Based Trim, railings, doors Hard finish, high durability Log and Timber Stain Full log exteriors Penetrates deep, shows wood grain Low-VOC Acrylic Interior walls and ceilings Safer air quality in enclosed spaces Deck Paint or Stain Cabin porches and decks Slip-resistant, moisture-proof For most exterior cabin surfaces in Canada, a high-quality acrylic latex paint or a penetrating log stain gives the best results. These products handle freeze-thaw cycles well and resist moisture without sealing the wood so tightly that it traps humidity inside. If you want a unique finish, limewash paint in Canada is an option worth considering for interior feature walls. It creates a soft, textured look that pairs well with the natural feel of a cabin. Things To Know Before You Paint a Cabin There are a few important things to keep in mind before starting any cabin painting project, whether it is big or small. Exterior vs Interior Cabin Painting Compared Knowing the differences between exterior and interior cabin painting helps you plan the right approach for each area. Factor Exterior Cabin Interior Cabin Main goal Weatherproofing and protection Aesthetics and air quality Paint type Acrylic latex or log stain Low-VOC acrylic or oil-based Primer needed? Always, especially on bare wood Yes, especially over knots and tannins Coats required 2 to 3 coats minimum 2 coats standard Reapplication Every 3 to 5 years Every 5 to 10 years Drying conditions Weather-dependent, above 10C Ventilate the space well When to Hire a Professional to Paint a Cabin Some cabin painting projects are manageable on your own. But others are better handled
Paint Stripper: Which Type Works Best and When to Use It
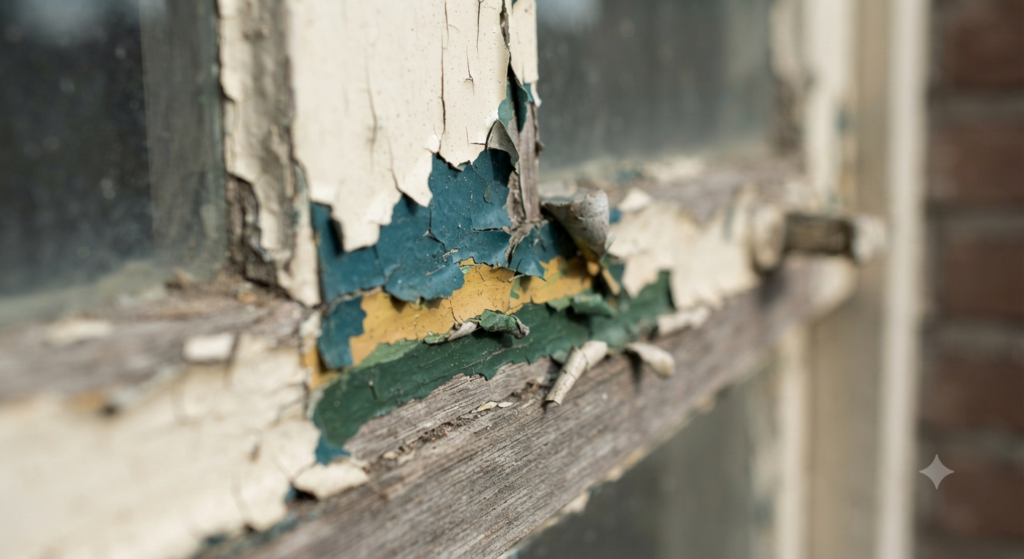
Using a paint stripper is one of the most effective ways to remove old, stubborn, or peeling paint from surfaces without damaging the material underneath. Whether you are dealing with layers of latex paint on drywall, oil-based coatings on wood trim, or weathered finishes on brick, the right paint stripper makes the job significantly faster and more manageable. Why Removing Old Paint the Right Way Actually Matters Skipping proper paint removal often leads to bigger problems down the road. Paint applied over a failing surface, whether it is peeling, chalking, or bonded poorly, will not adhere well regardless of how premium the new coat is. The result is blistering, flaking, and premature failure, which costs more to fix than getting the surface prep right the first time. In older Canadian homes, especially those built before 1978, there is also the question of lead-based paint. Health Canada advises that paint in homes constructed before that era should be tested before any sanding, scraping, or chemical removal begins. Lead exposure is a serious health risk, particularly for children and pregnant women. If you suspect lead paint is present, chemical stripping with proper containment is generally considered safer than mechanical methods like sanding, which can release fine particles into the air. Moisture is another factor that Winnipeg homeowners deal with constantly through True Coat’s services. Manitoba winters are brutal, and freeze-thaw cycles create real stress on exterior surfaces. Moisture trapped beneath paint layers accelerates peeling, which is why thorough surface preparation, including proper stripping when needed, is not optional for lasting results. The Different Types of Paint Stripper and How They Work Not all paint strippers are the same. Each type has a different chemical makeup, a different application method, and a different set of surfaces it works best on. Understanding the differences helps you choose the right product for your specific project. Chemical-Based Strippers Chemical strippers work by breaking down the bond between the paint film and the surface below. They are applied as a gel, paste, or liquid, left to dwell for a set period, and then scraped away along with the loosened paint. There are two broad categories here: Heat-Based Removal Heat guns and infrared paint removers soften paint by raising the surface temperature, allowing you to scrape it away cleanly. Heat tools are effective on wood trim, doors, and furniture but should never be used near lead paint because heating lead-based coatings releases toxic fumes. They are also not ideal near glass, as rapid temperature changes can crack window panes. Mechanical Methods Sanders, wire brushes, and scrapers are the most basic approaches. They work fine for small areas or lightly bonded paint but are slow, physically demanding, and generate significant dust. For interior walls, mechanical removal risks gouging drywall paper, which then requires skim coating to repair. If you want to understand how different paint types respond to stripping methods, the formulation of the existing coating matters just as much as the method you choose. Comparing Paint Stripper Types: A Quick Breakdown Type Best For Speed Safety Level Cost (CAD) Solvent-based Multiple layers, fast jobs Fast (15-30 min) Low (high VOC) C$20-C$50 per litre Caustic (lye) Metal, masonry, heavy buildup Medium (1-2 hrs) Moderate C$15-C$40 per litre Biochemical/low-VOC Indoor use, wood, DIY projects Slow (4-24 hrs) High C$25-C$60 per litre Heat gun Wood trim, furniture, doors Medium Moderate C$40-C$120 (tool cost) Mechanical sanding Small patches, lightly bonded paint Slow Moderate (dust) Minimal (labour-heavy) How to Use Paint Stripper Safely and Effectively Applying a paint stripper is straightforward when you follow the right steps. Rushing the process or skipping safety precautions is where most DIY projects go sideways. Step 1: Test and prepare the surface. Clean the area of grease, dirt, and loose paint flakes. If you suspect lead paint, use a lead test kit available at most Canadian hardware stores before doing anything else. Step 2: Protect surrounding areas. Cover floors and adjacent surfaces with plastic sheeting. Remove hardware, outlet covers, and anything that could be damaged by chemical contact. Step 3: Apply the stripper generously. Use a natural-bristle brush or a chemical-resistant applicator. Apply in one direction and do not overwork it. Thickness matters: a thin coat dries out before it can work. Step 4: Allow adequate dwell time. Follow the manufacturer’s instructions. Biochemical strippers often need significantly longer dwell times than solvent-based options. Step 5: Scrape and clean. Use a plastic scraper to avoid gouging the surface. Work in sections and dispose of the paint waste according to your municipality’s hazardous waste guidelines. In Winnipeg, the City of Winnipeg’s Eco-Stations accept paint and chemical waste at no charge. Step 6: Neutralise and rinse. Some strippers, especially caustic types, require a neutralising wash before the surface is ready for new paint. Skip this step and the new coating may fail to bond properly. If you are planning to paint a wall after stripping, make sure the surface is completely dry and free of residue before applying primer. Surface-Specific Considerations: Wood, Brick, Metal, and Drywall Different surfaces respond differently to stripping methods, and using the wrong one can cause lasting damage. Surface Recommended Stripper Caution Wood (interior trim) Biochemical or heat gun Avoid caustic lye; raises wood grain Brick or masonry Caustic or pressure wash Test small area first; porous surfaces absorb chemicals Metal (railings, doors) Caustic or solvent-based Rinse thoroughly to prevent rust Drywall Avoid chemical; use light scraping or sanding Chemical strippers damage drywall paper Concrete floors Caustic or mechanical grinder Requires neutralisation before recoating For exterior surfaces like brick, the prep work is especially important. If you are working on masonry and plan to repaint afterward, understanding exterior paint for brick is essential for choosing a coating that bonds properly to the stripped surface. Things to Know When to Call a Professional Instead of DIYing It There is a point where the scale, the surface complexity, or the safety risk of a stripping project makes it smarter to hire a professional rather than tackle it